Setup a Raspberry Pi Zero 2 W as a Wyoming Satellite

This guide is my version of wyoming-satellite/docs/tutorial_2mic.md at master · rhasspy/wyoming-satellite · GitHub
So if you want the original you can check it out there.
This guide is meant to be used in conjunction with my video:
But it can be used as a stand along guide.
You will need to already have a Local Assist pipeline setup, which you can do by following this guide: https://www.home-assistant.io/voice_control/voice_remote_local_assistant
To follow along you will need (Affiliate Links)
- Raspberry Pi Zero 2 W https://amzn.to/4bonMNK
- KEYESTUDIO ReSpeaker 2-Mic Pi HAT V1.0 https://amzn.to/3VGHVsK
- A speaker Like https://amzn.to/3zlhFwx
You will also need header pins in your Pi Zero to connect the speaker hat. You can buy a Pi Zero 2 W with the pins already attached - https://amzn.to/4bnFCAD
Or you can buy the Hammer in headers and the little jig made by Vilros ( https://amzn.to/45L5Njr ) and skip the soldering.
But once you have the hardware you can install the OS
Installing the OS
For this you will want to use the Raspberry Pi OS Image software. You can download it at https://www.raspberrypi.com/software/
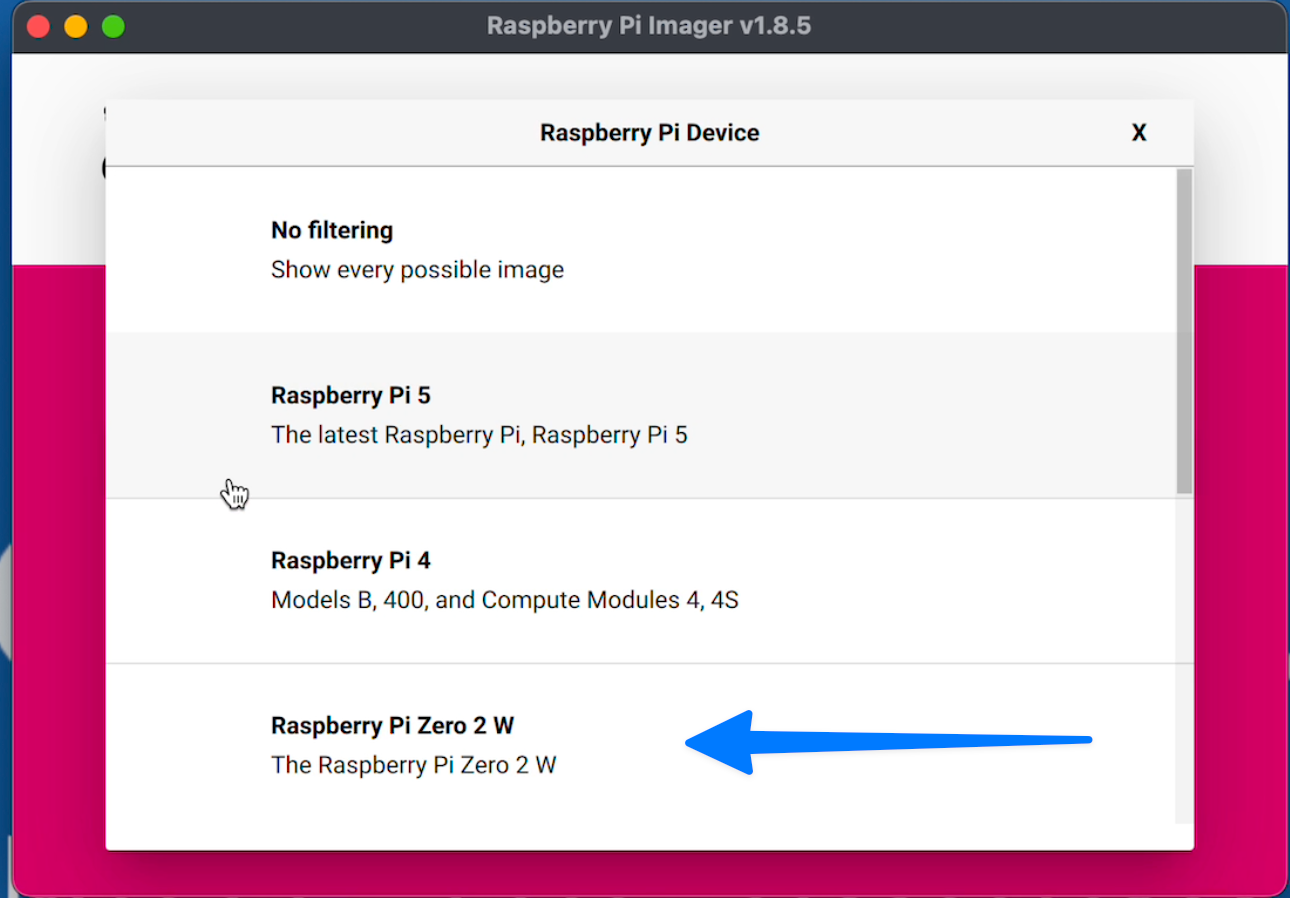
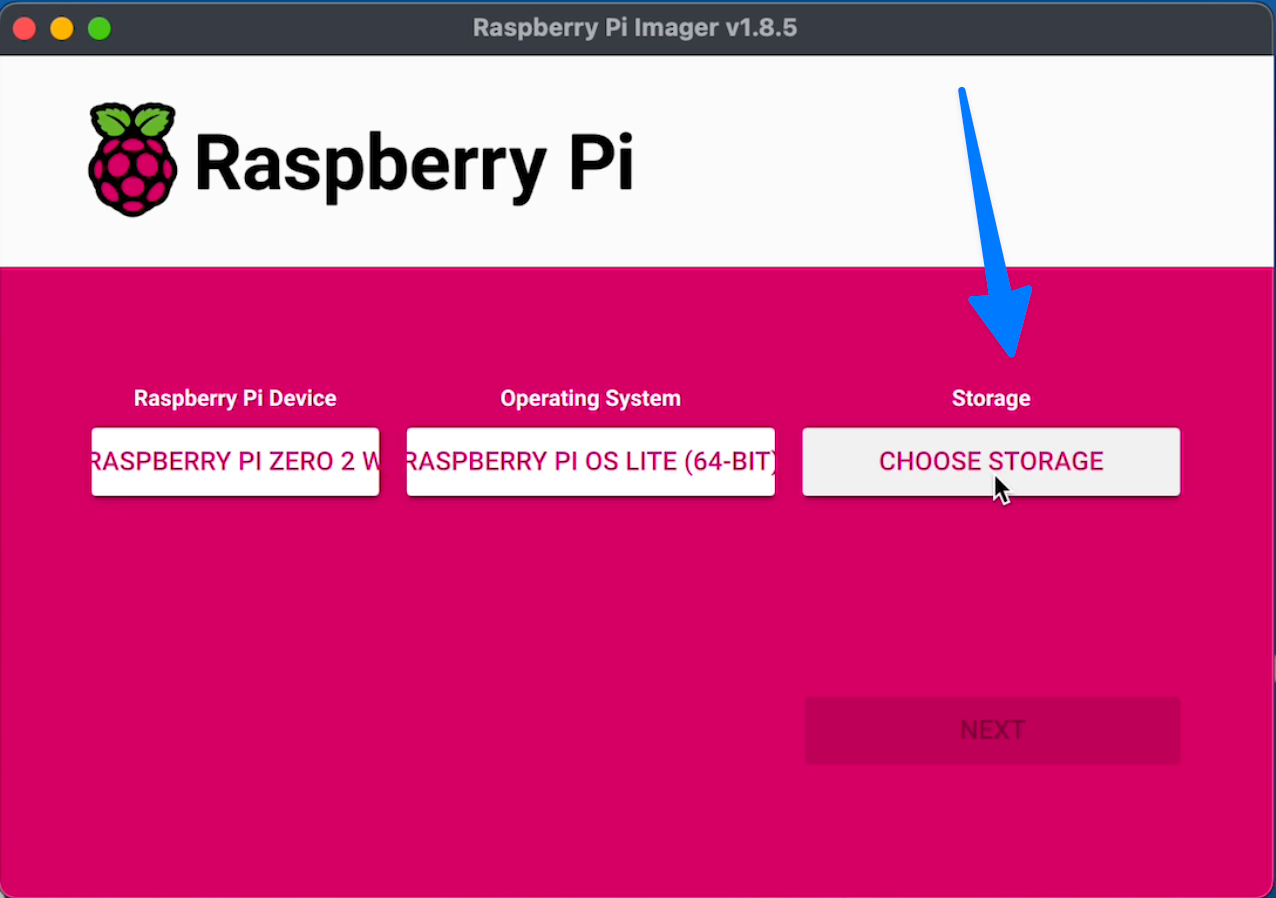
Click Choose Device

In the options choose Raspberry Pi 2 W
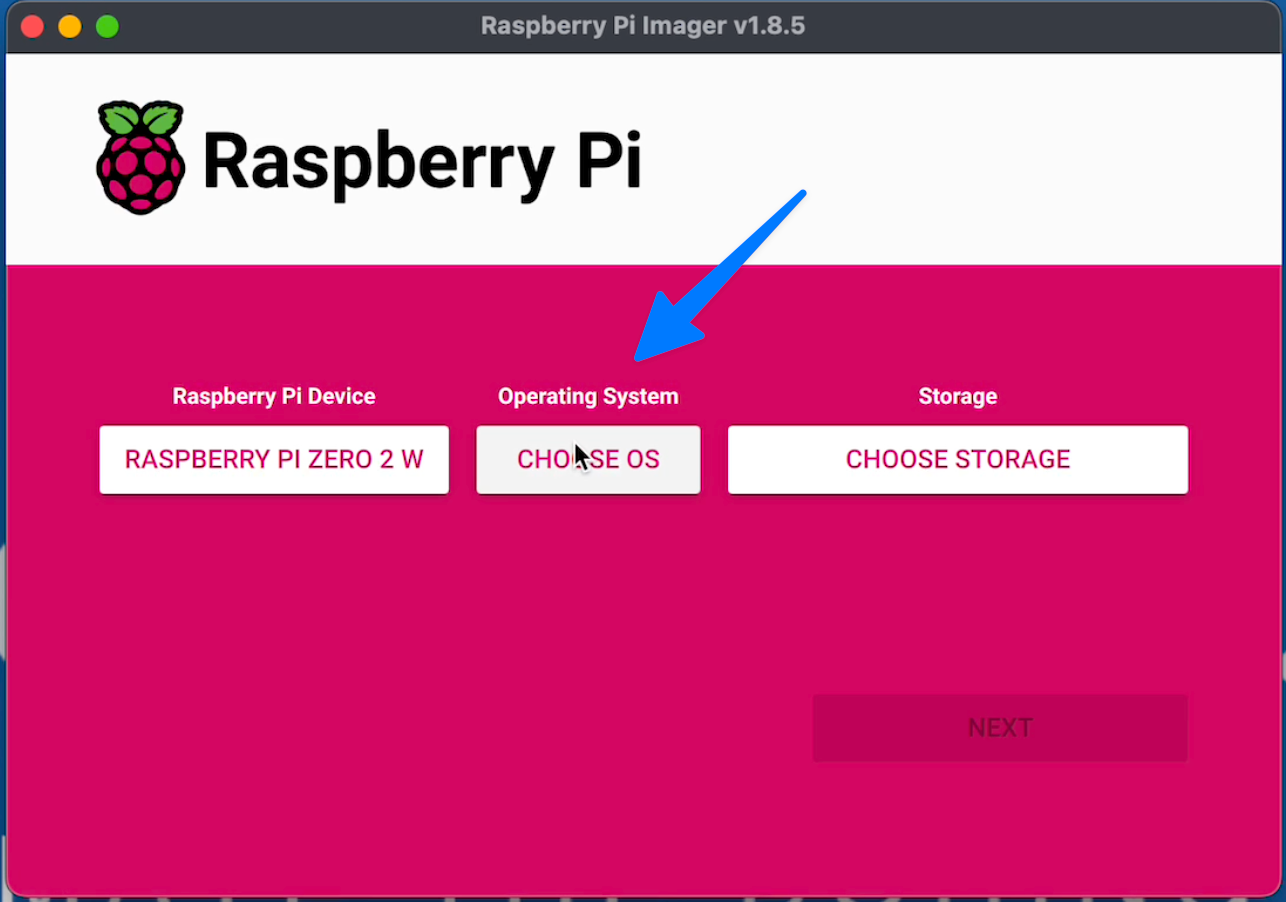
Click "Choose OS"
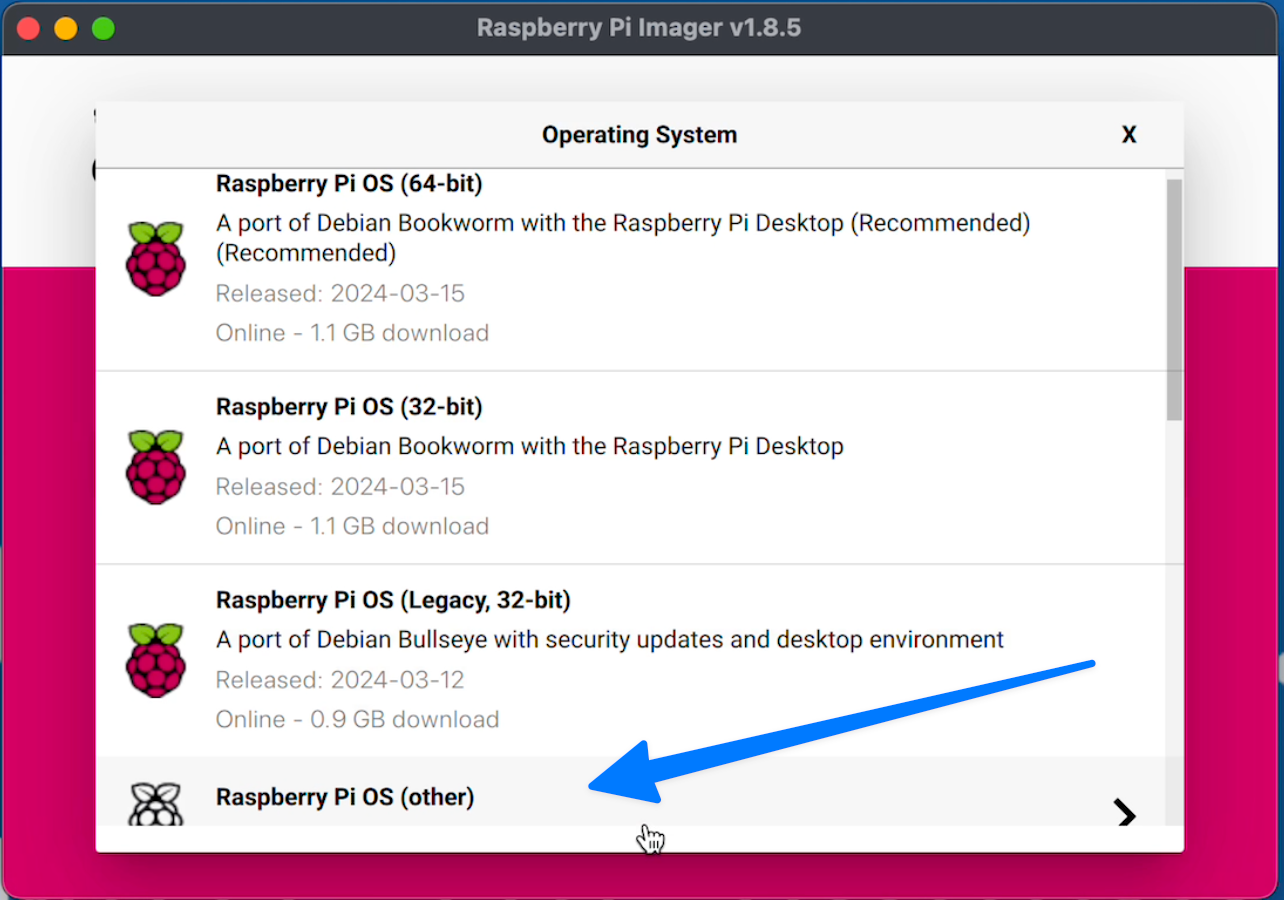
pick "Raspberry Pi OS (other)"
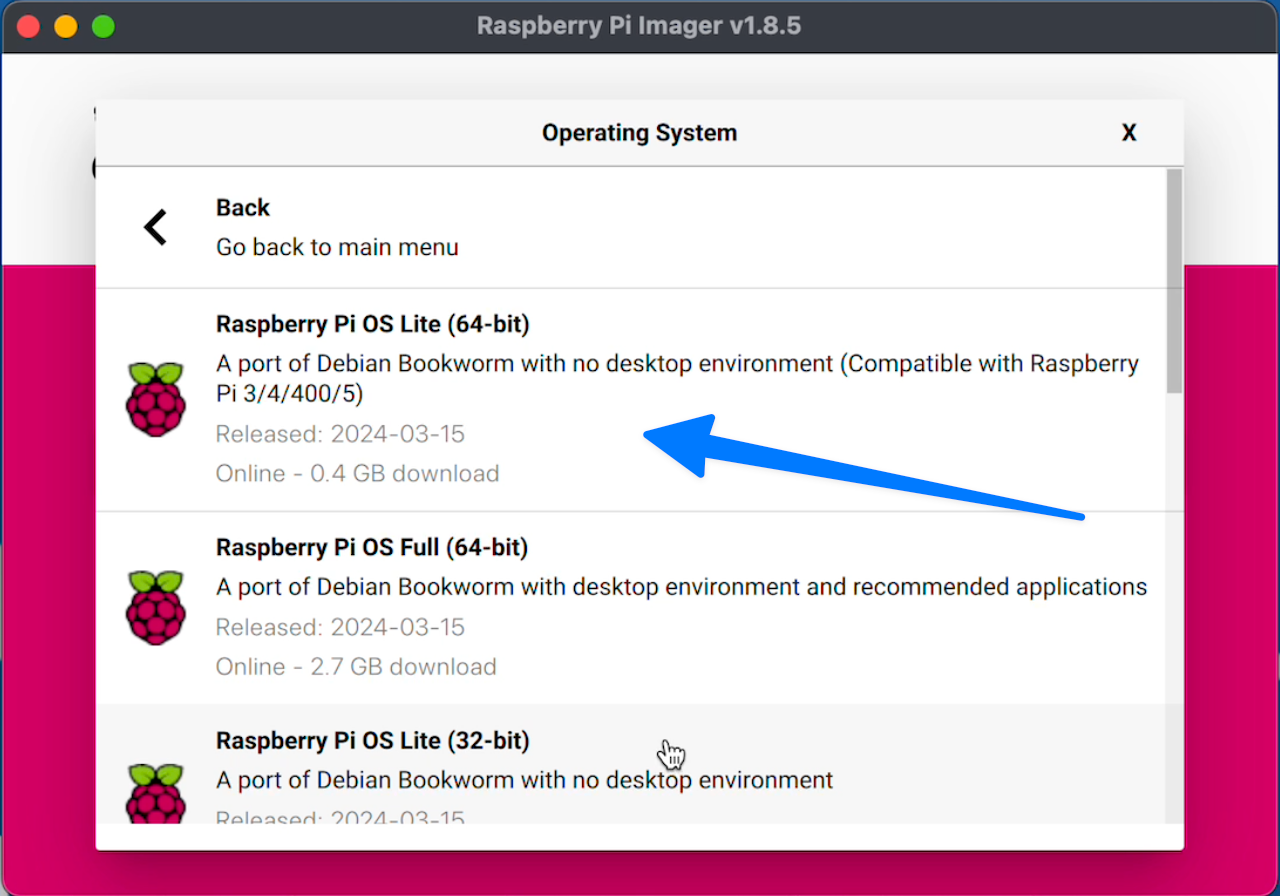
Then "Raspberry Pi OS (Legacy, 64-bit) Lite".
Then Click Storage and pick your SD Card you want to use.
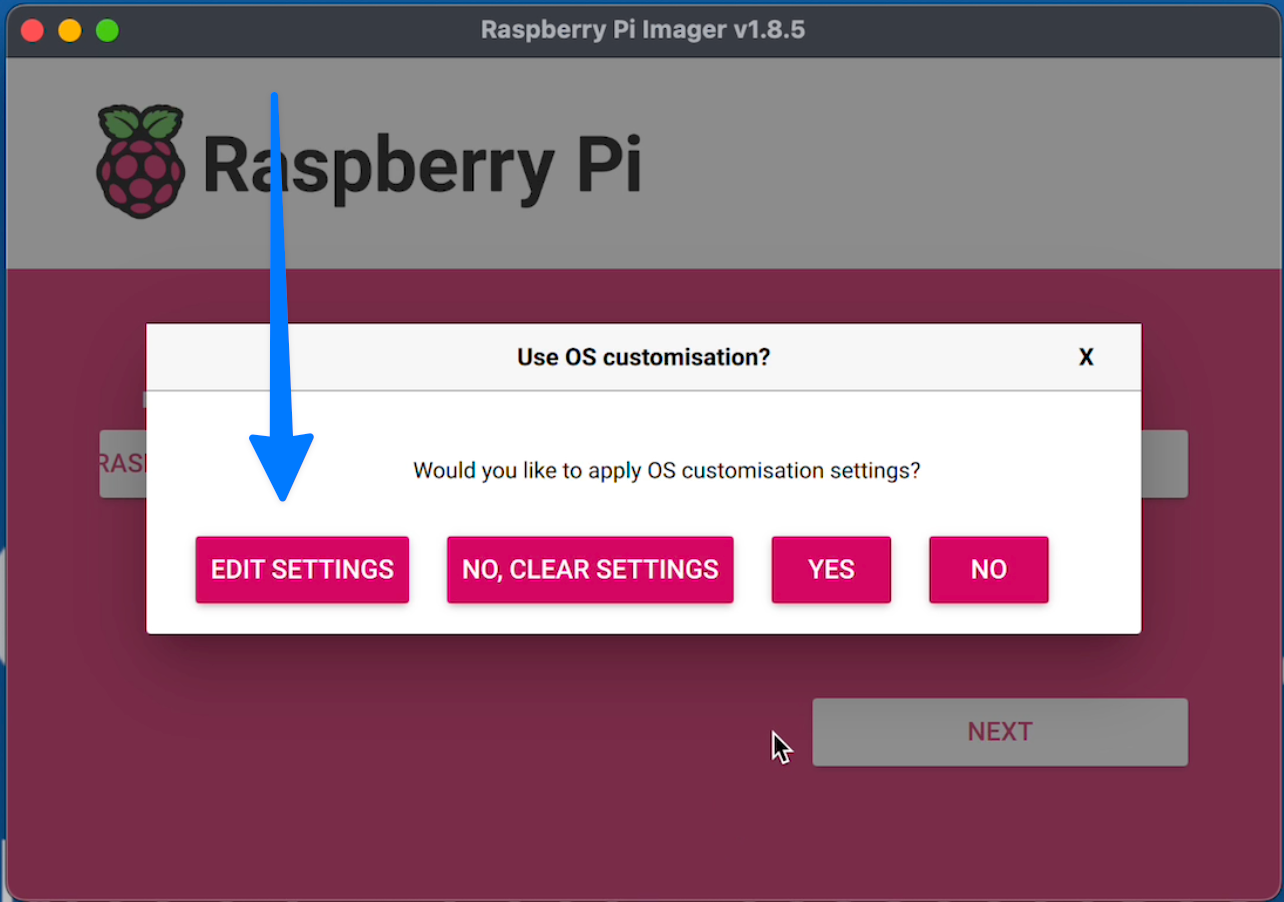
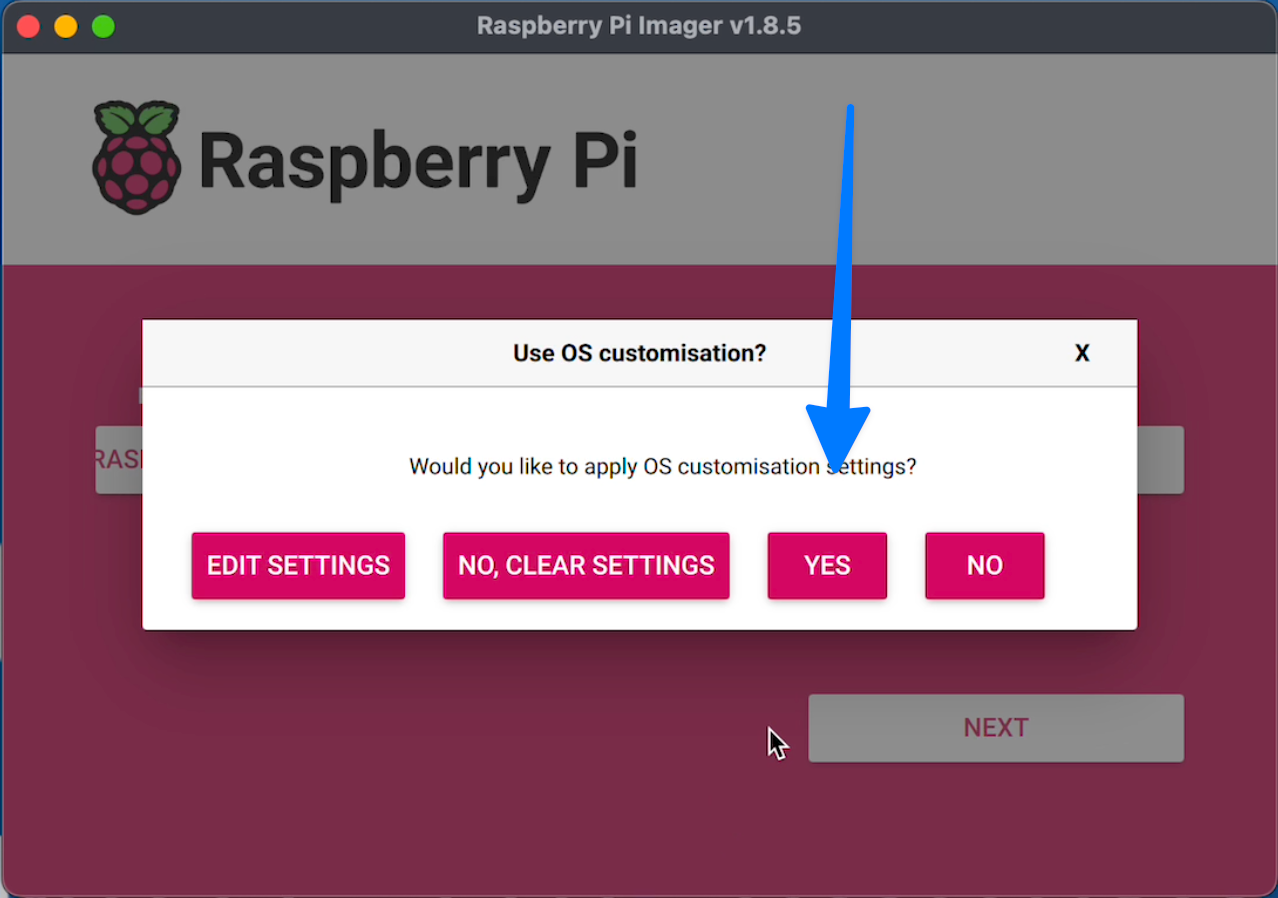
When asking if you'd like to apply customization settings,
choose "Edit Settings"
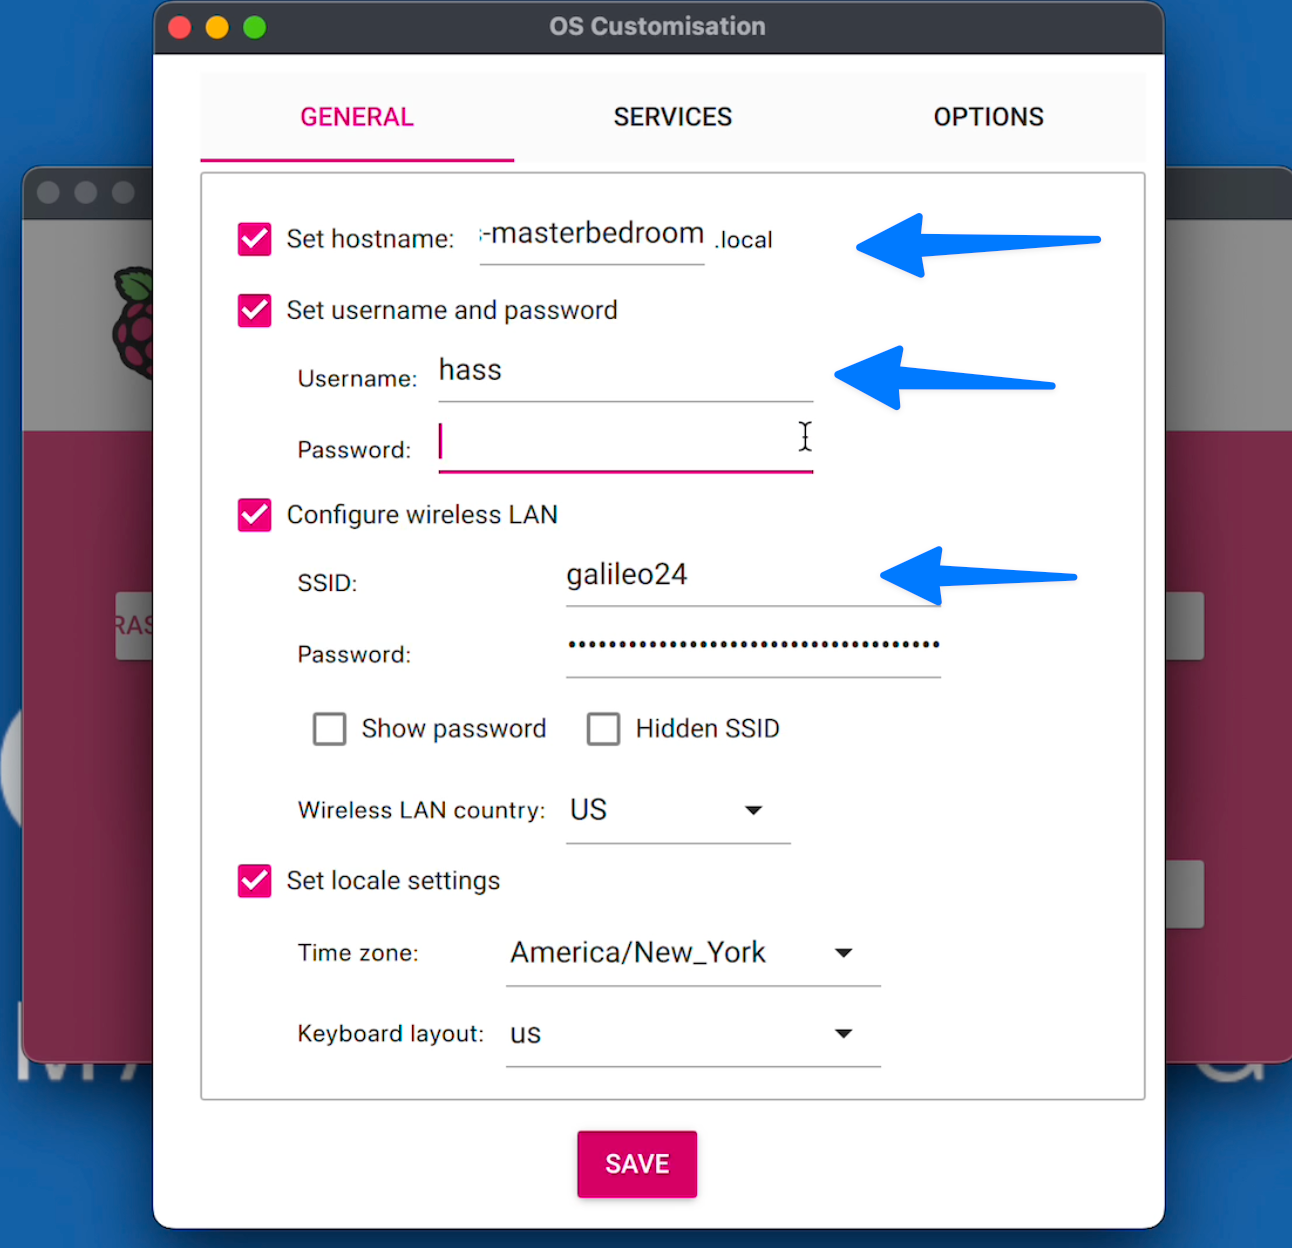
Then on the next screen you need to update
- Hostname
- Set a username/password
- Configure the wireless LAN
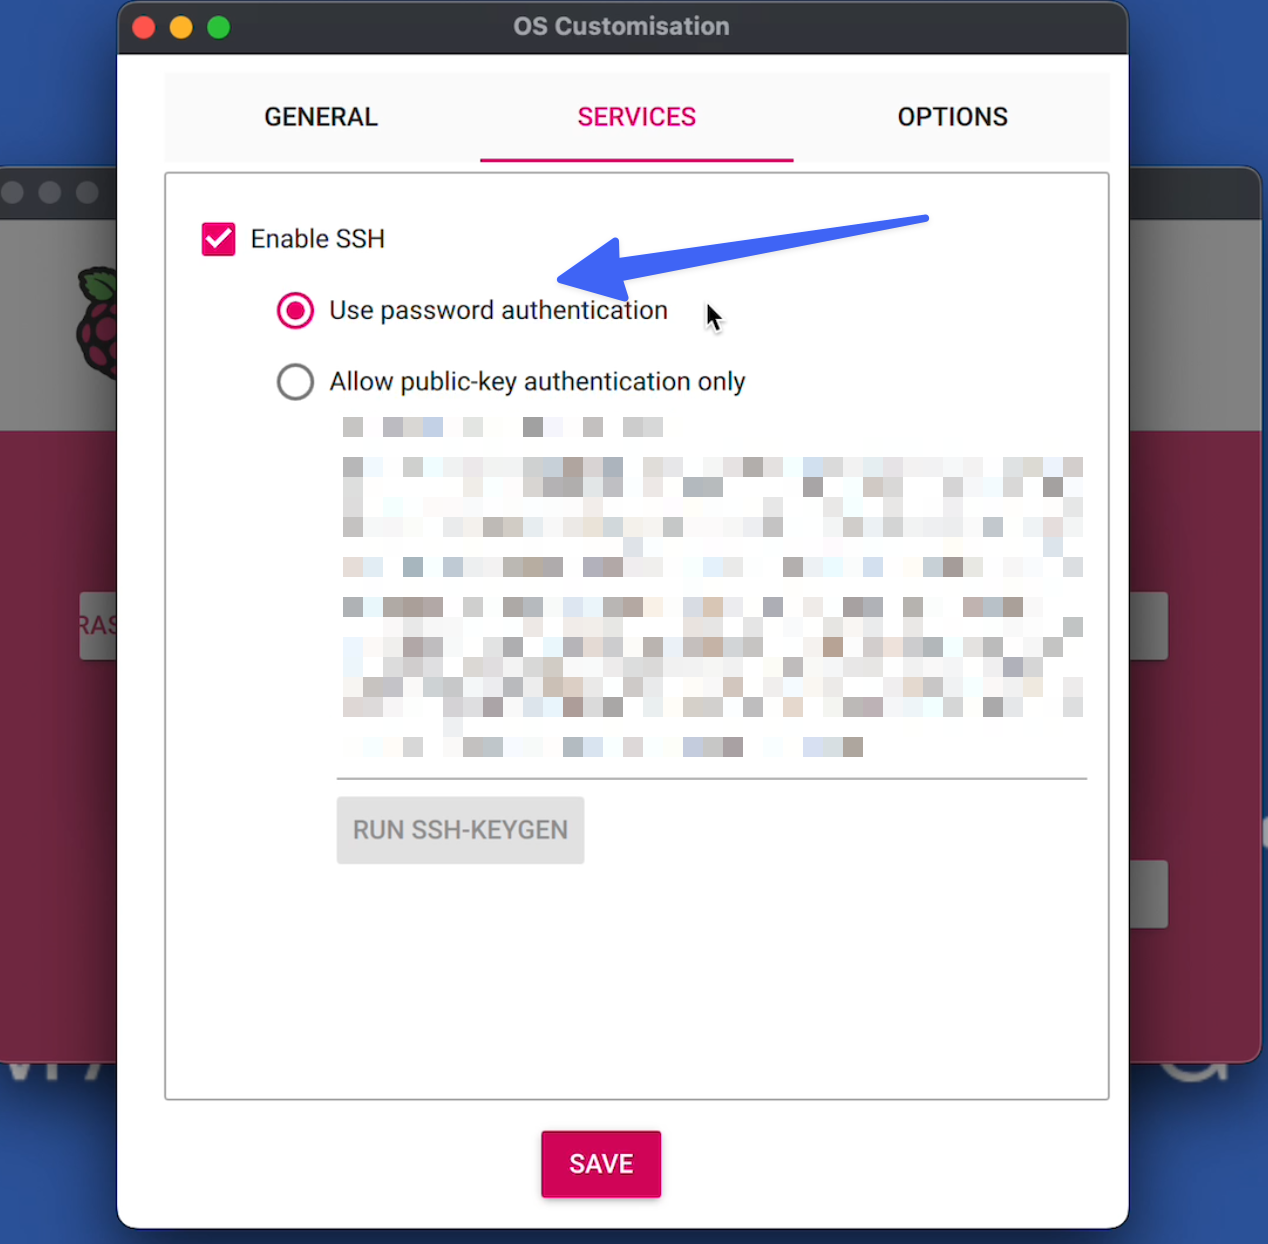
Then Under the Services tab at the top, enable SSH and use password authentication
Then click Save
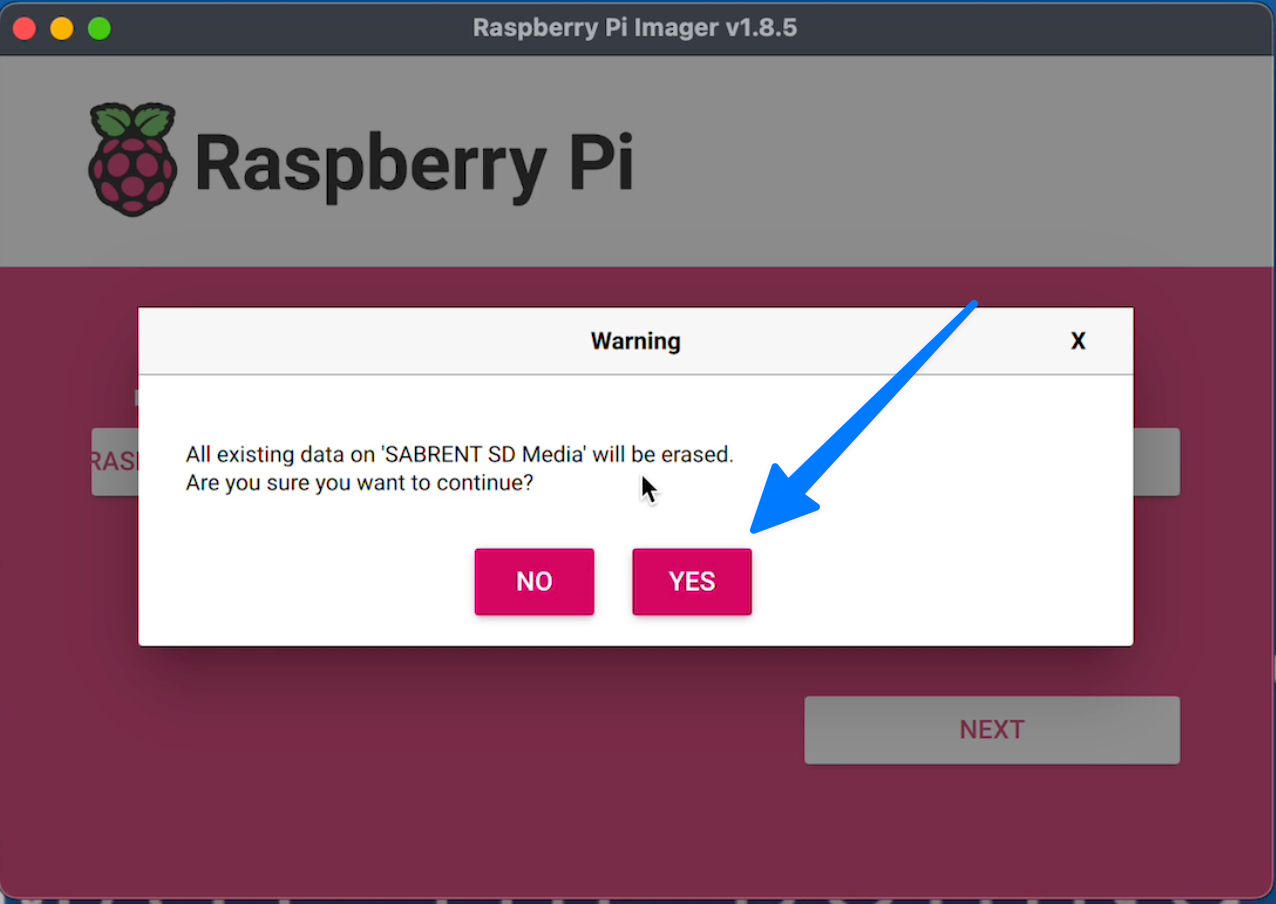
And then click YES to apply those changes
You will then be prompted to write the data to your SD card. So say Yes.
Install Software
Step 0 - SSH Into your Pi
After you have the Raspberry Pi OS installed and you have powered on the zero 2 W you can start setting it up as a Wyoming Satellite.
To do that we will need to SSH over the network to the Pi Zero.
To do that you will want to use something like Putty, or if you are on Mac or if your computer has a command line SSH client you can just use the command line.
On my Mac I can pull up the command line and enter the command:
C0.1
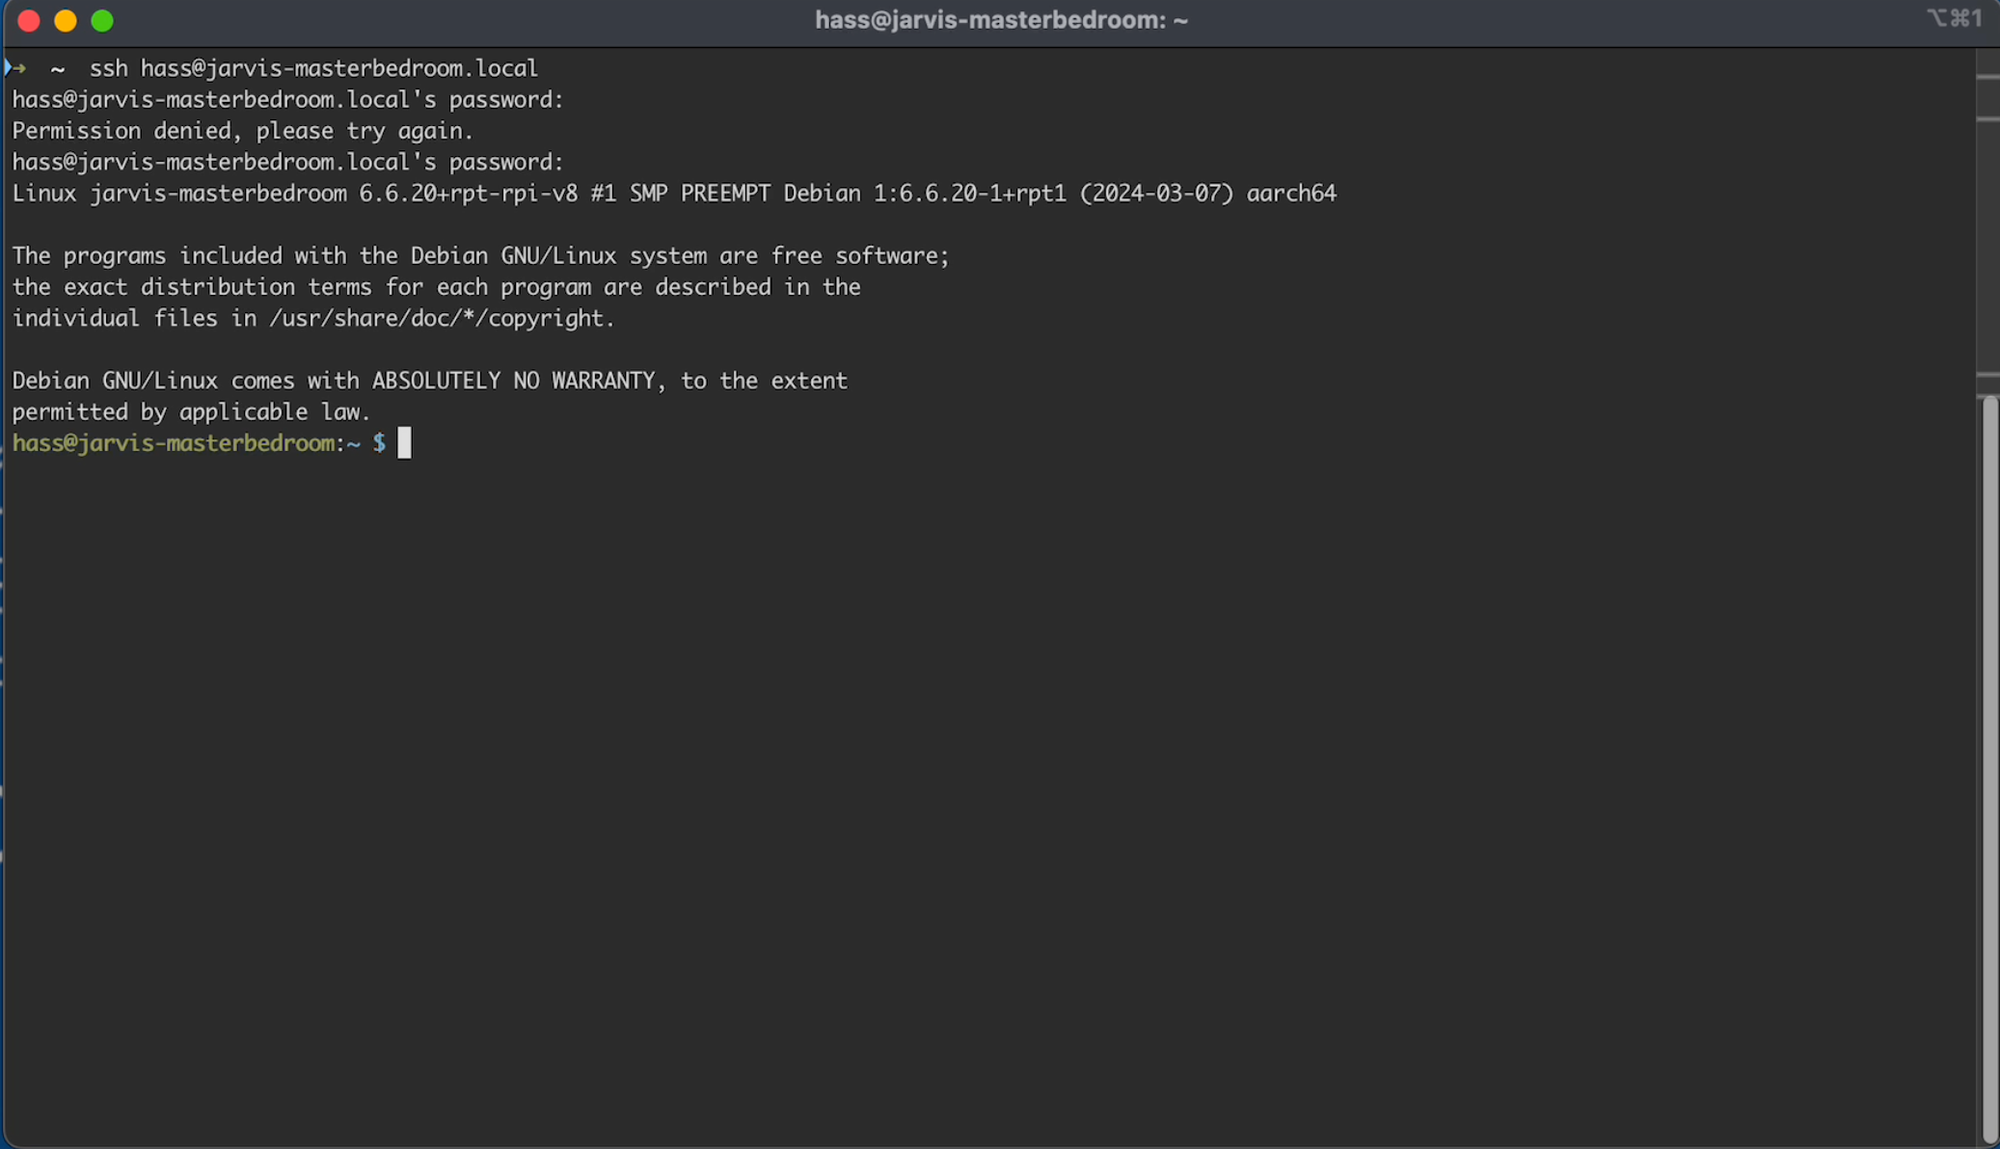
ssh hass@jarvis-masterbedroom.local
In this command hass is the username I defined during the OS customization step above. If you didn’t change it, the username may be pi
Then jarvis-masterbedroom is the hostname I set during the OS customization step. .local is added since its on my internal network.
You will be prompted for the password you created during the OS Customization step, so enter that.
If you are successful you should see:
Setup Wyoming Satellite Software
Now we need to install the satellite software. I have listed all the commands in this document so you just have to copy and paste. Or you can type them.
The Step headers are to keep in sync with the video.
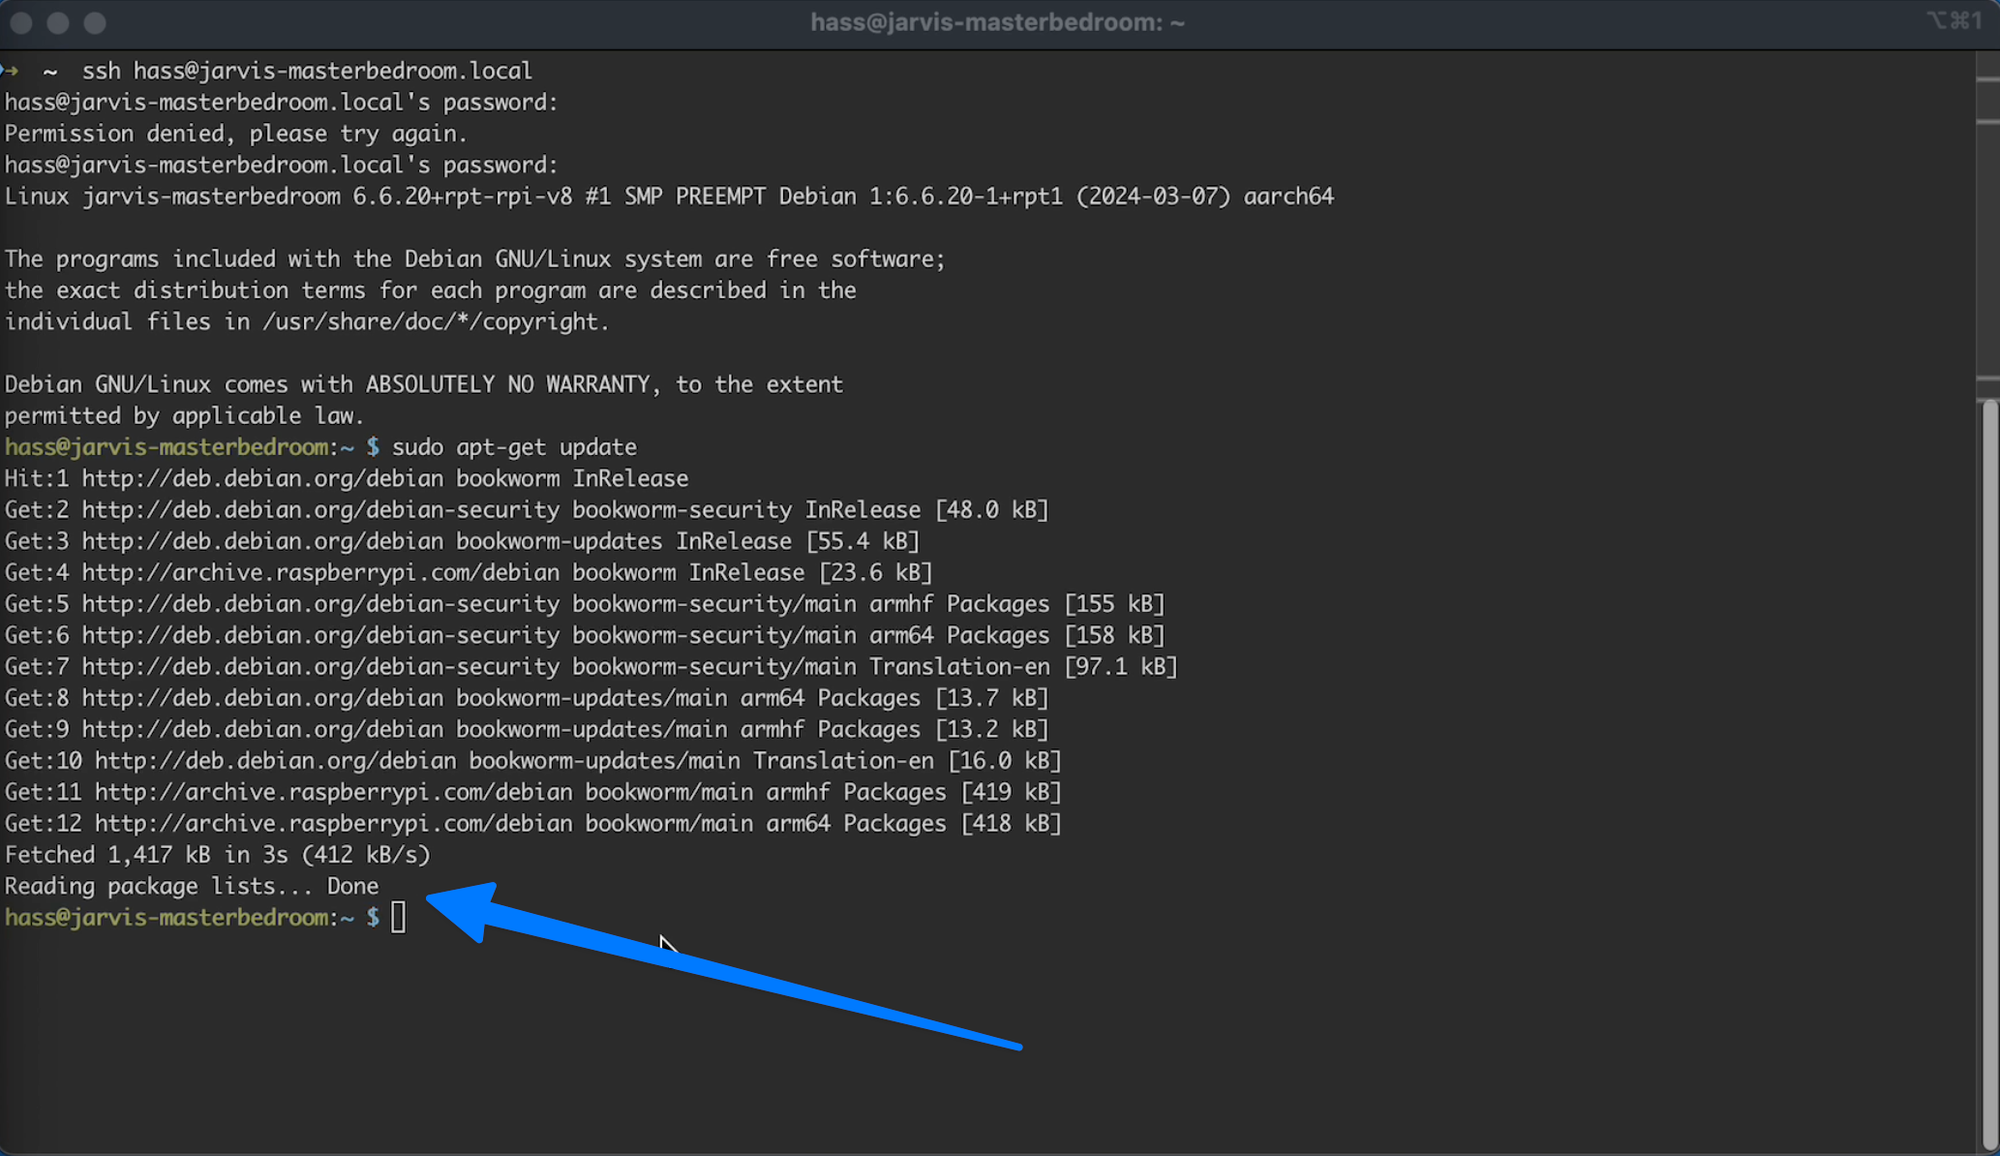
Step 1 - Update the OS
Type or copy paste the following and hit enter:
C1.1
sudo apt-get update
When completed you should see Done followed by a new command prompt:
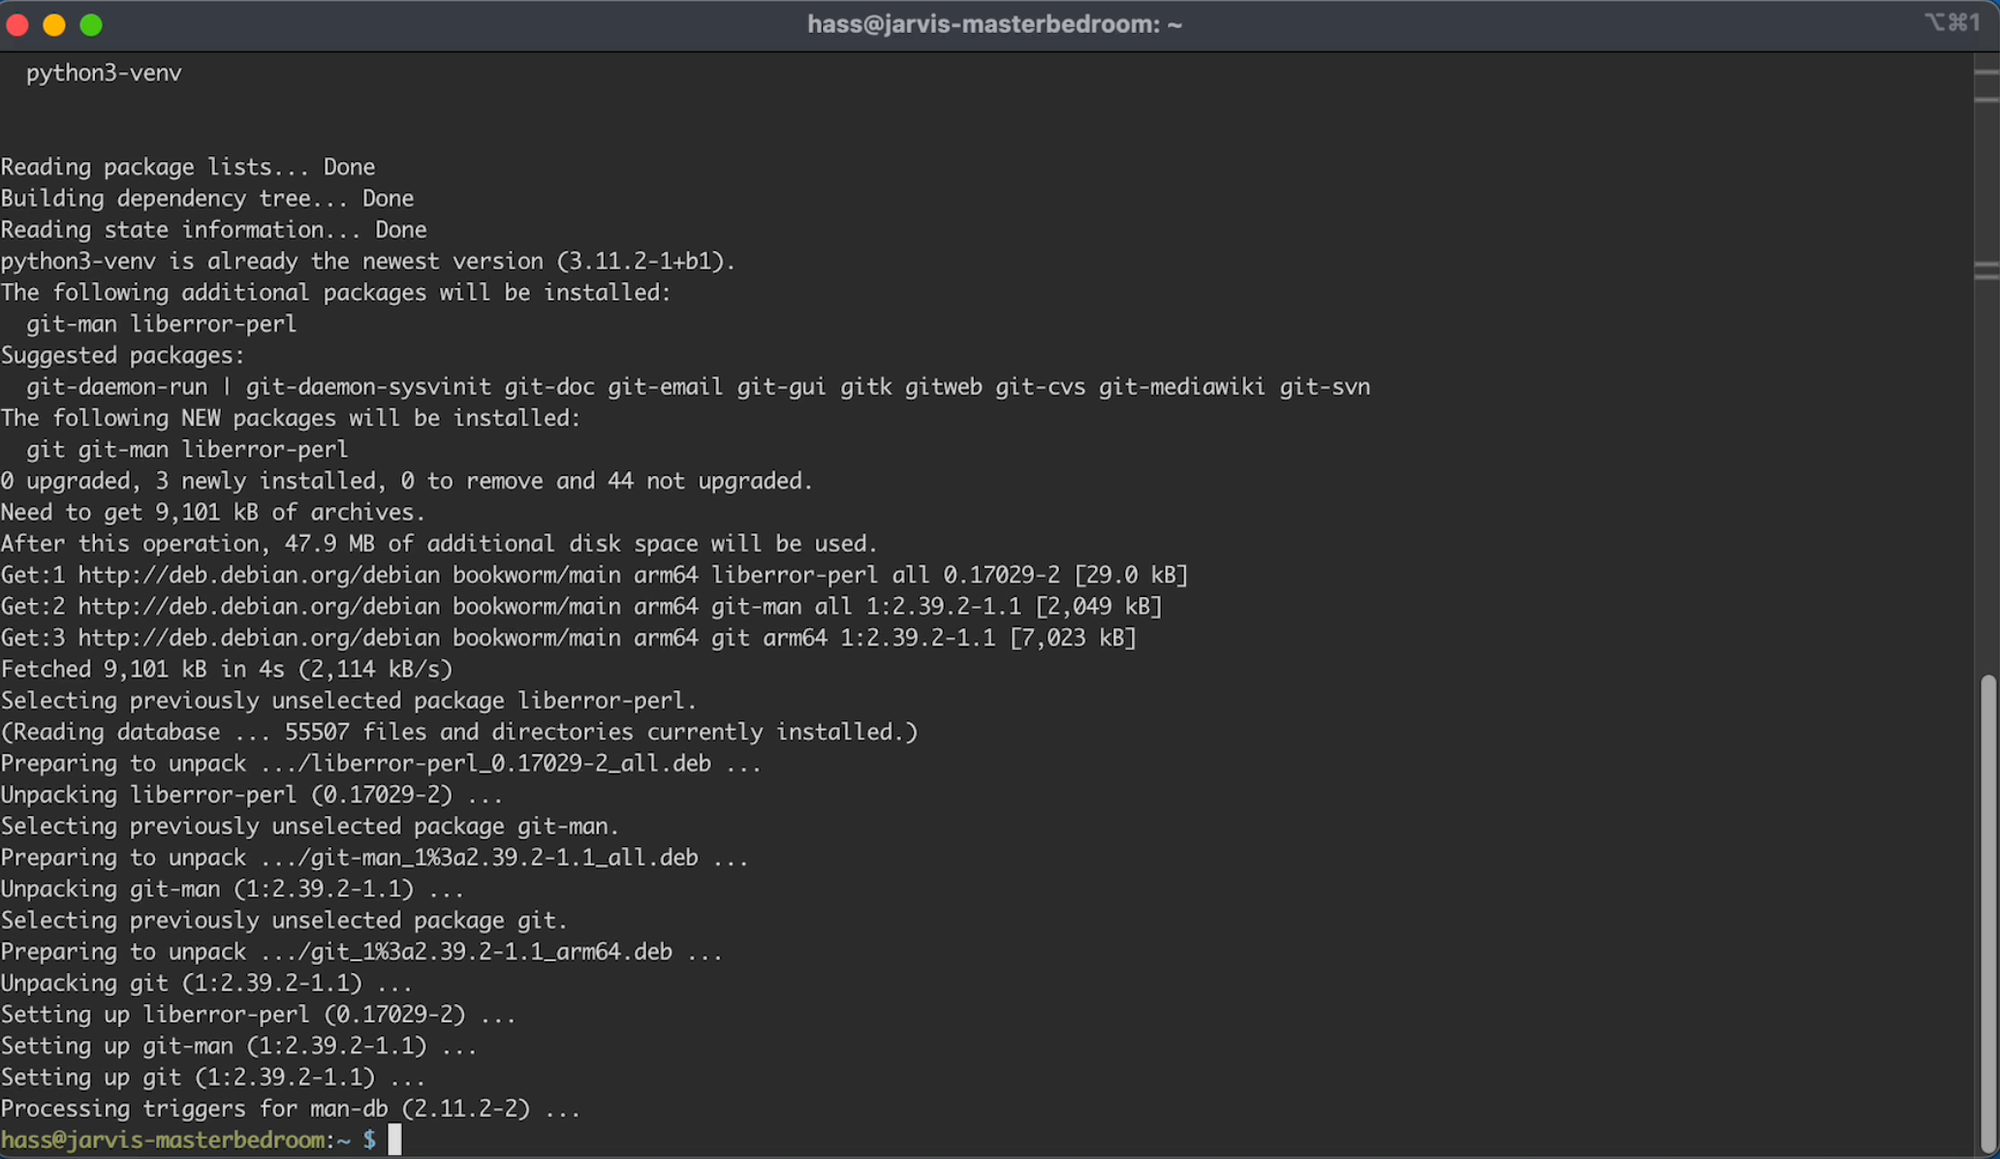
Step 2 - Install Git
Type or copy paste the following and hit enter:
C2.1
sudo apt-get install --no-install-recommends  \
  git \
  python3-venv
When it is done you should have a new command prompt:
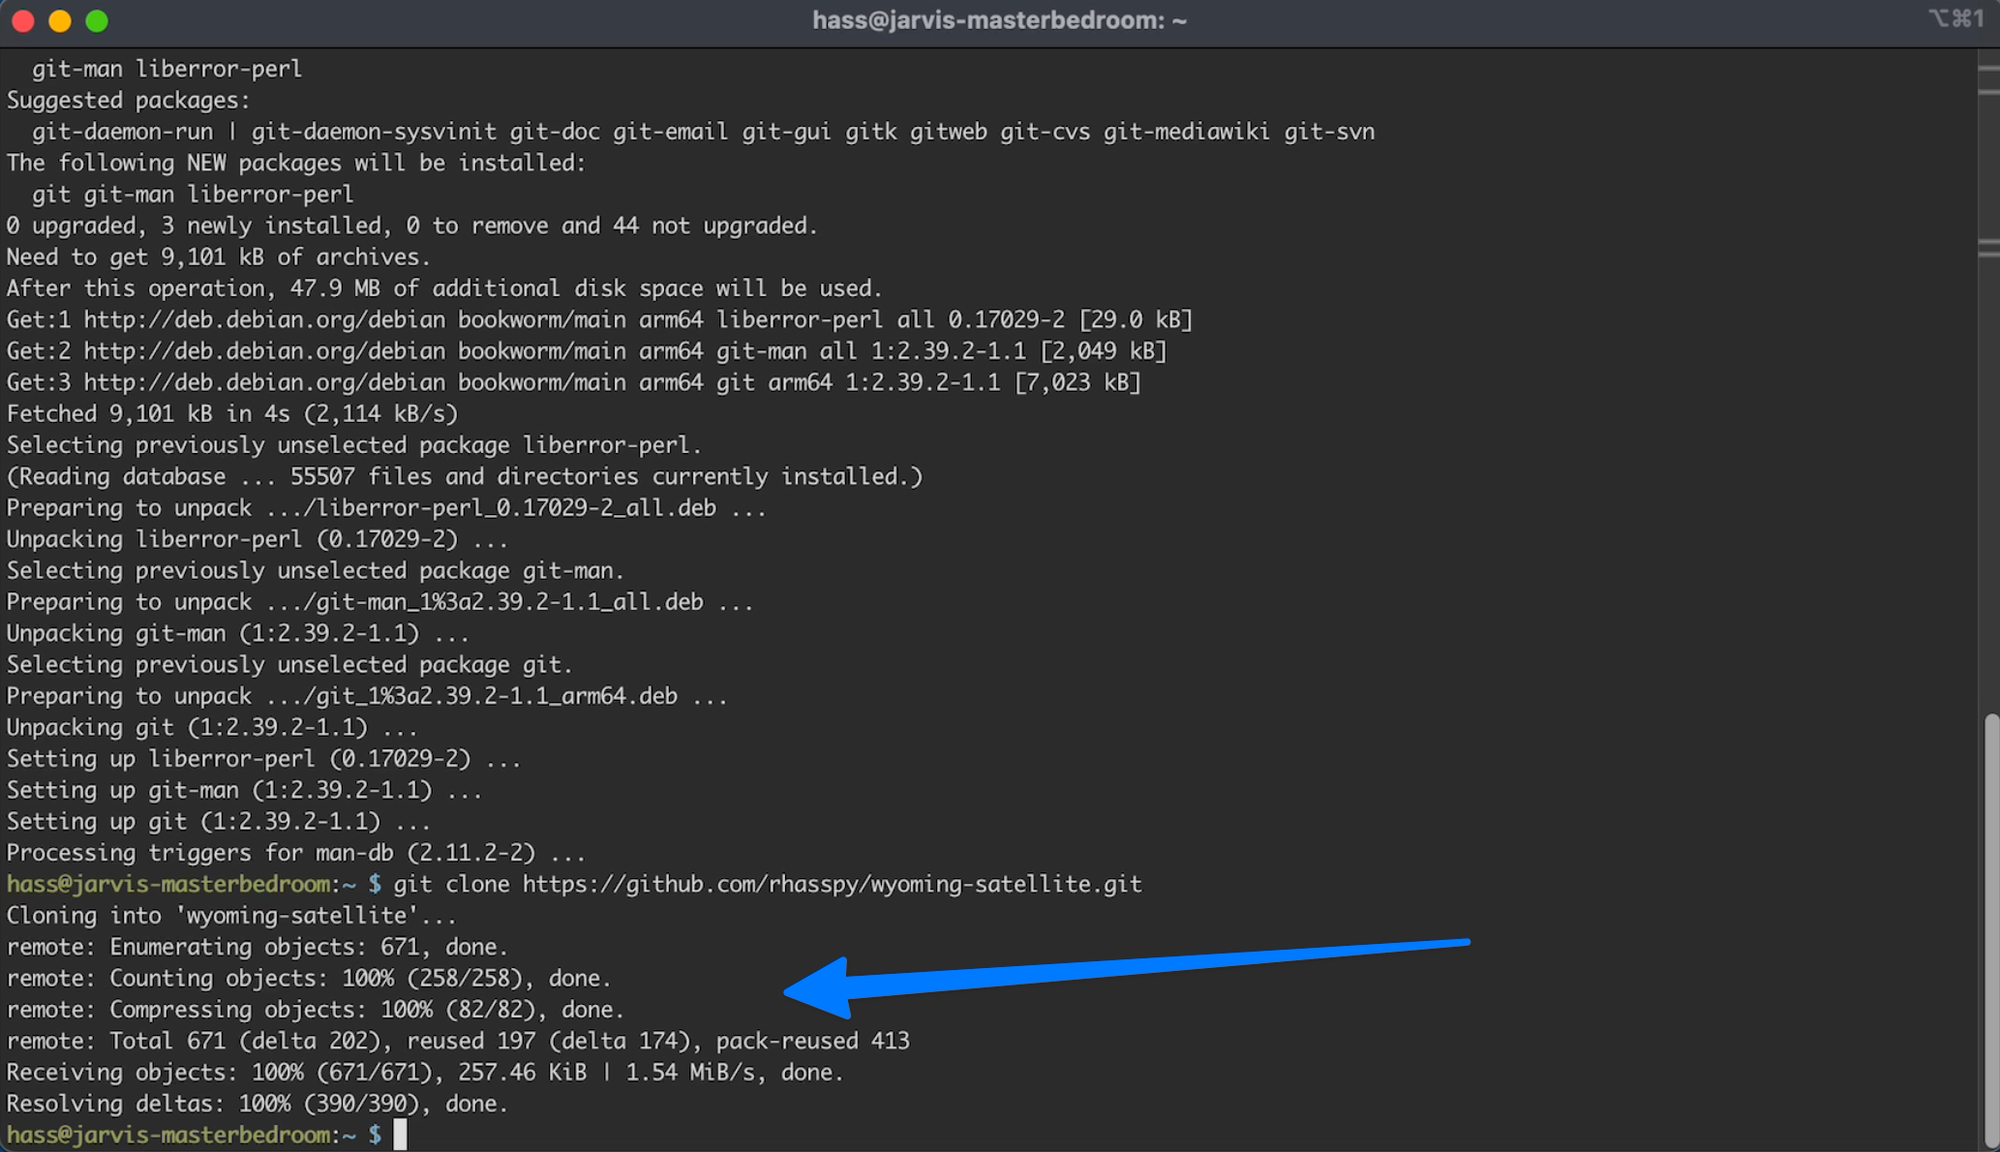
Step 3 - Clone the wyoming-satellite repository:
Type or copy paste the following and hit enter:
C3.1
git clone https://github.com/rhasspy/wyoming-satellite.git
When that is done you will see:
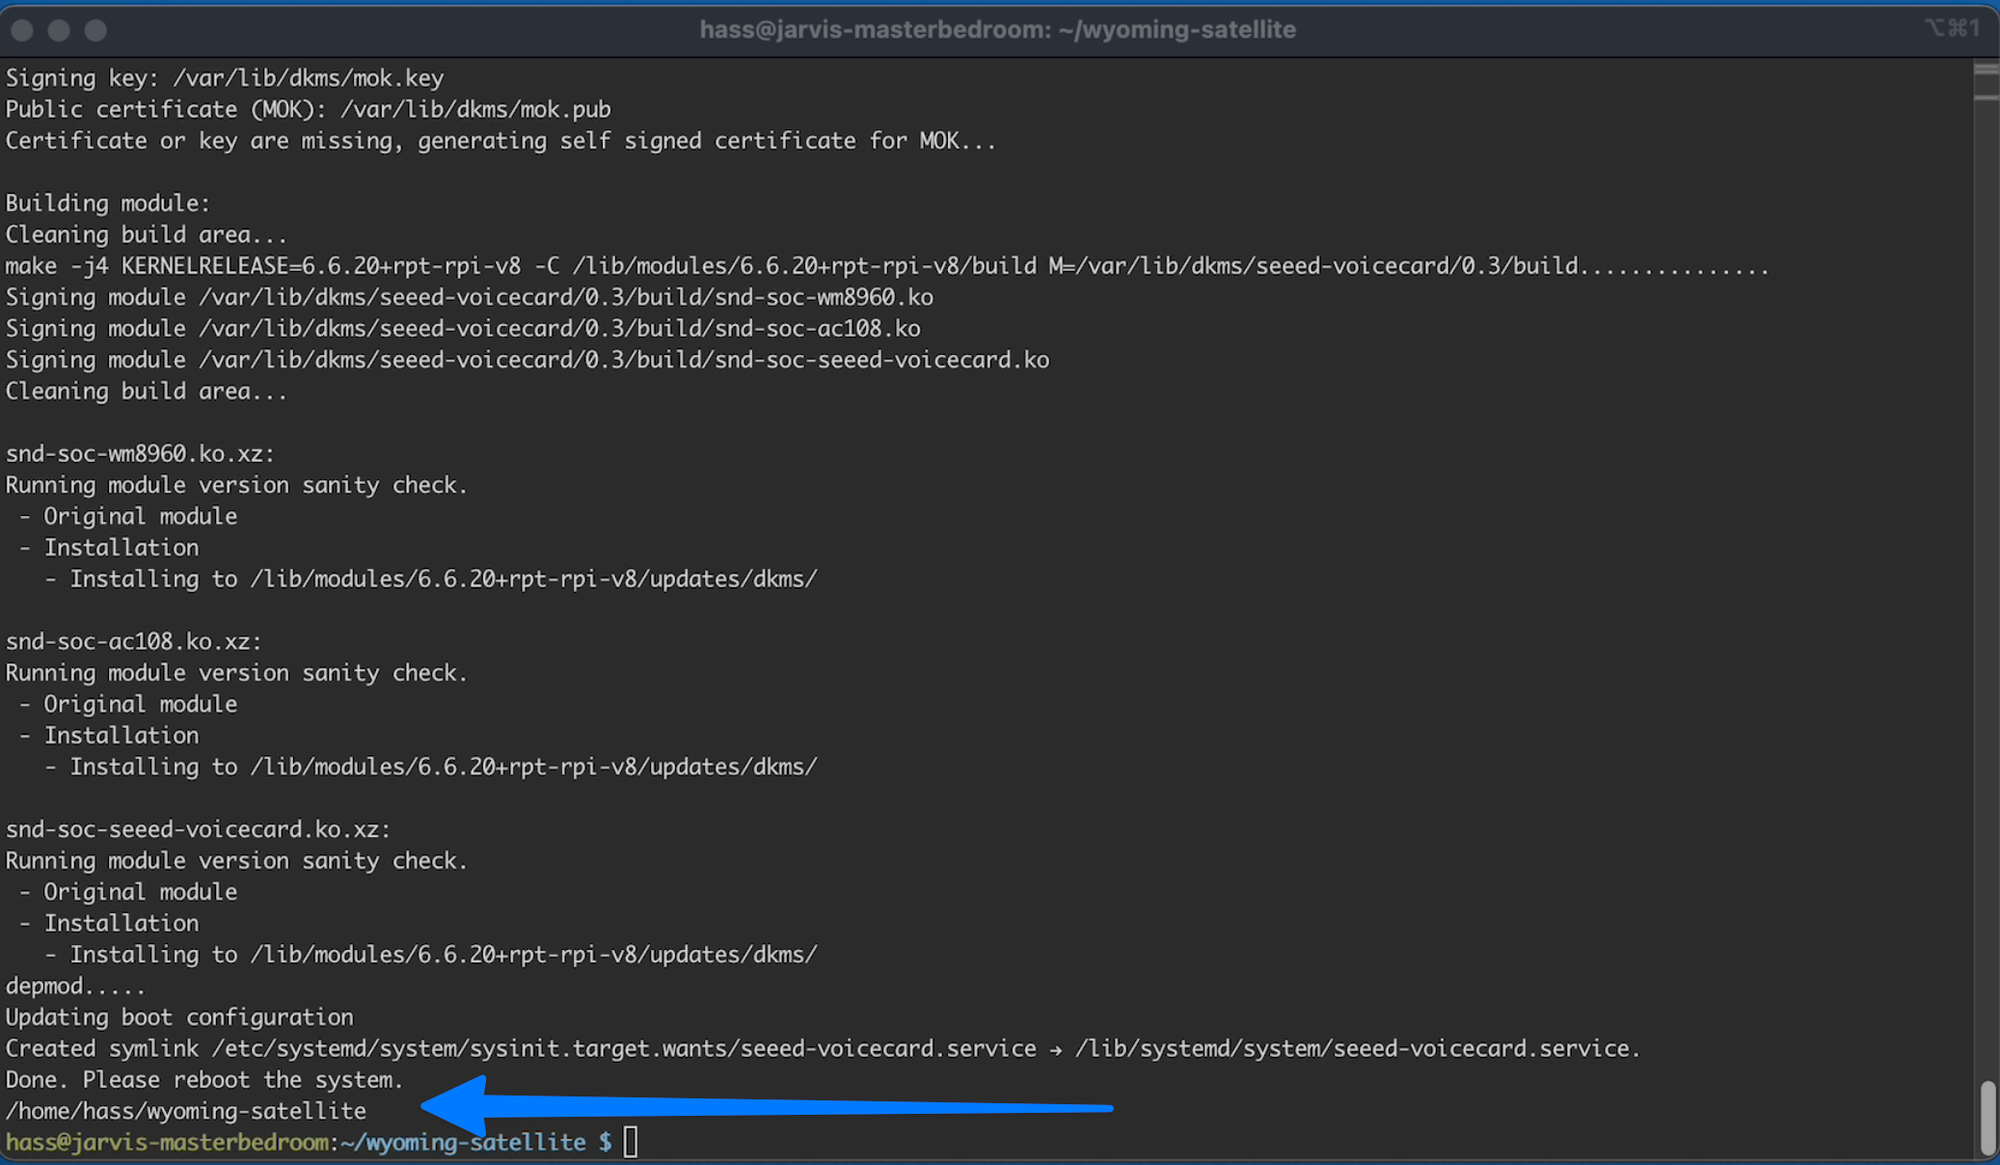
Step 4 - Install drivers for 2 Mic and 4 Mic Hat
First Change directory by toeing or copy / pasting this and pressing enter
C4.1
cd wyoming-satellite/
Then type or copy paste and press enter:
C4.2
sudo bash etc/install-respeaker-drivers.sh
When that is done you will see:
Step 5 - Reboot the System
Then type or copy paste and press enter:
C5.1
sudo reboot
Step 6 - SSH back into the Pi
After a minute or so SSH back into your Pi using the same SSH command from Step 0.
C6.1
ssh hass@jarvis-masterbedroom.local
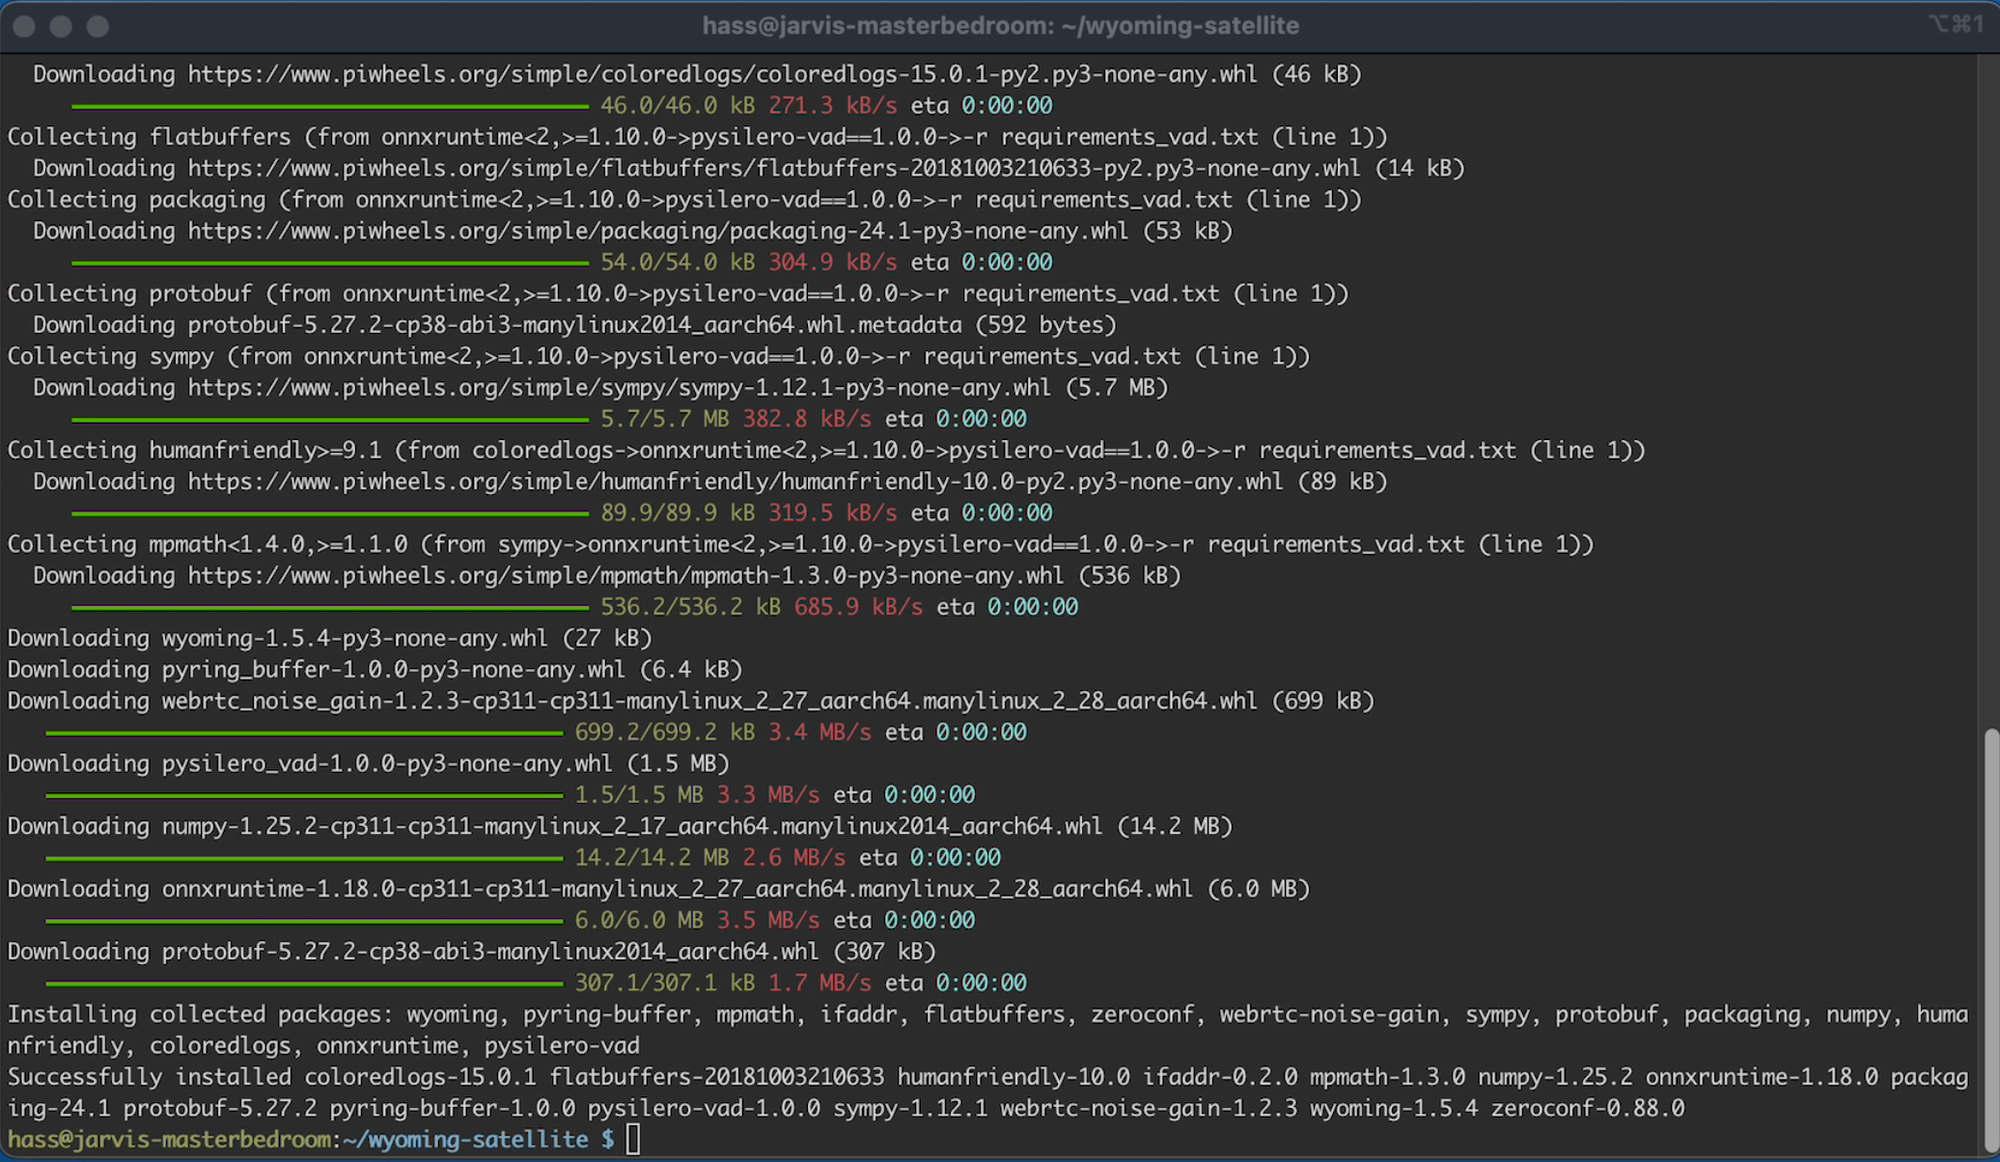
Step 7 - Install the Wyoming Satellite Dependencies
First change directory by typing or copy pasting the following and pressing enter:
C7.1
cd wyoming-satellite/
Then we need to type or copy paste the following and press enter:
C7.2
python3 -m venv .venv
.venv/bin/pip3 install --upgrade pip
.venv/bin/pip3 install --upgrade wheel setuptools
.venv/bin/pip3 install \
  -f 'https://synesthesiam.github.io/prebuilt-apps/' \
  -r requirements.txt \
  -r requirements_audio_enhancement.txt \
  -r requirements_vad.txt
If Successful you will see:
Step 8 - Test your progress
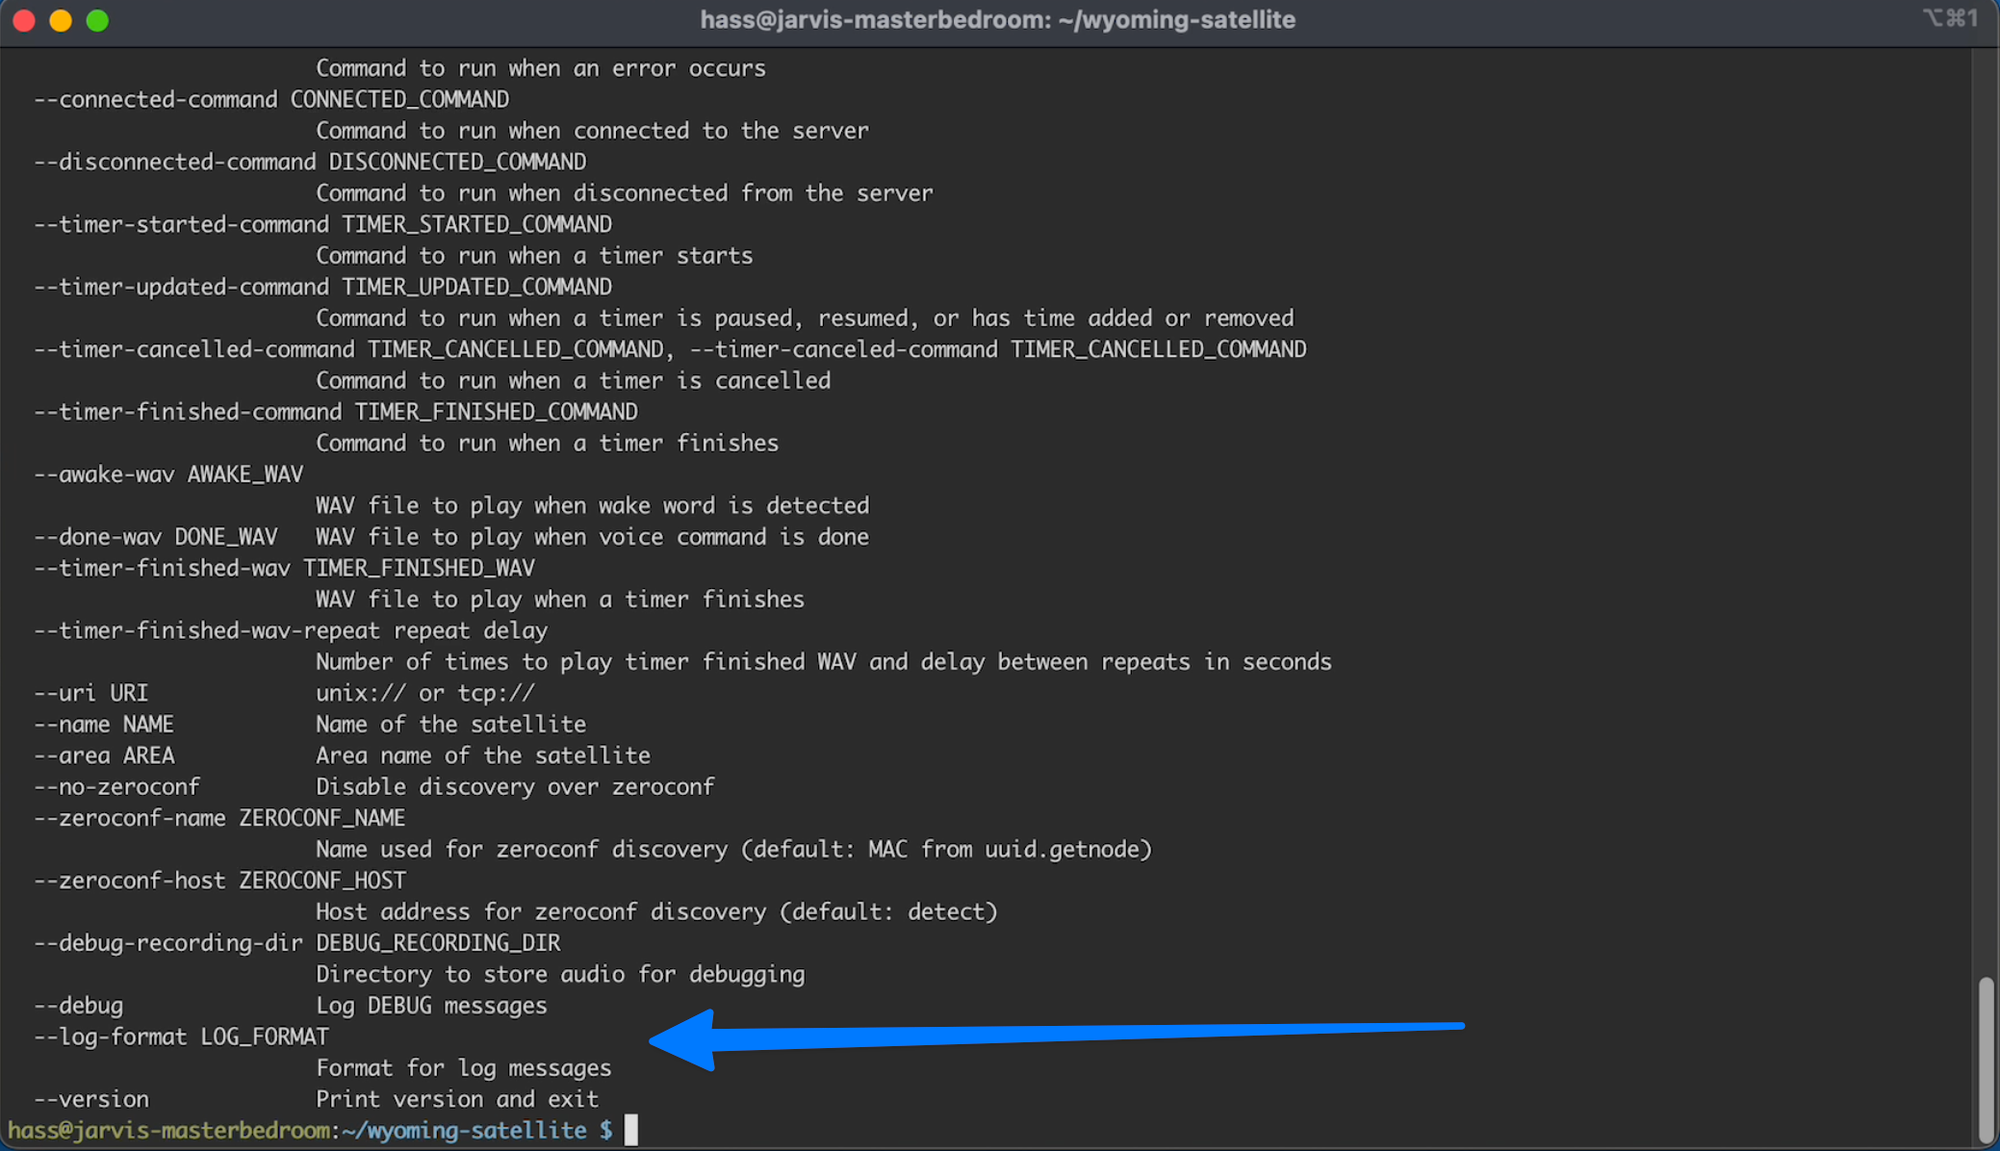
If the installation was successful, you should be able to type or copy paste the following command and press enter:
C8.1
script/run --help
If you see the following you are good to continue:
If you get told the command was not found, then something failed. I would start over at Step 1
Step 9 - Make sure your ReSpeaker Hat is detected
Type or copy/paste the following and press enter:
C9.1
arecord -L
If you have the ReSpeaker 2Mic HAT, you should see:
plughw:CARD=seeed2micvoicec,DEV=0
    seeed-2mic-voicecard, bcm2835-i2s-wm8960-hifi wm8960-hifi-0
    Hardware device with all software conversions
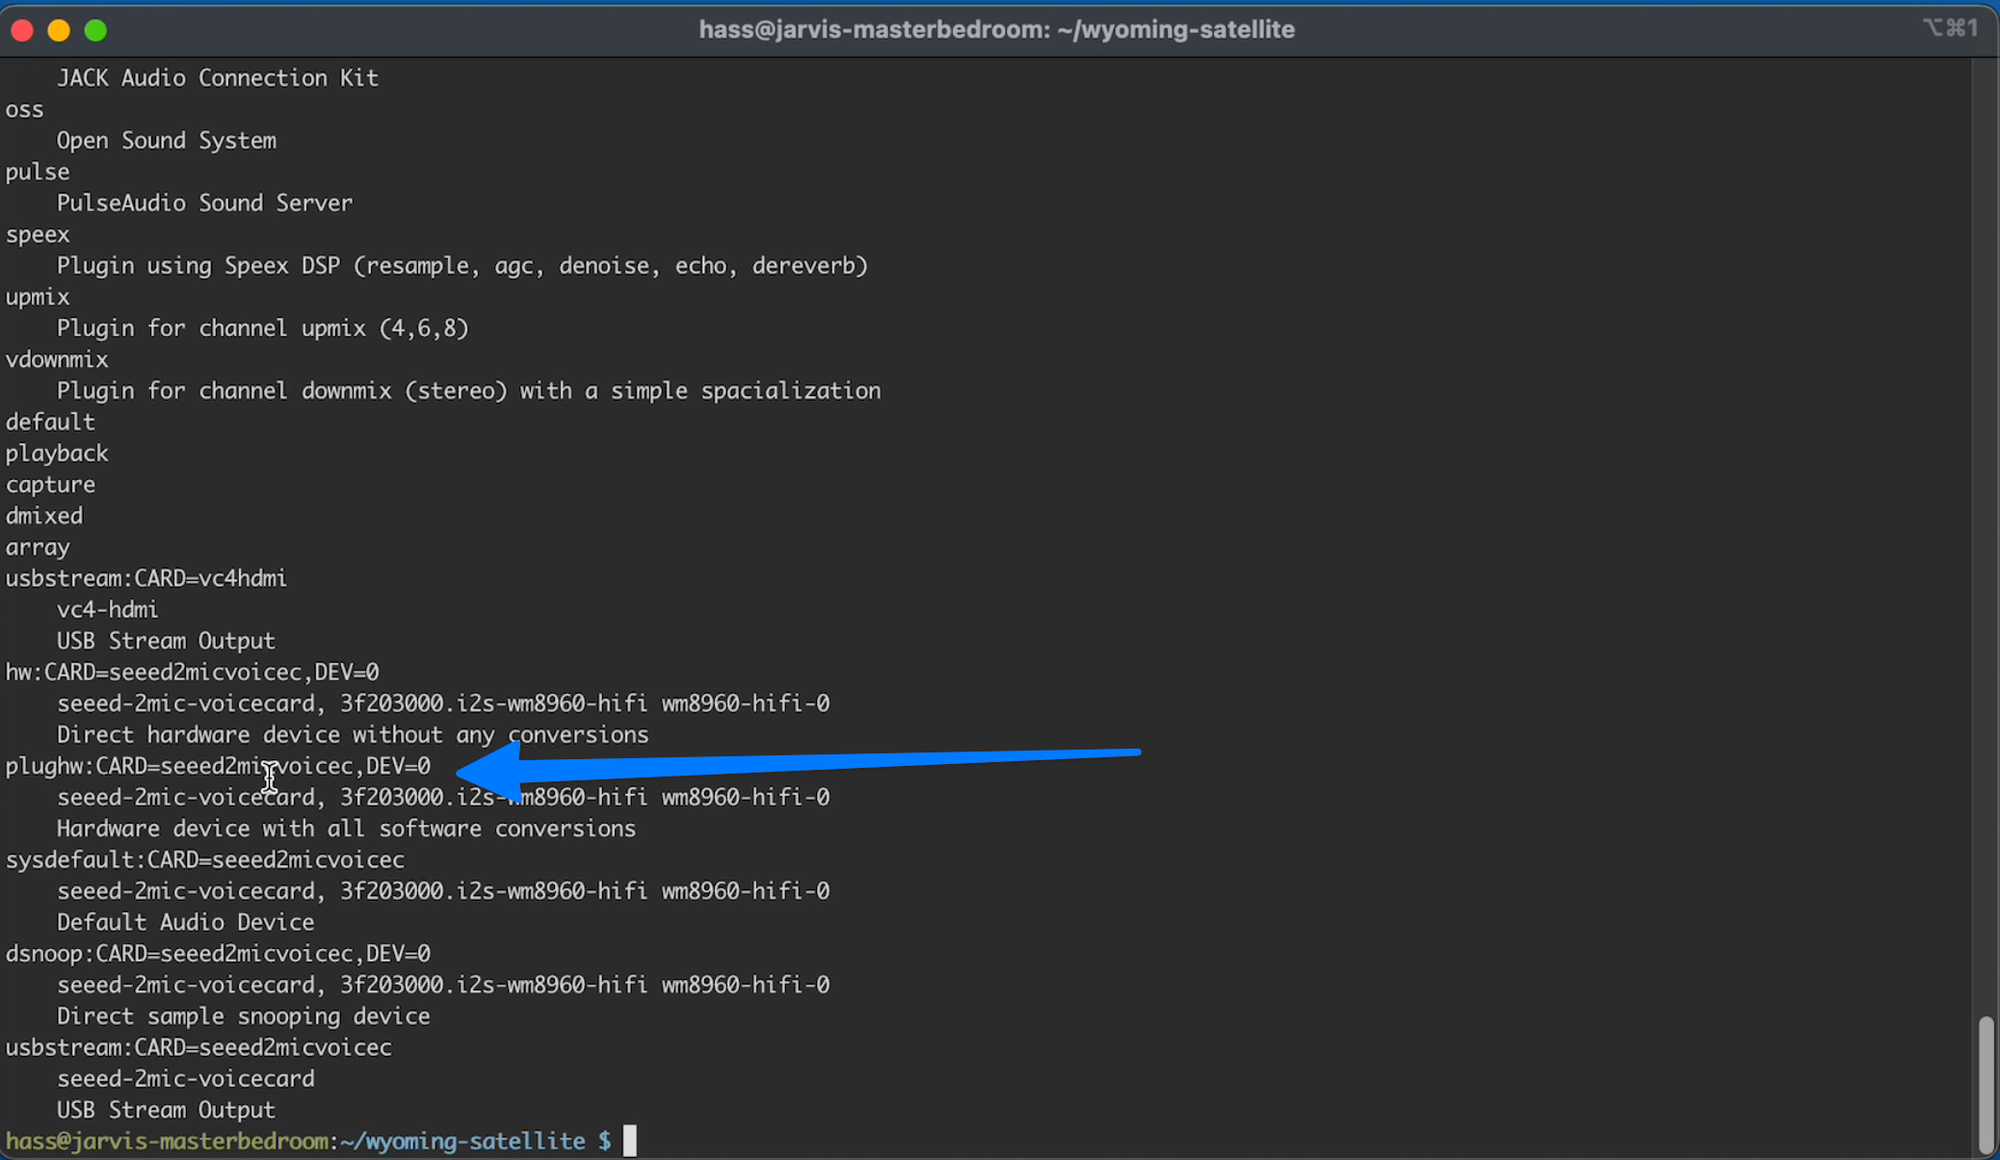
If you are using something different make sure you take note of which device it is, because you will need to reference it later.
Step 10 - Record a test
If you haven’t already connect a speaker to your ReSpeaker board.
Then when ready Type or copy/paste the following and press enter:
(This command is for the 2 Mic Hat, update the device after -D if you are using something different)
C10.1
arecord -D plughw:CARD=seeed2micvoicec,DEV=0 -r 16000 -c 1 -f S16_LE -t wav -d 5 test.wav
Say something while arecord is running.
Step 11 - Playback Test Audio
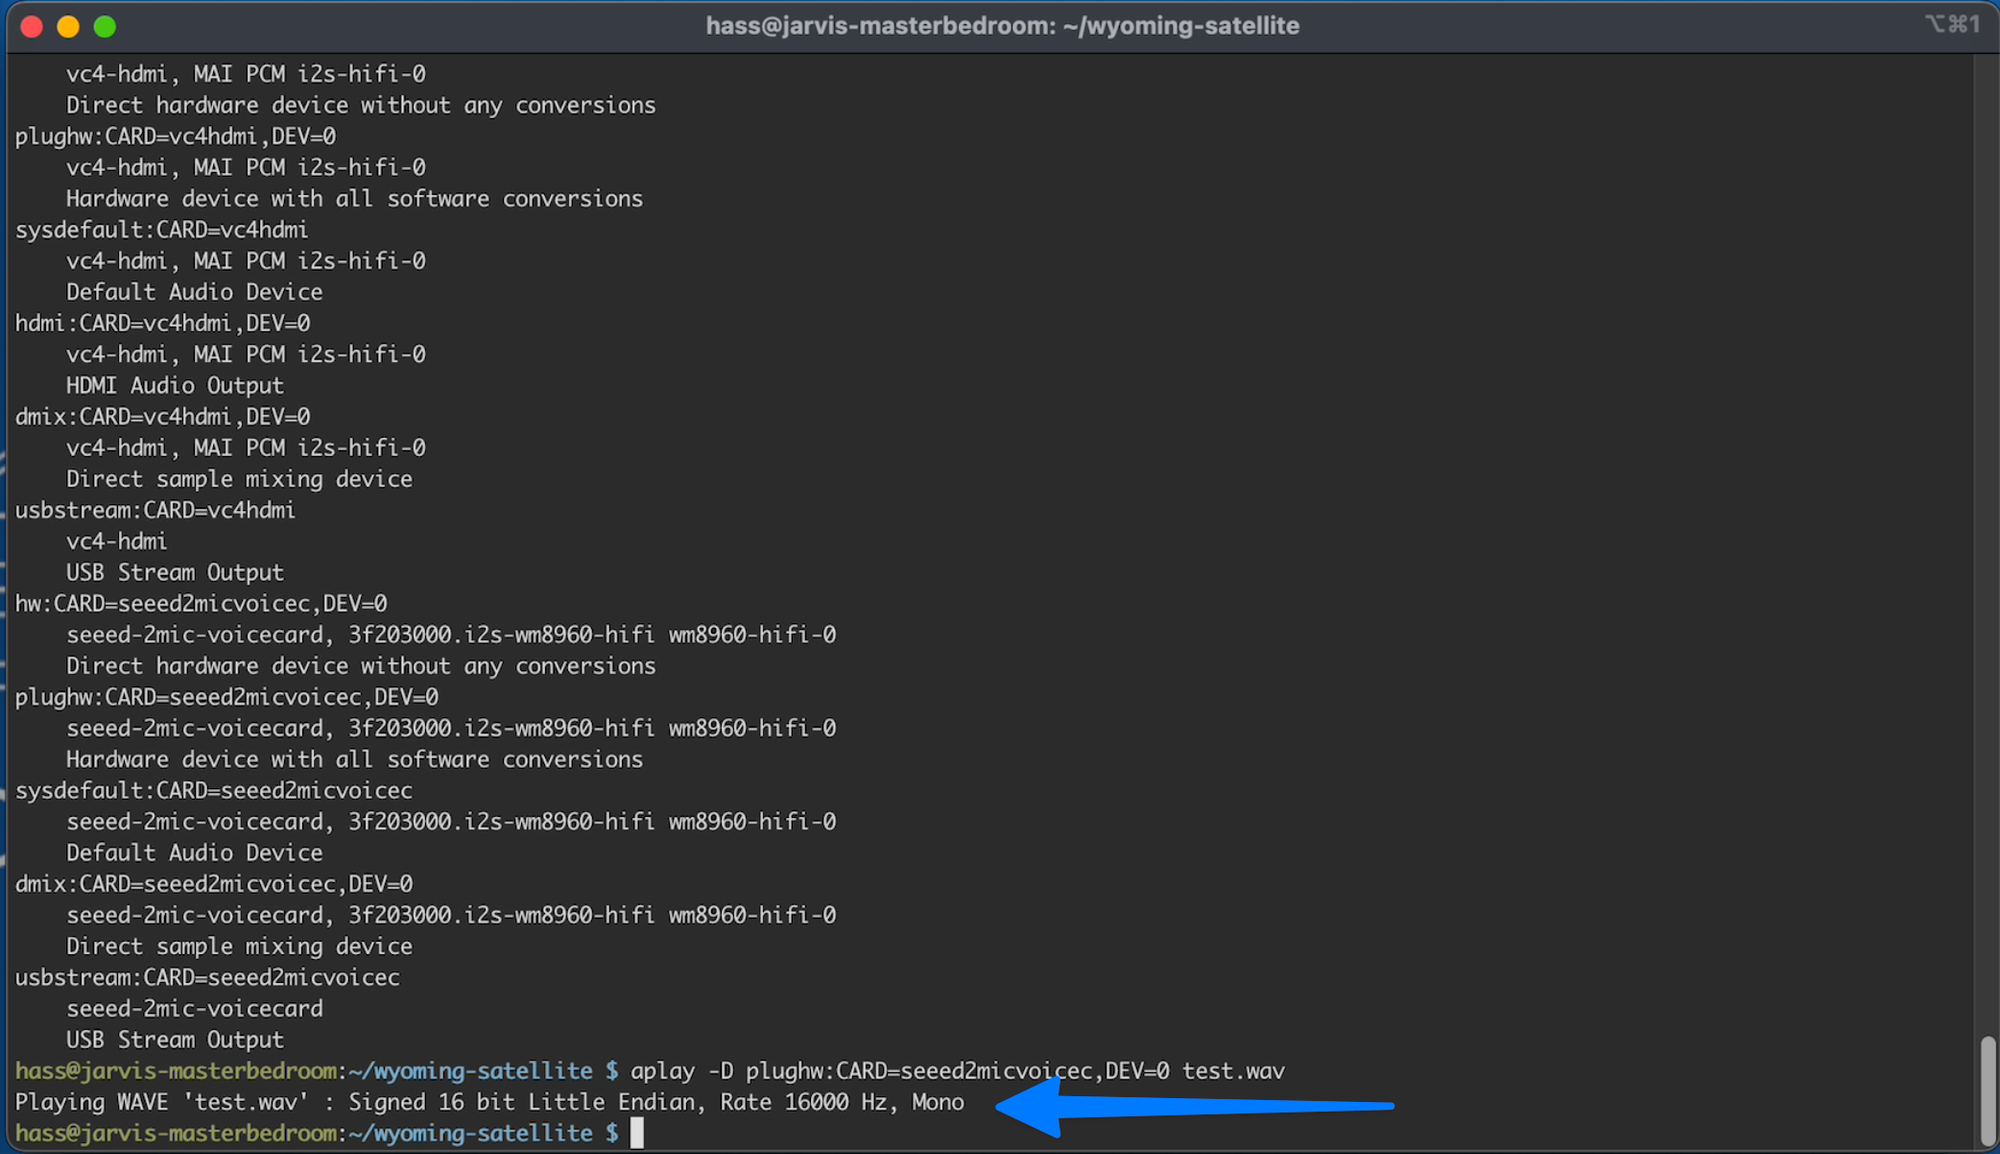
Play back your recorded sample WAV by typing or copy/pasting the following and pressing enter:
C11.1
aplay -D plughw:CARD=seeed2micvoicec,DEV=0 test.wav
You should hear your recorded sample. And see the following output:
Step 12 - Make sure the Wyoming Satellite will run
Make sure you are in wyoming-satellite directory, then type, or copy/paste the following and press enter:
C12.1
script/run \
  --debug \
  --name 'my satellite' \
  --uri 'tcp://0.0.0.0:10700' \
  --mic-command 'arecord -D plughw:CARD=seeed2micvoicec,DEV=0 -r 16000 -c 1 -f S16_LE -t raw' \
  --snd-command 'aplay -D plughw:CARD=seeed2micvoicec,DEV=0 -r 22050 -c 1 -f S16_LE -t raw'
That command assumes you have the 2mic hat. If you are using a different ReSpeaker your device may need to be updated to match the one you have.
Now you should be able to flip over to home Assistant
And under Integrations you should now see your satellite show up as "Discovered" (Wyoming Protocol).
Back in our terminal we need to close this by pressing CTROL + C
Which will give us our command prompt back.
And now we need to setup a service that will run anytime the Pi is started.
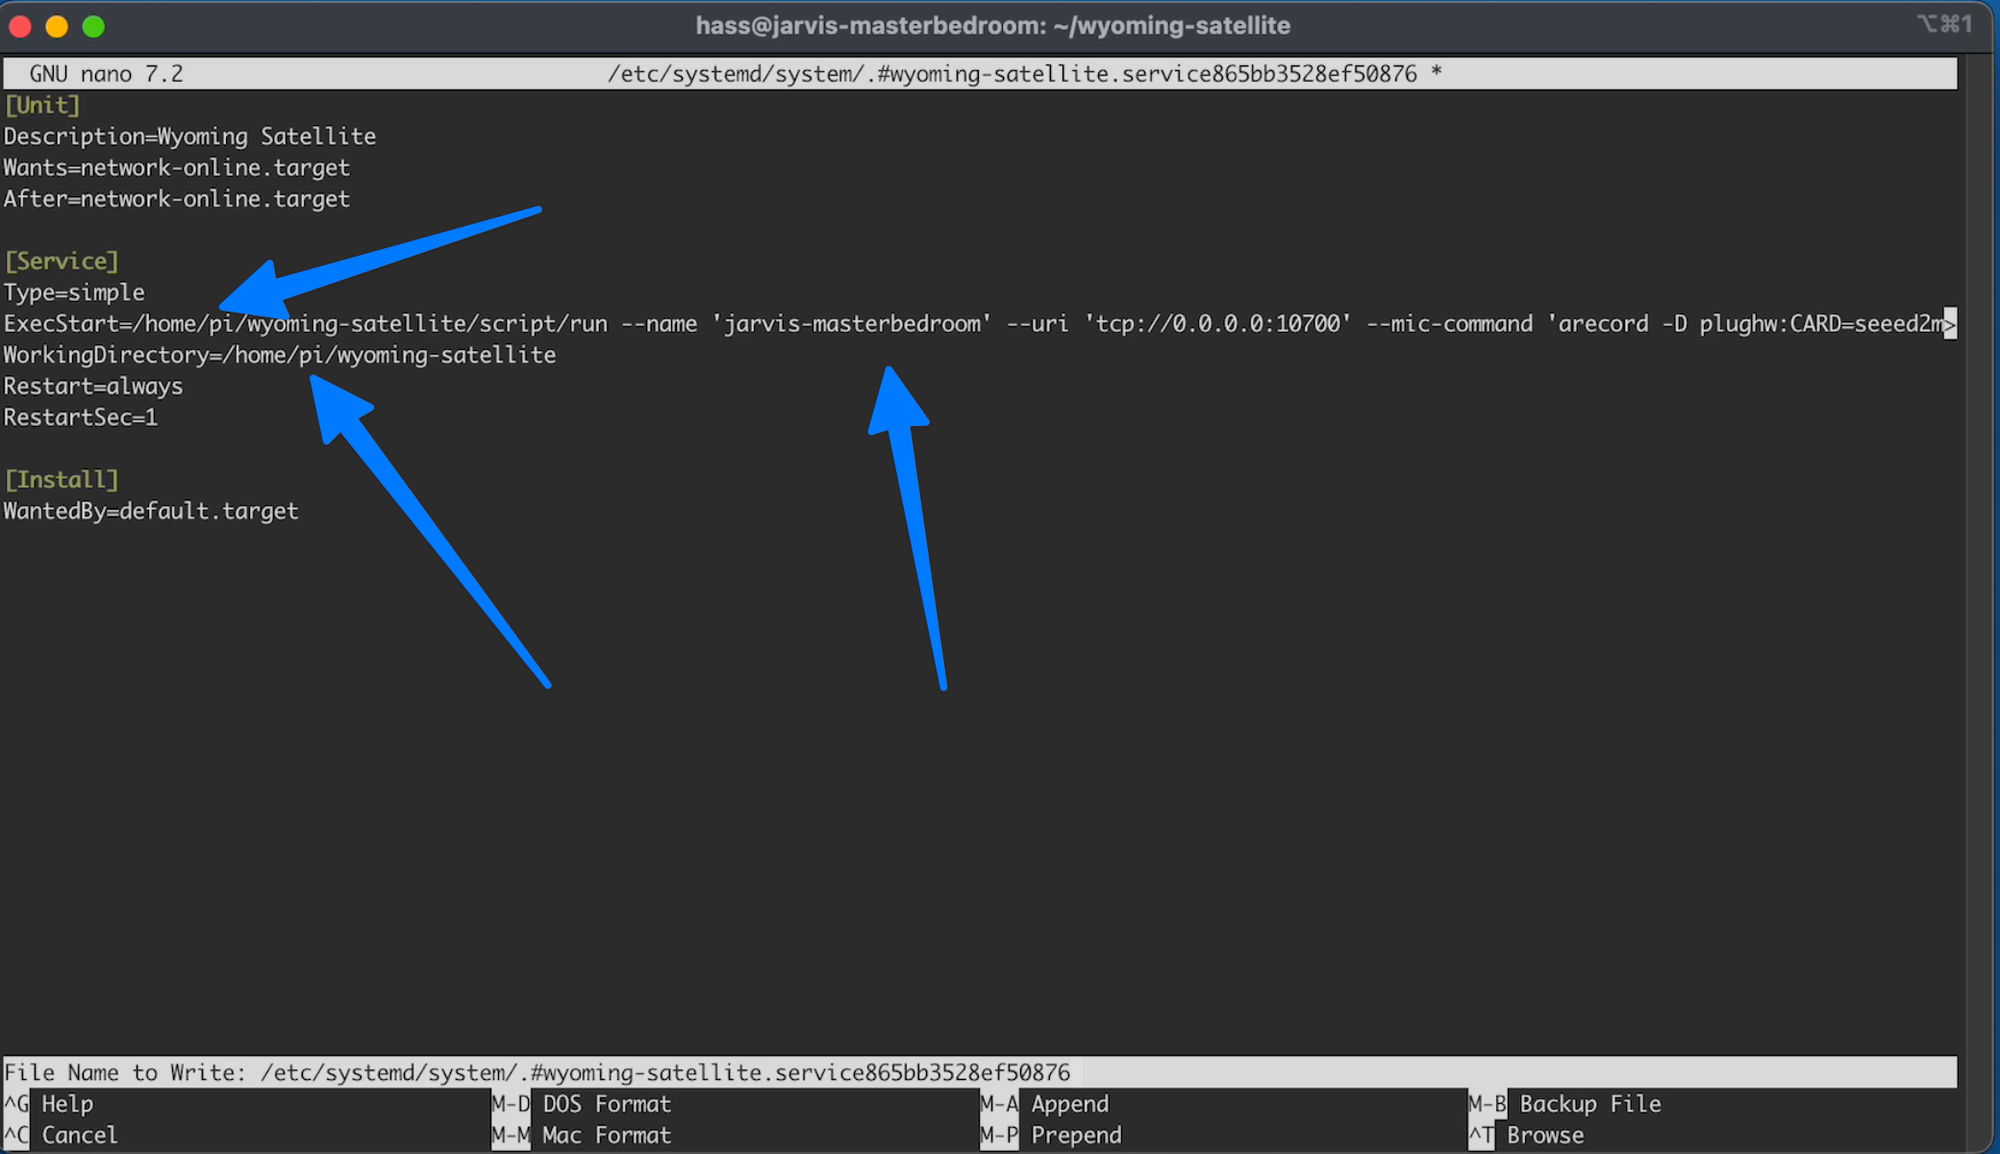
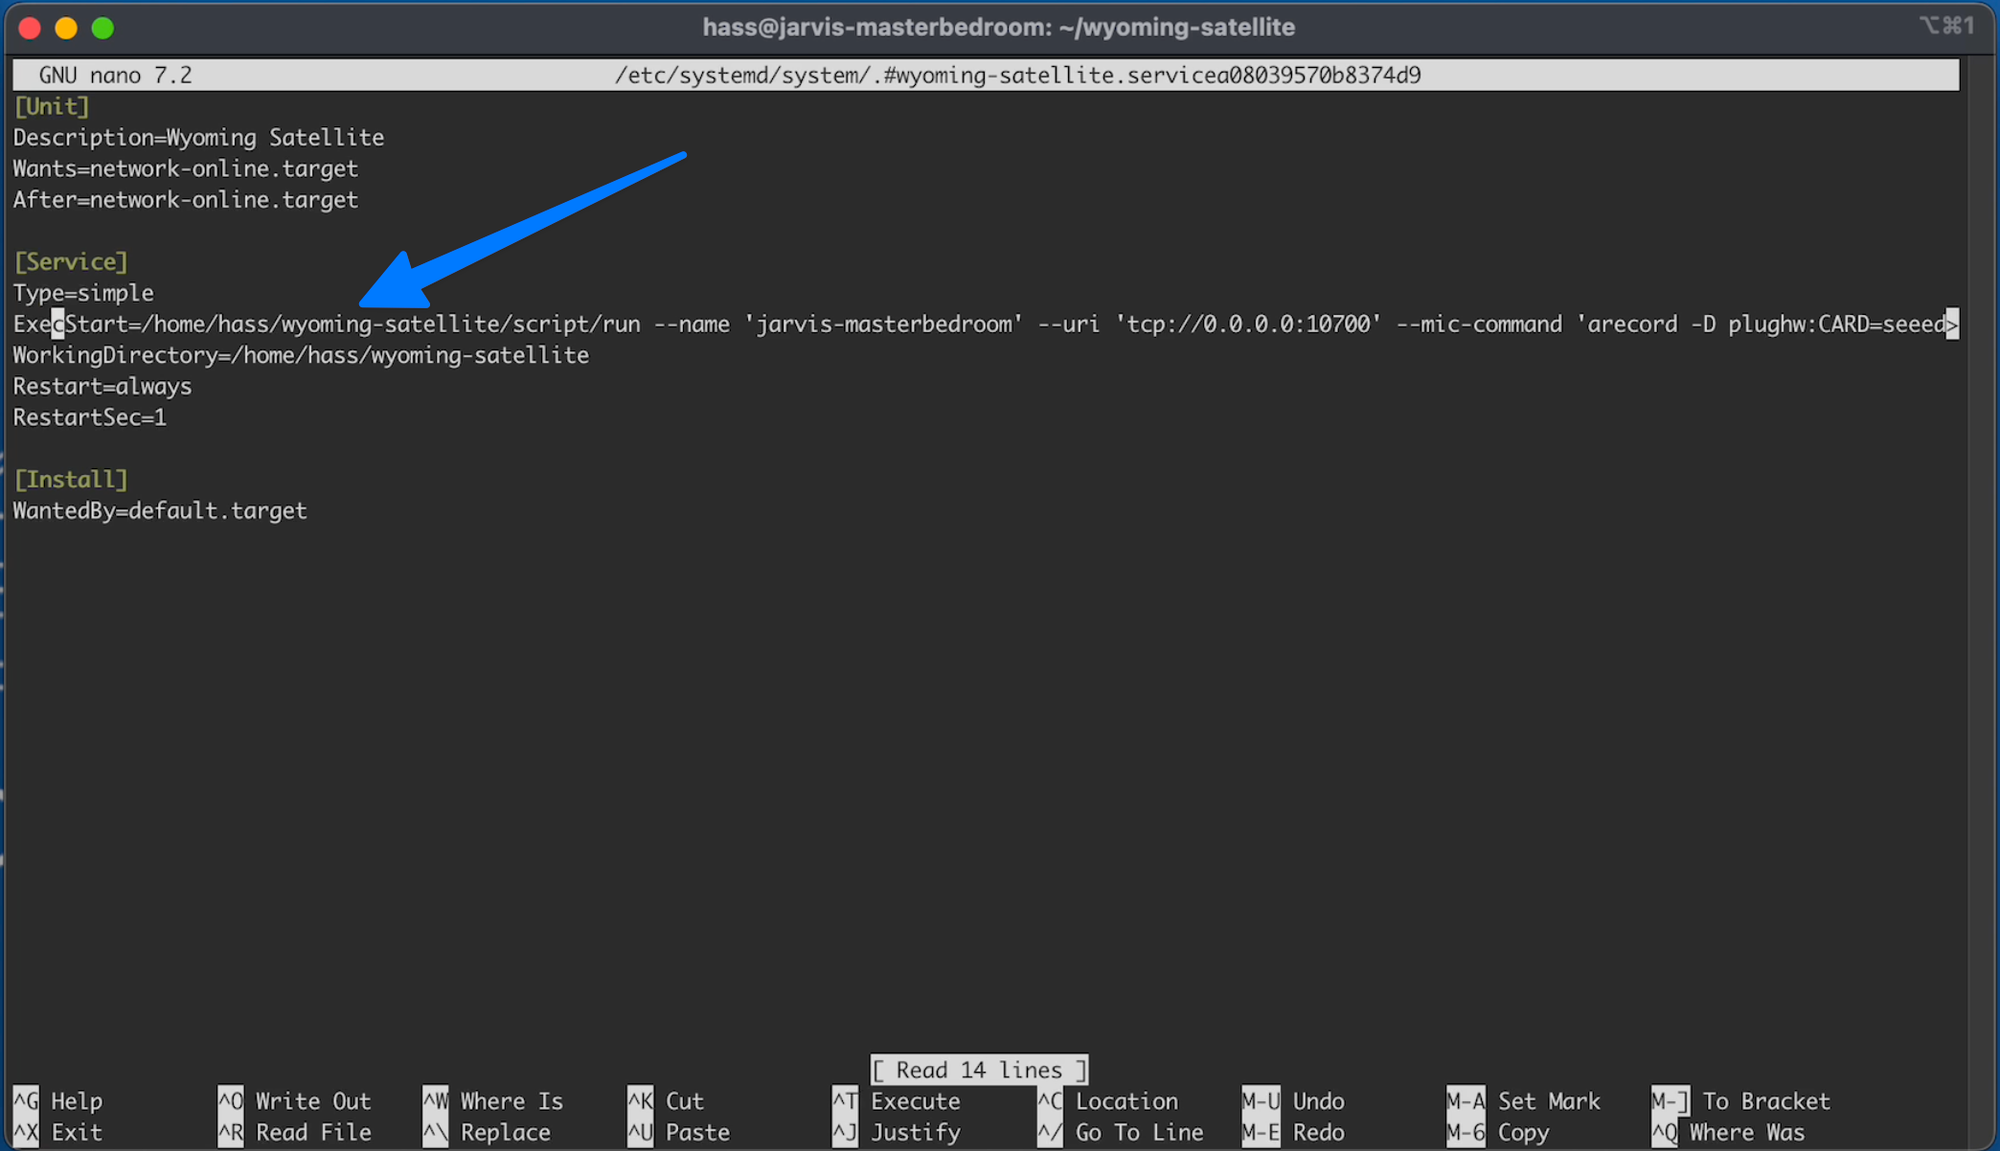
Step 13 - Create the Wyoming Service
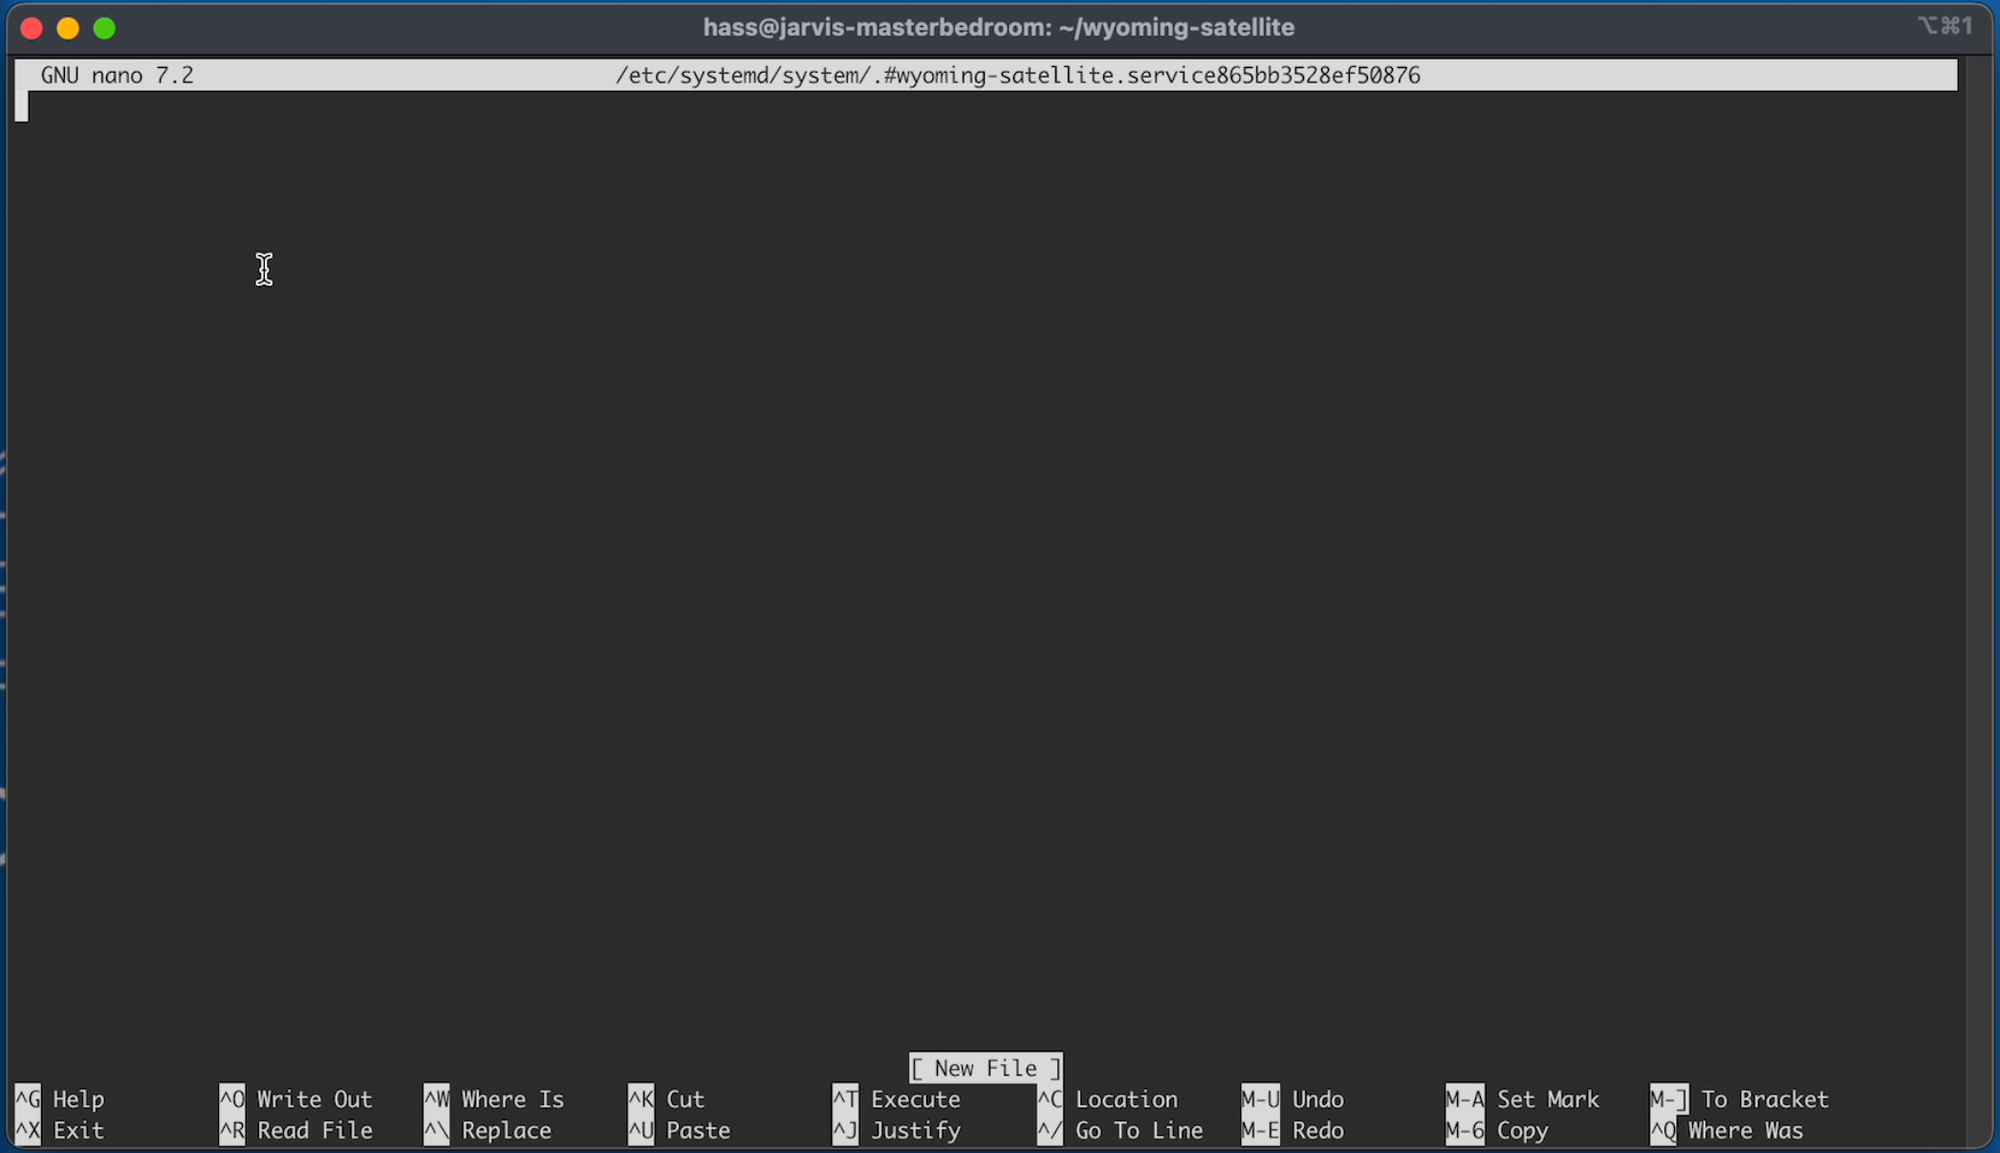
To create a service file we need to type or copy/past the following command and press enter:
C13.1
sudo systemctl edit --force --full wyoming-satellite.service
You terminal should look like this:
Copy and Paste in the following template:
C13.2
[Unit]
Description=Wyoming Satellite
Wants=network-online.target
After=network-online.target

[Service]
Type=simple
ExecStart=/home/pi/wyoming-satellite/script/run --name 'my satellite' --uri 'tcp://0.0.0.0:10700' --mic-command 'arecord -D plughw:CARD=seeed2micvoicec,DEV=0 -r 16000 -c 1 -f S16_LE -t raw' --snd-command 'aplay -D plughw:CARD=seeed2micvoicec,DEV=0 -r 22050 -c 1 -f S16_LE -t raw'
WorkingDirectory=/home/pi/wyoming-satellite
Restart=always
RestartSec=1

[Install]
WantedBy=default.target
Then you want to update this. Use the arrow keys and change /home/pi to /home/hass but replace has with the username you choose.
And update the my satellite to match the name you want for your device. jarvis-masterbedroom for mine.
The places you might need to update are marked:
Save the the changes by pressing CTRL + X
And when asked if you want to save the modified buffer, type Y
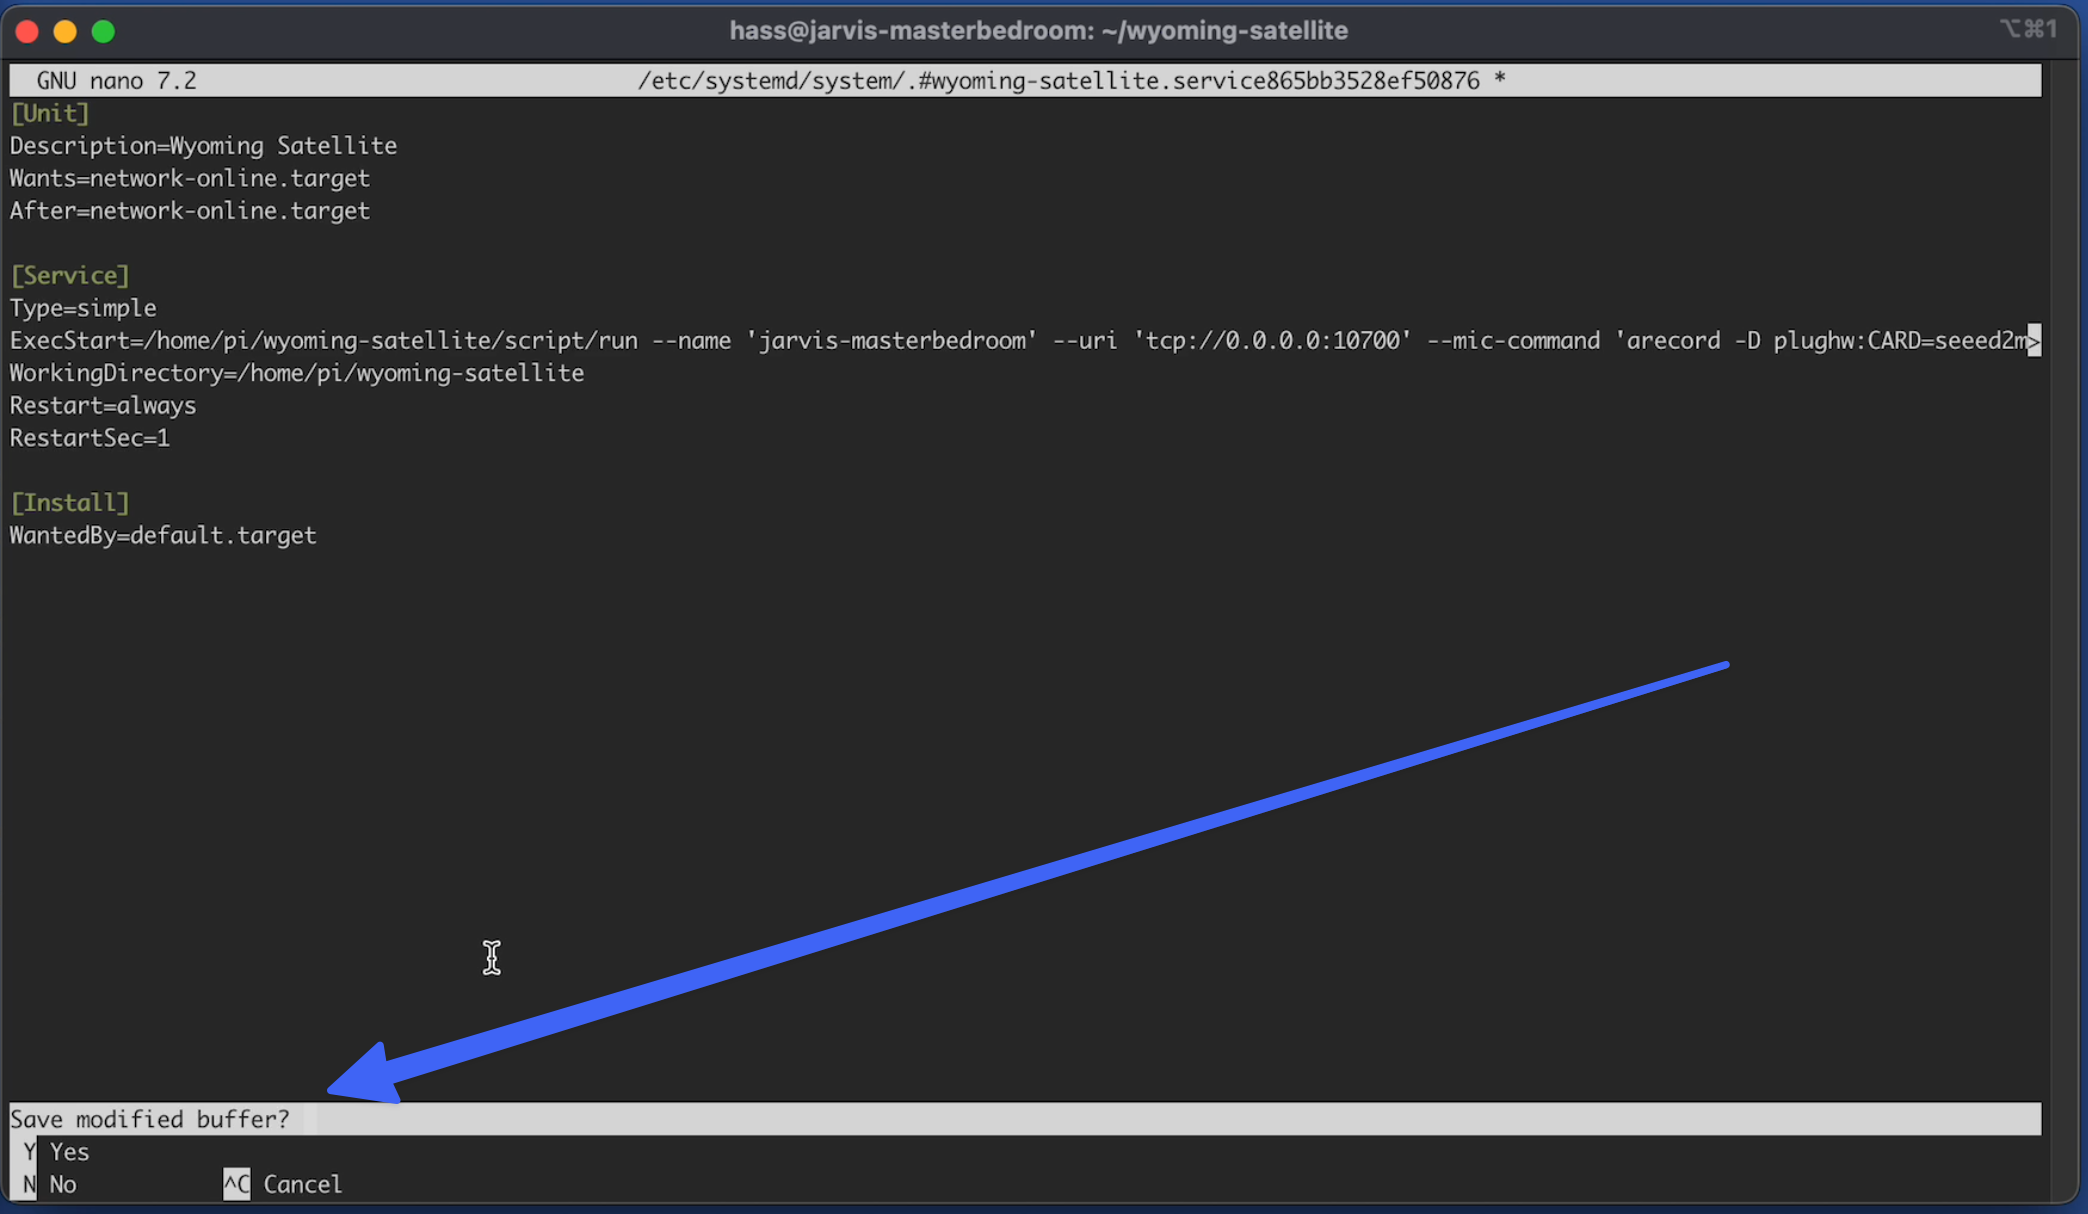
Then press Enter to complete the save
Step 14 - Enable the Service
To enable the service to start at boot type or copy paste the following in your terminal and press enter:
C14.1
sudo systemctl enable --now wyoming-satellite.service
You should see a line that a symlink was created:

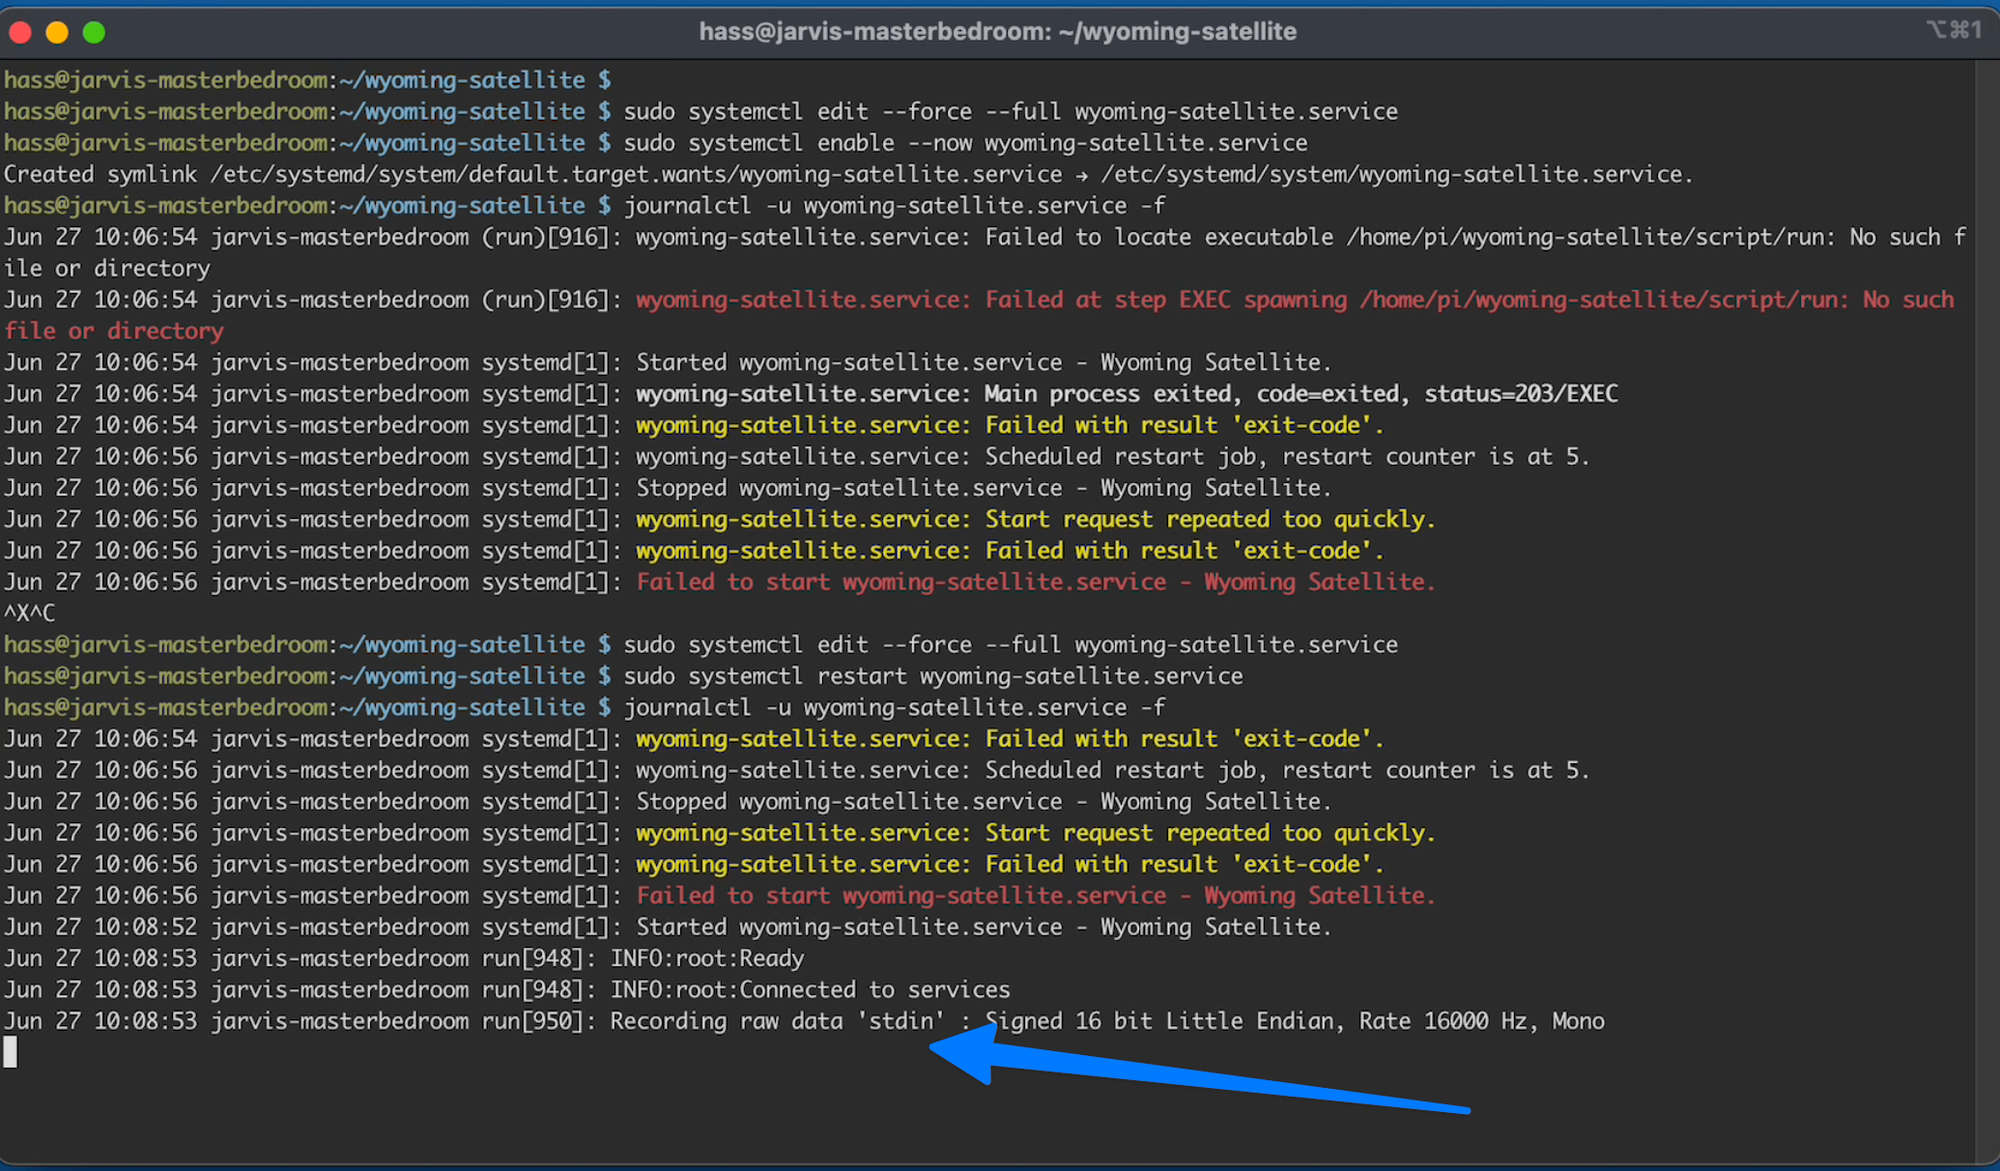
Step 15 - Check that Service is running
Type or Copy paste the following command and press enter:
C15.1
journalctl -u wyoming-satellite.service -f
If you see the following the service failed to start
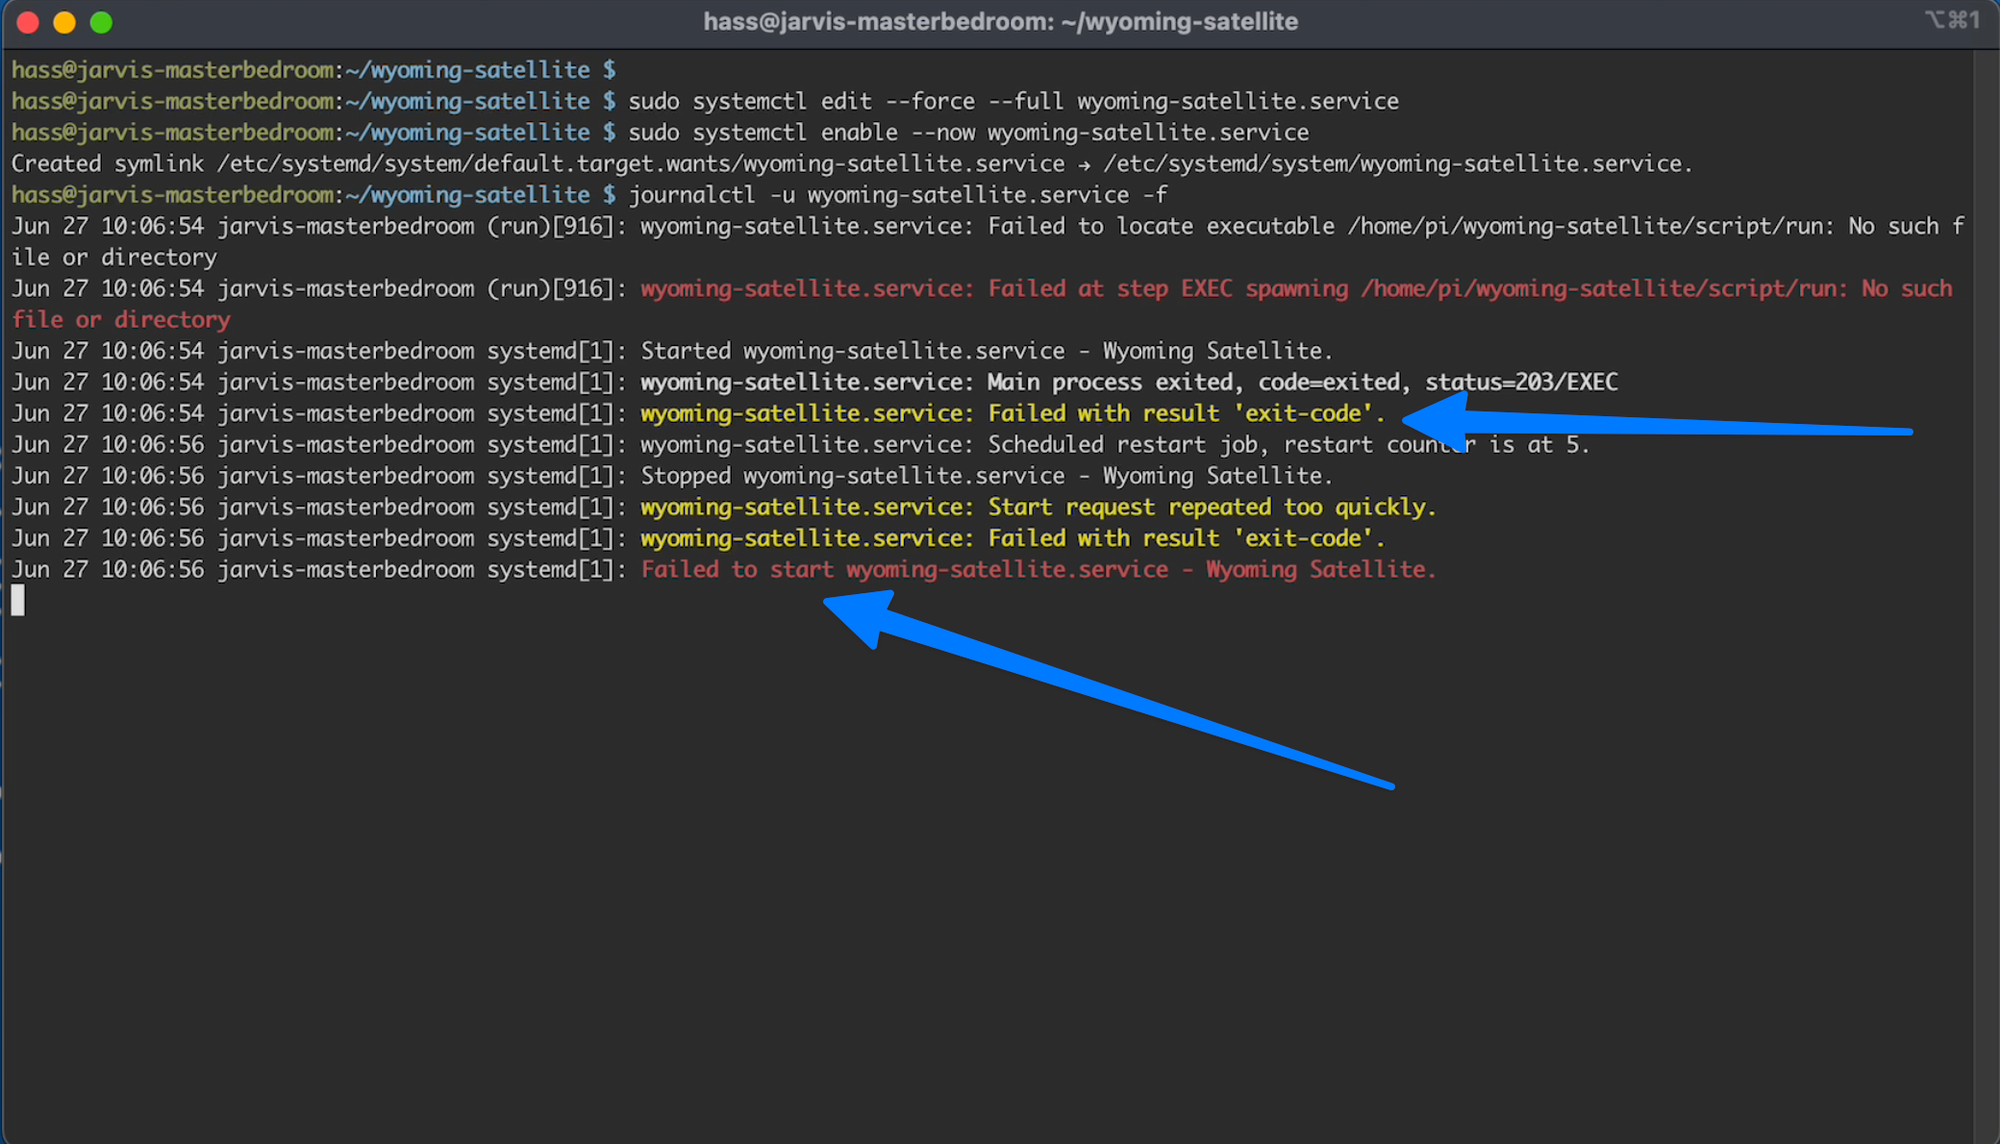
And in my case the problem was I forgot to change the user name.
So Press CTRL - C to close this
Then type or copy and paste the following re-edit the service:
C15.2
sudo systemctl edit --force --full wyoming-satellite.service
And as you can see I did for get to change Pi to hass
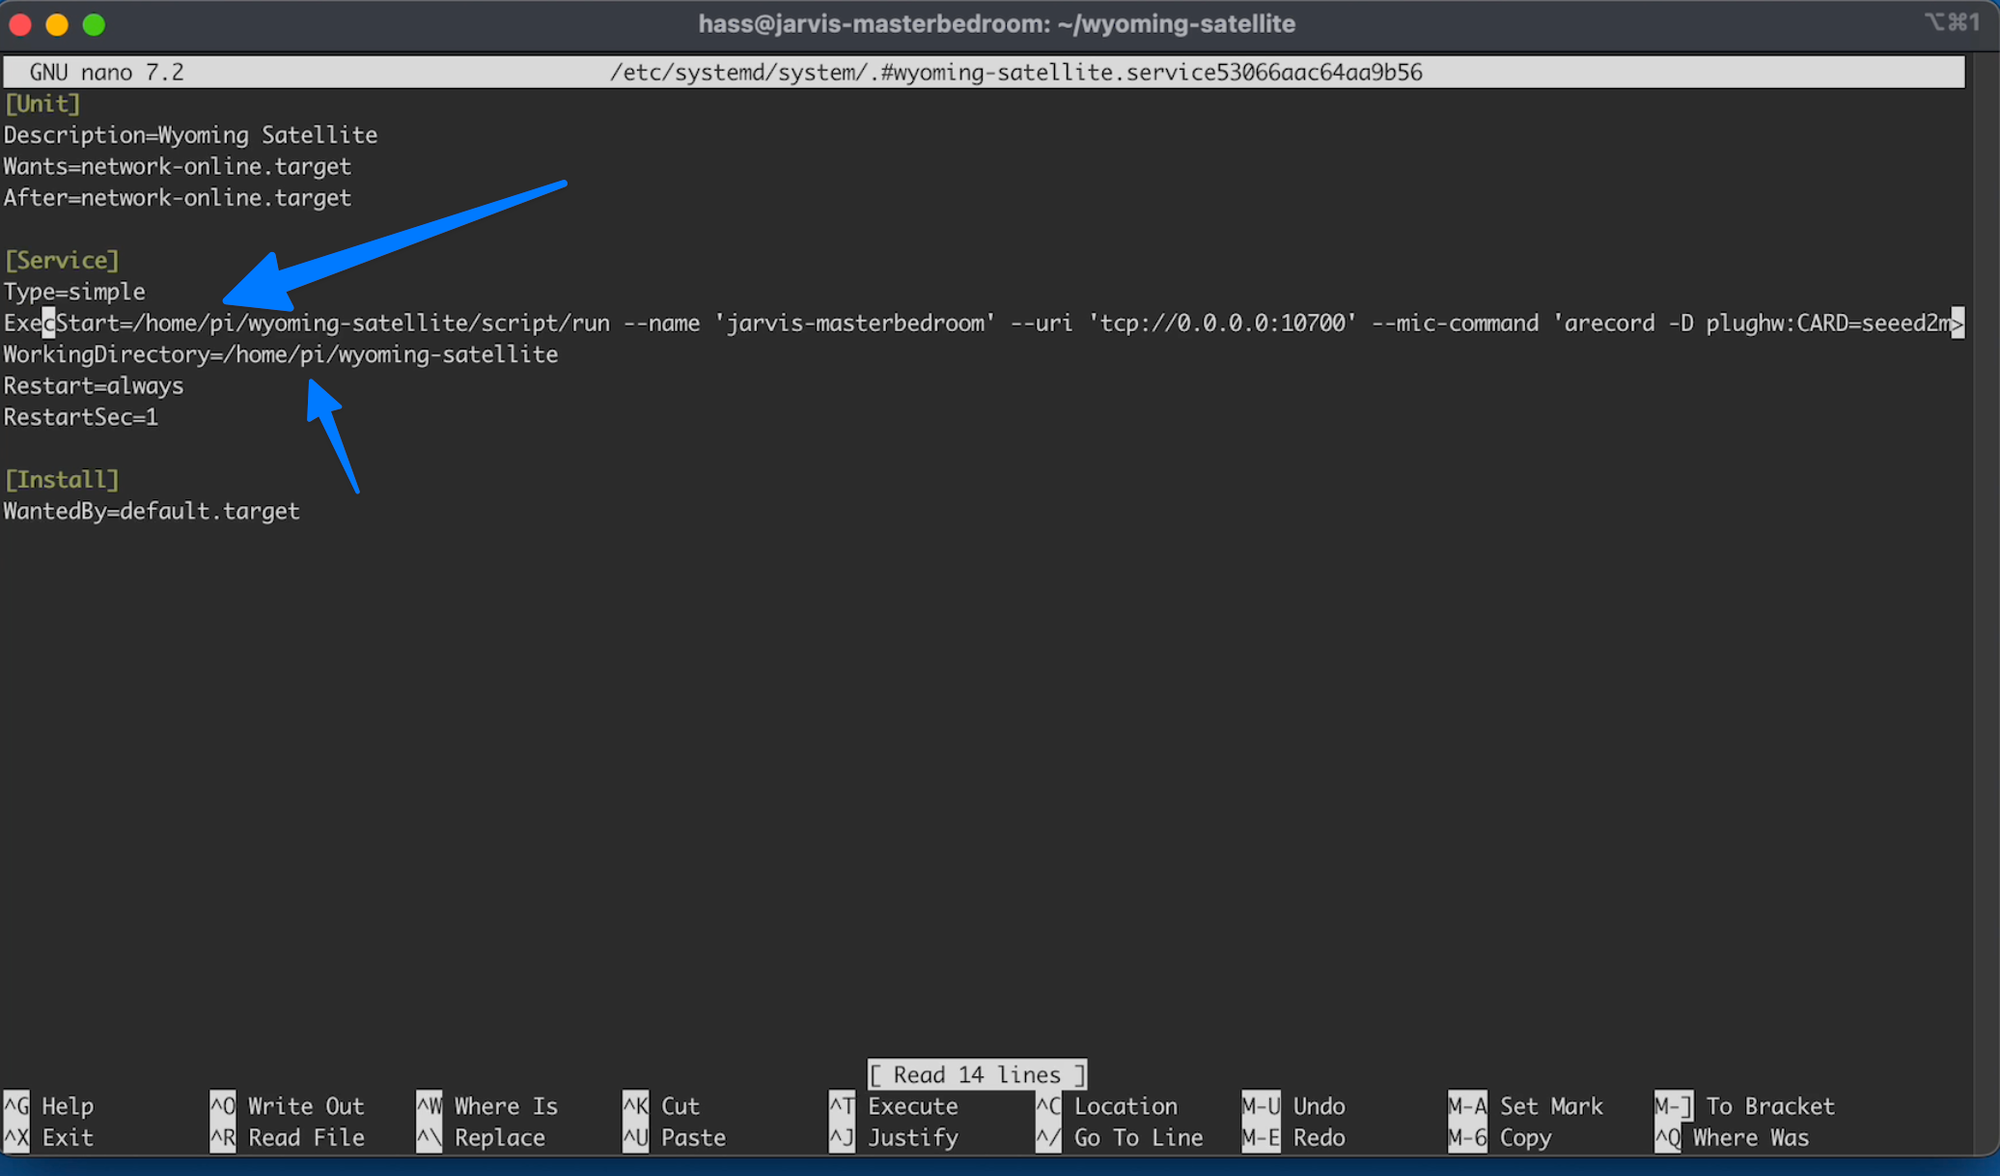
So after making those changes, saving by hitting CTRL + X, typing Y to save the changes and pressing Enter
I can now restart the service with:
C15.3
sudo systemctl restart wyoming-satellite.service
And if I open the journal again to see the current state with:
C15.4
journalctl -u wyoming-satellite.service -f
You can see it is now running as it should:
Step 16 - Add Wyoming Satellite to Home Assistant
Now wea can add our satellite to Home Assistant.
Head overt home Assistant
Jump into Integrations
And you should see your discovered satellite.
Click configure
And then submit.
The device should have the name you set in your service we created on the pi
Choose the area it will be in.
In my case Master bedroom
And click Finish
Now we can scroll down to the Wyoming Integration
Click on the services link.
This will give you a list of your current Wyoming satellites.
Click on the one you just added. In my case that is Jarvis-masterbedroom
Here we can set the Assist Preferred Pipeline.
For me it is Jarvis.
And with that we now have a Wyoming satellite.
And now, we can head back over to our terminal window and make it better
Step 16 - Audio Enhancements
If you want, you can set the auto gain and the noice suppression.
For more details on these values check out the original guide linked at the top of my guide.
We need to open our Wyoming service config
So yep or copy/paste the following command and press enter:
C16.1
sudo systemctl edit --force --full wyoming-satellite.service
Now navigate down to this line:
And then move your curls all the way over to the far right to the end of that line
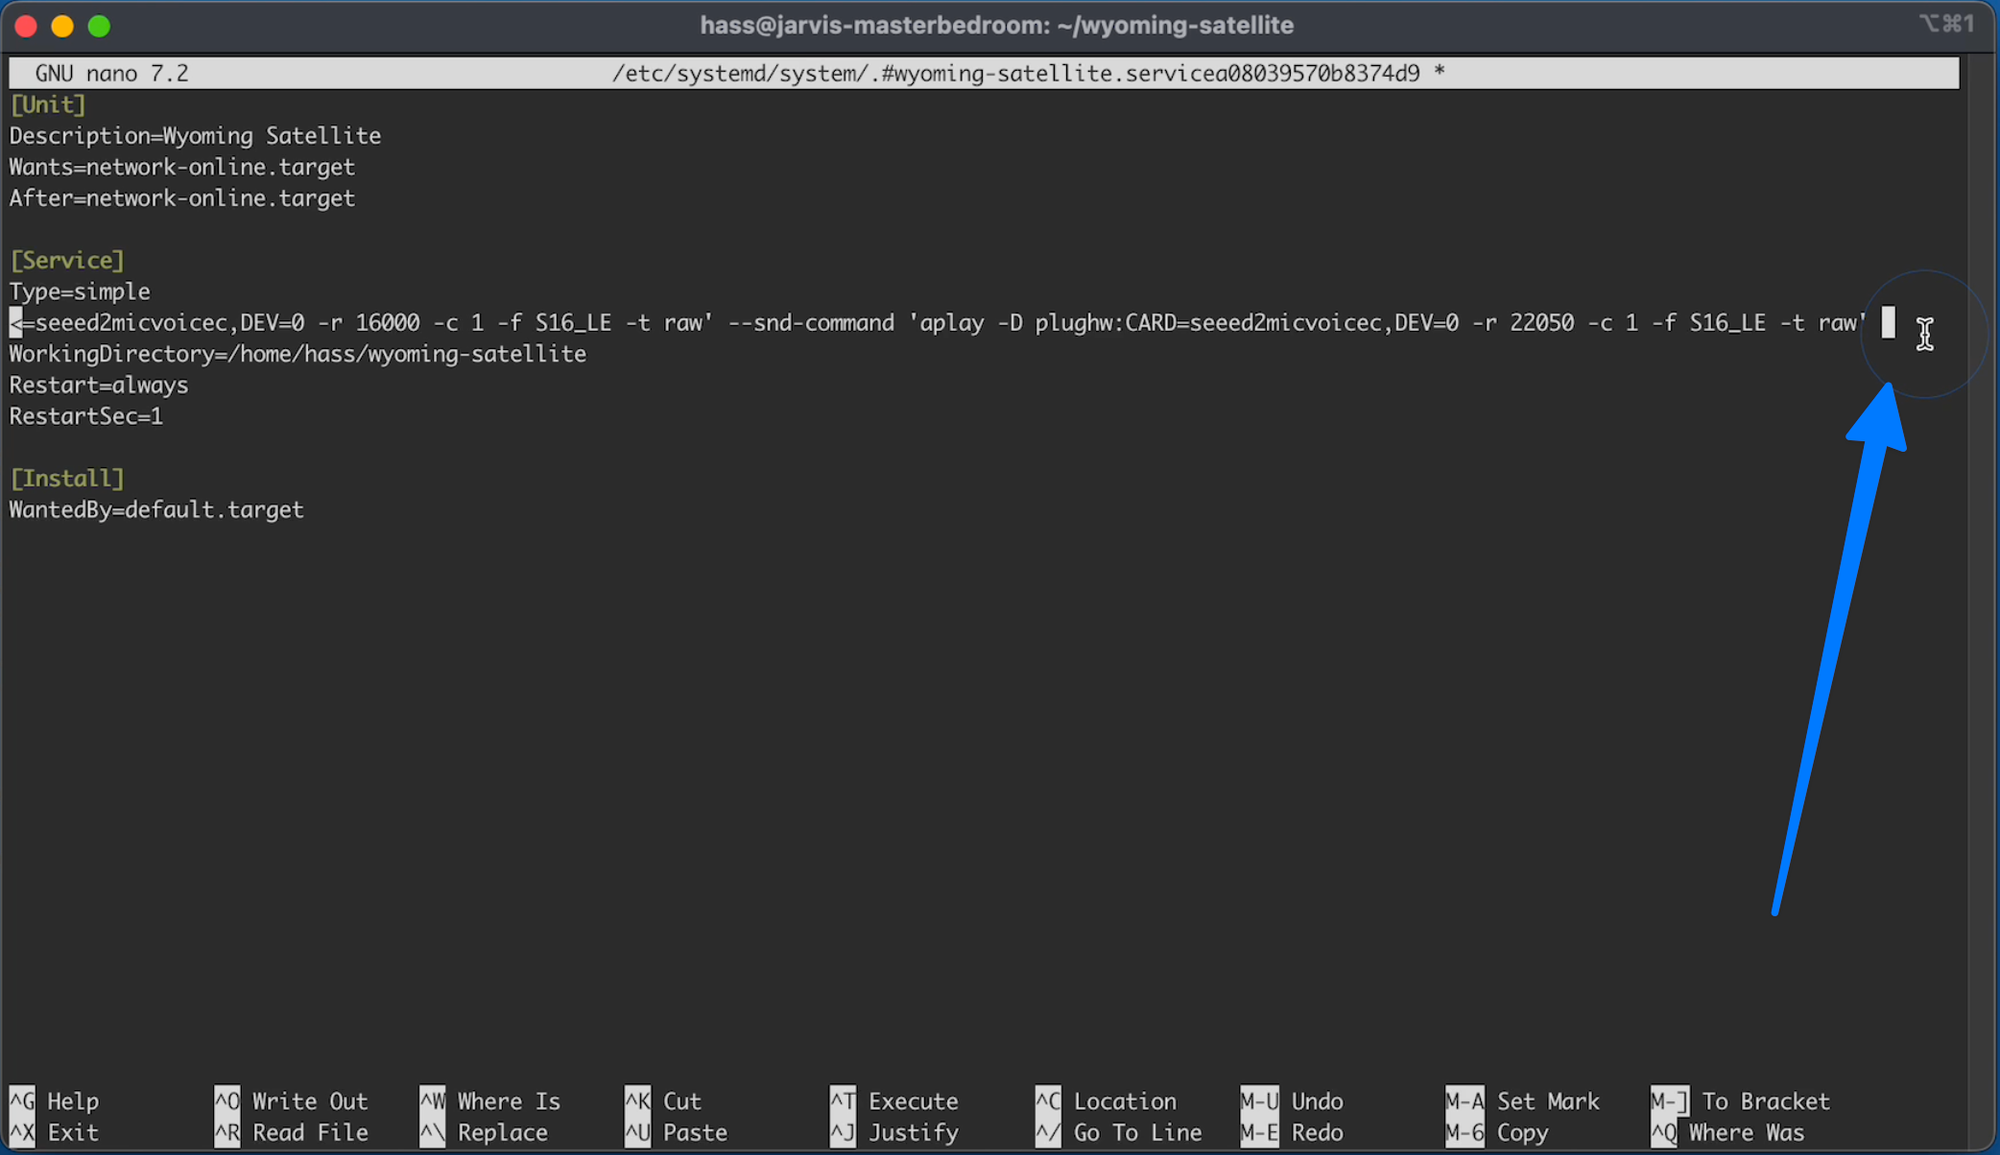
Here we need to type or copy/paste the following to the end of that line:
C16.2
--mic-auto-gain 5 --mic-noise-suppression 2
Then save the changes ( CTRL + X, type Y and press enter)
Then we need to restart our Wyoming service by using the command:
C16.3
sudo systemctl restart wyoming-satellite.service
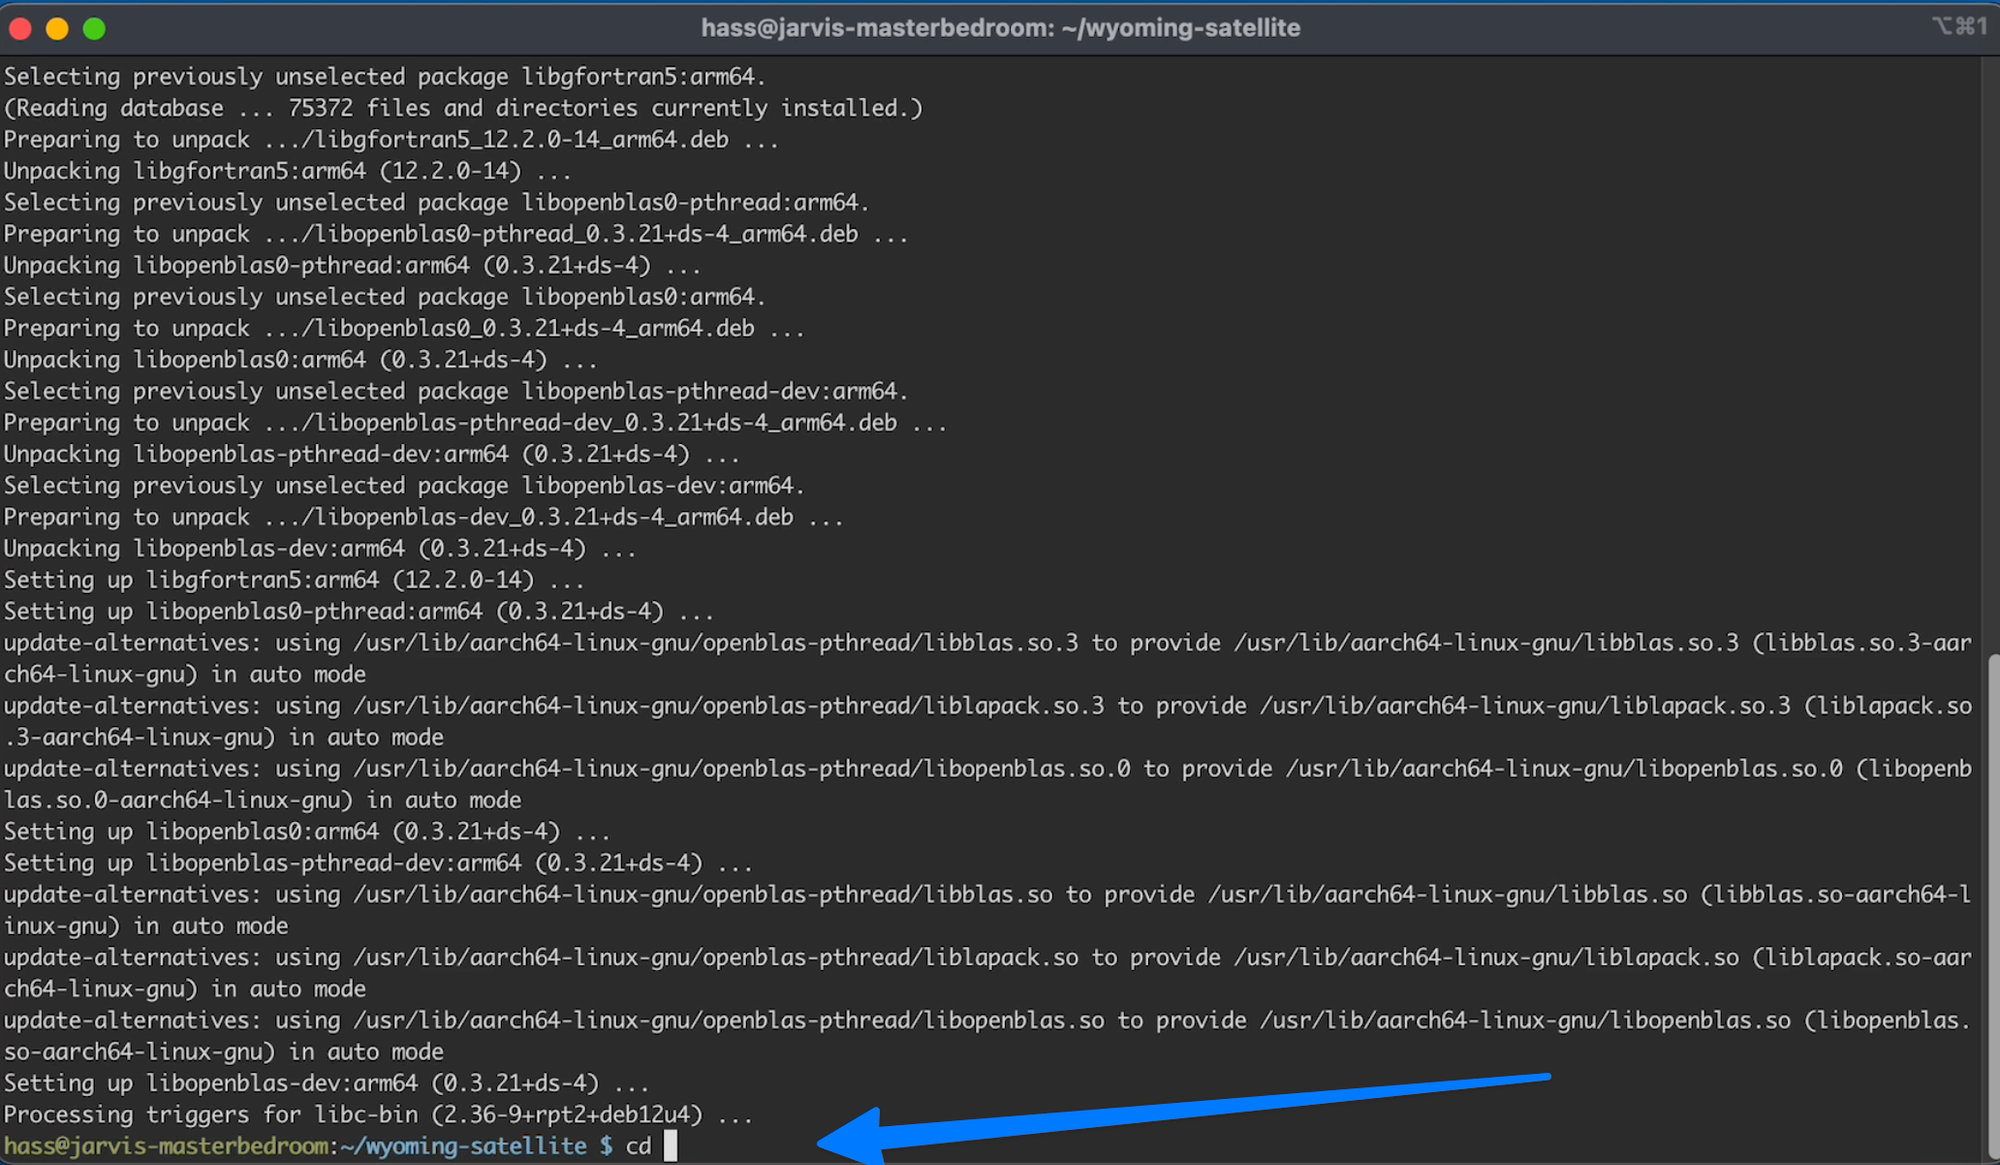
Step 17 - Install Local Wake word Dependencies
First we need to make sure the system is up to date, which it should be.
So type or copy and past the following:
C17.1
sudo apt-get update
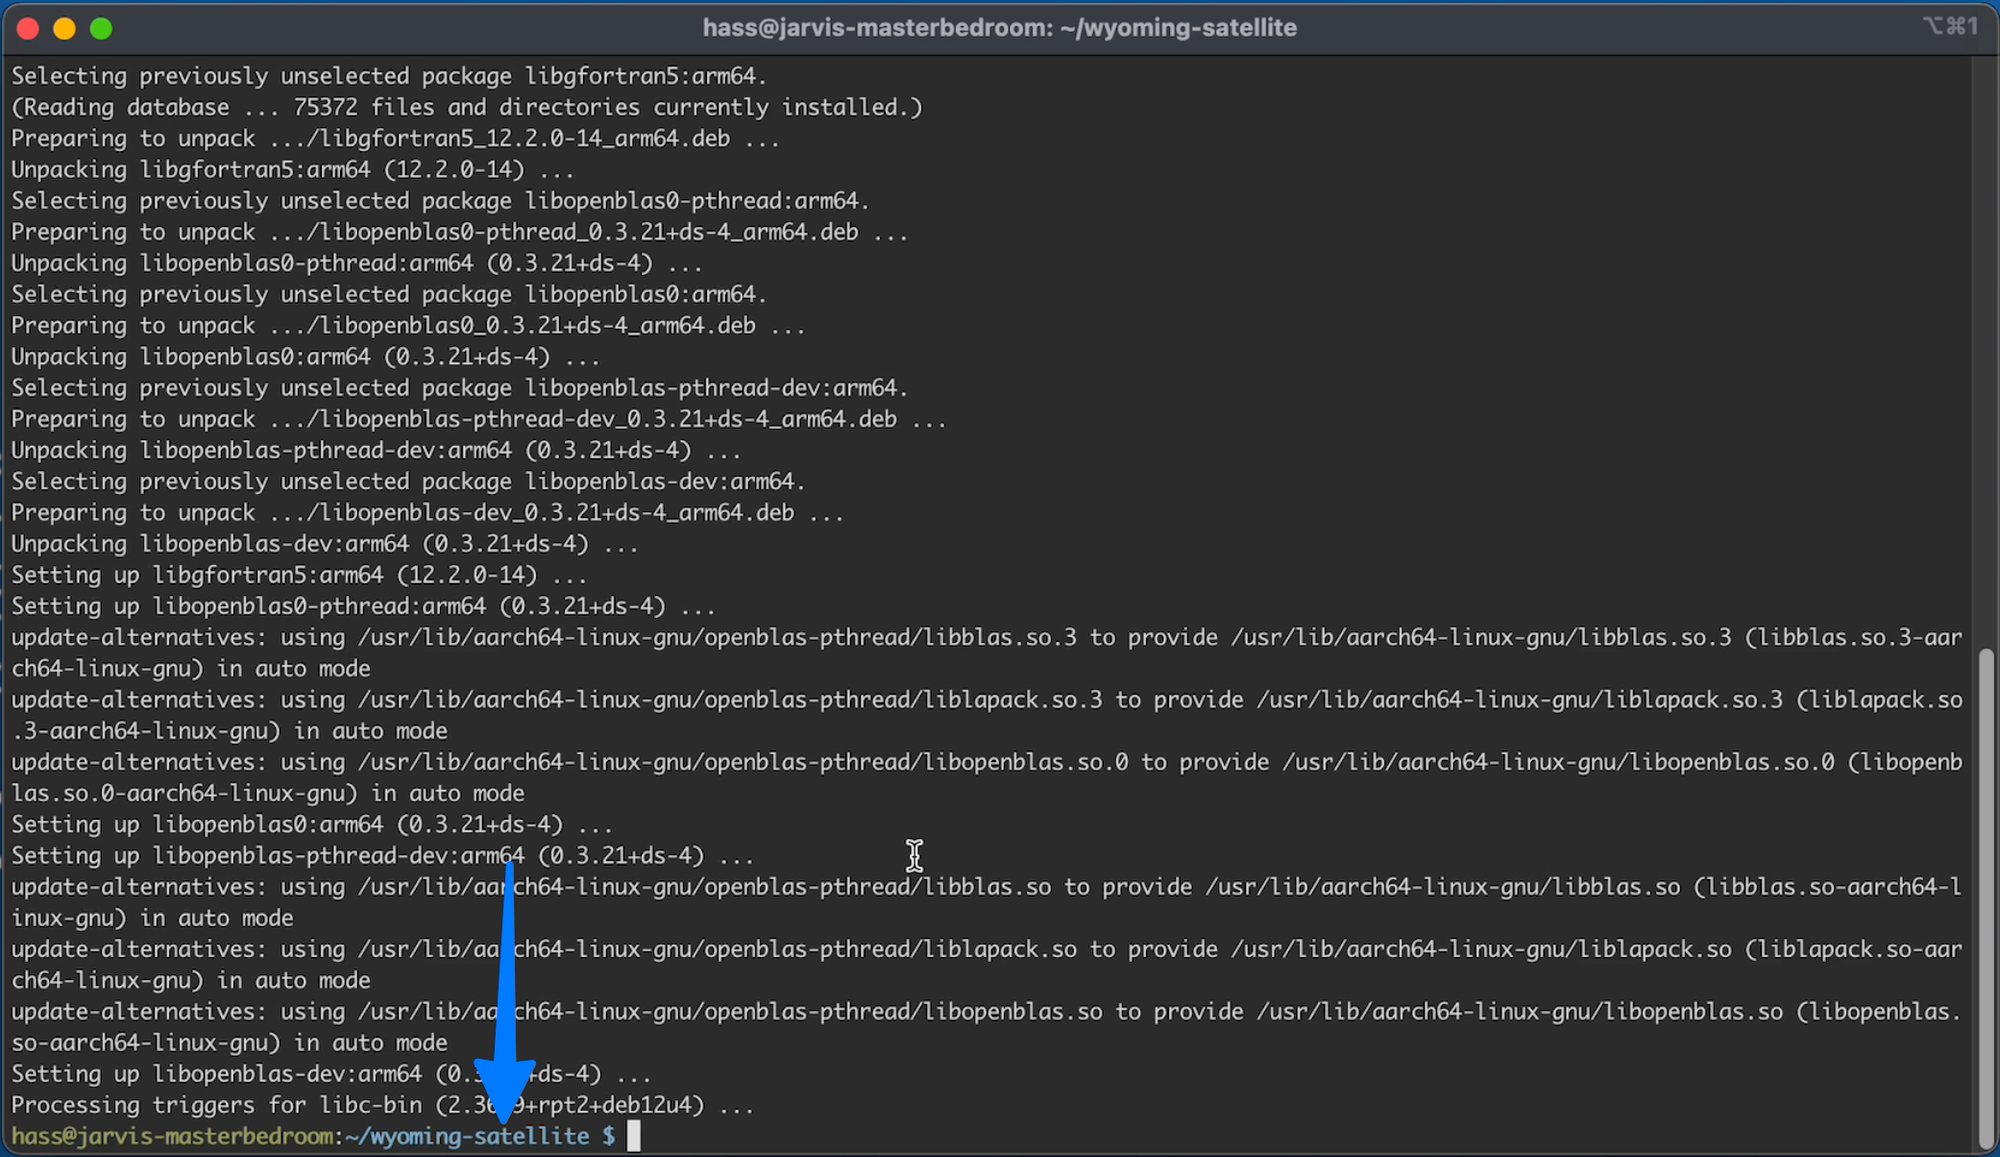
And when that is done you can install the local wake work dependencies using the following command:
C17.2
sudo apt-get install --no-install-recommends  \
  libopenblas-dev
You may be promoted to continue, so type y and hit enter
And when done it should give you a prompt:
Step 18 - Clone Open Wake Word
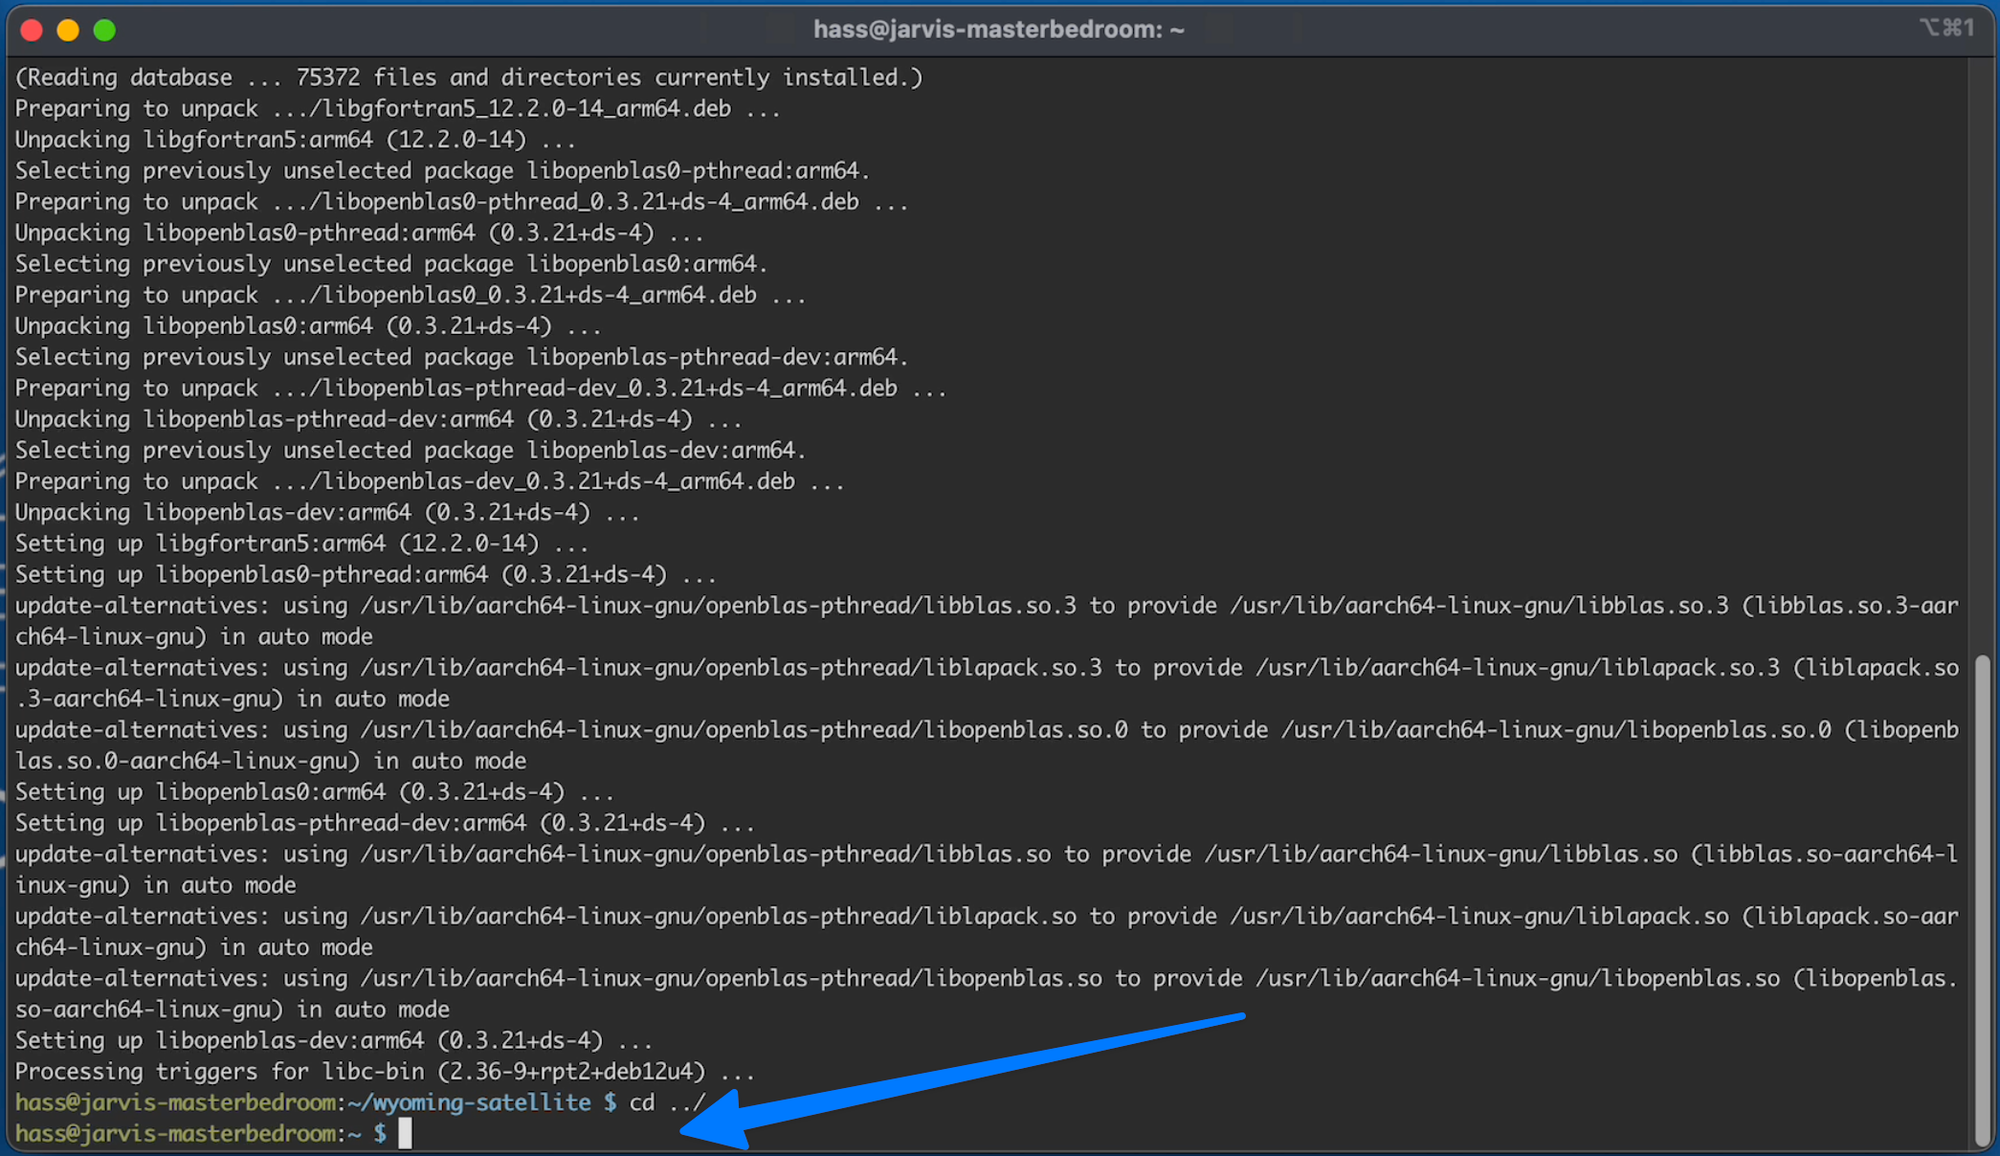
First we need to make sure we are in our home directory.
Do if you see:
Then you need to use the following command
C18.1
cd ../
Which will take you up a directory
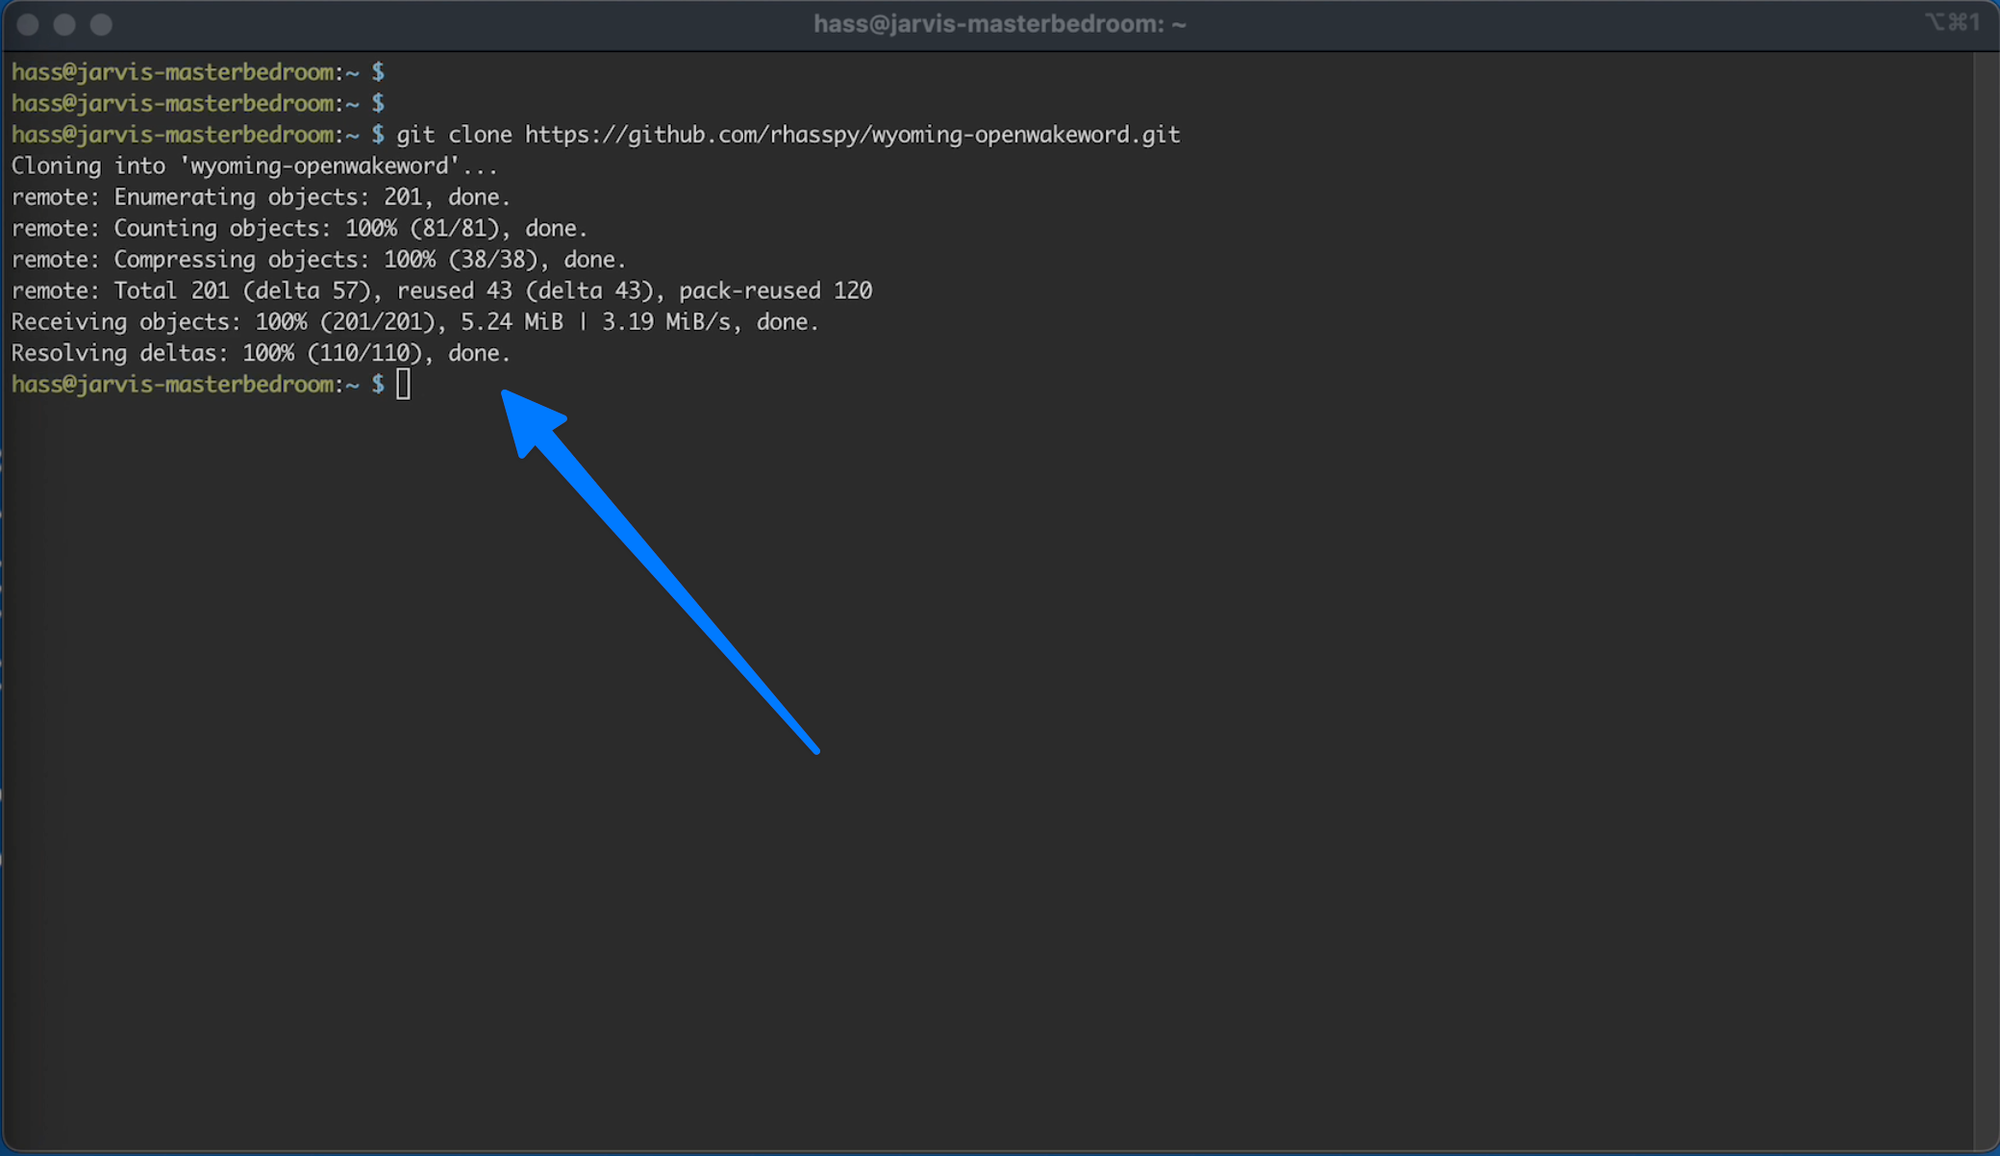
Now we can clone the code from without suing the following command
C18.2
git clone https://github.com/rhasspy/wyoming-openwakeword.git
When its done you should see
Step 19 - Setup Local Wake Word
First change directory using the following command:
C19.1
cd wyoming-openwakeword
Then run the setup command:
C19.2
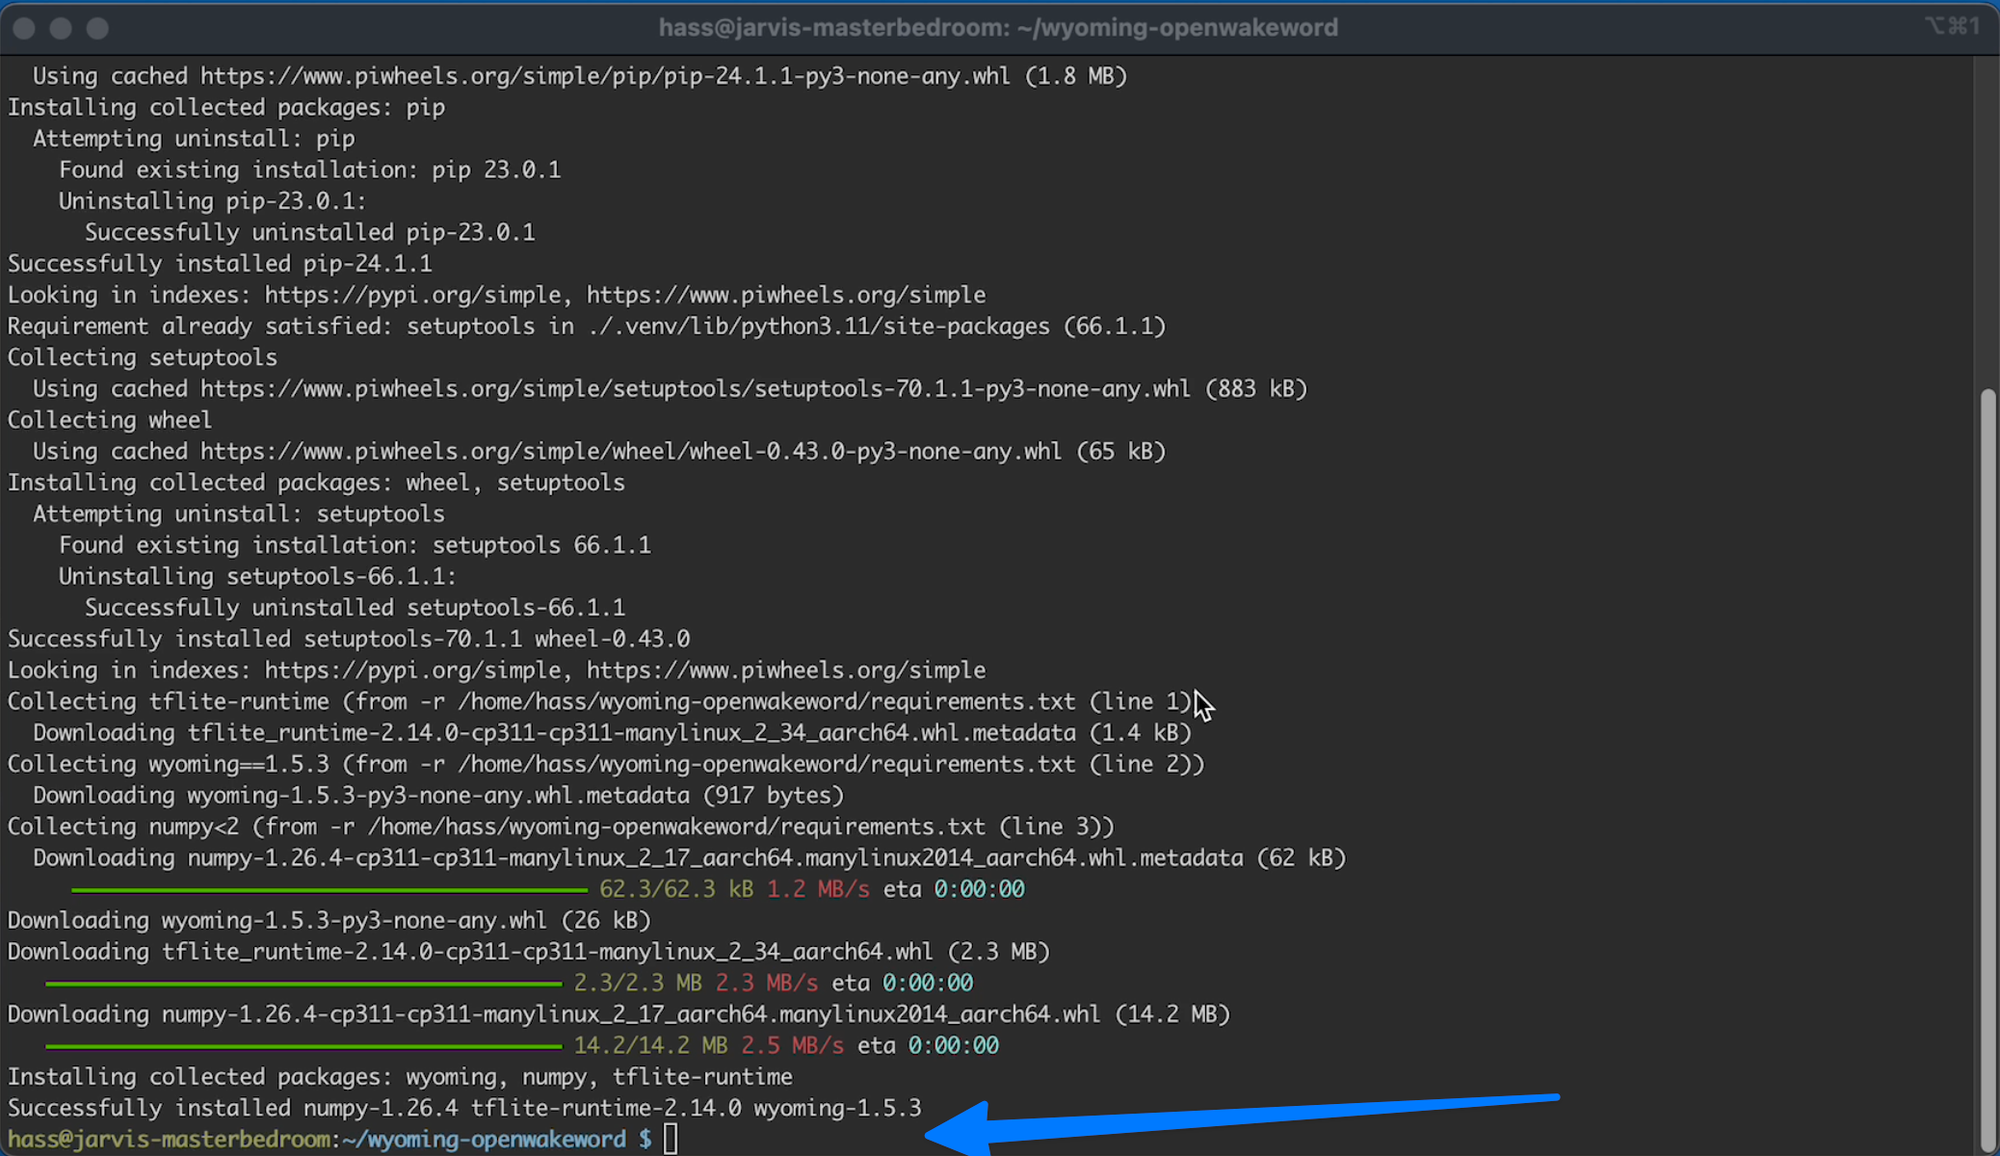
script/setup
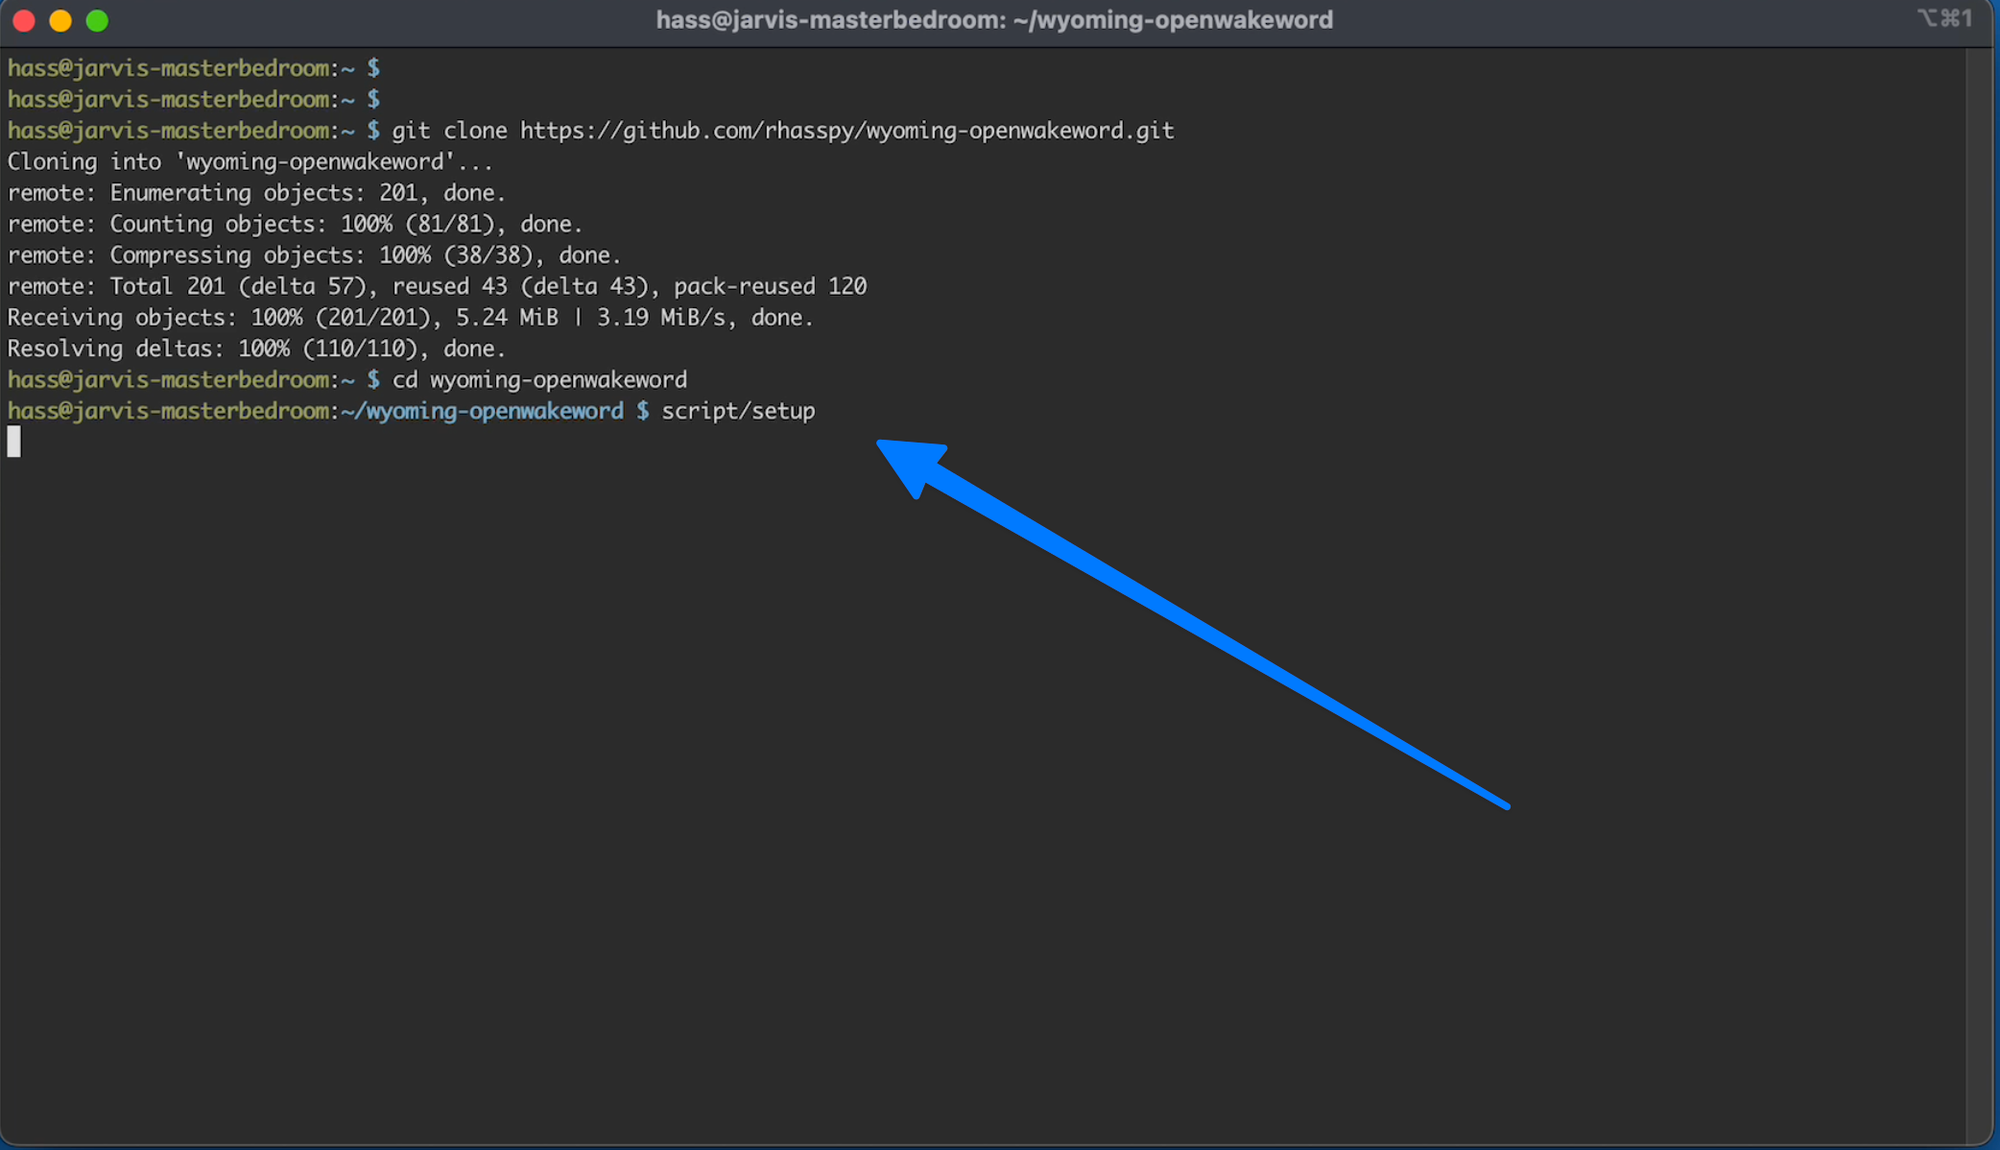
When its done you should see:
Step 20 - Create Local Wake Word Service
Like we did for the Wyoming service we need to create a file that tells the system to run this app.
Type or copy / paste the following:
C20.1
sudo systemctl edit --force --full wyoming-openwakeword.service
You should now see:
Be sure to copy and paste the following into that screen.
C20.2
[Unit]
Description=Wyoming openWakeWord

[Service]
Type=simple
ExecStart=/home/pi/wyoming-openwakeword/script/run --uri 'tcp://127.0.0.1:10400'
WorkingDirectory=/home/pi/wyoming-openwakeword
Restart=always
RestartSec=1

[Install]
WantedBy=default.target
And make sure you update the marked locations with the right username:
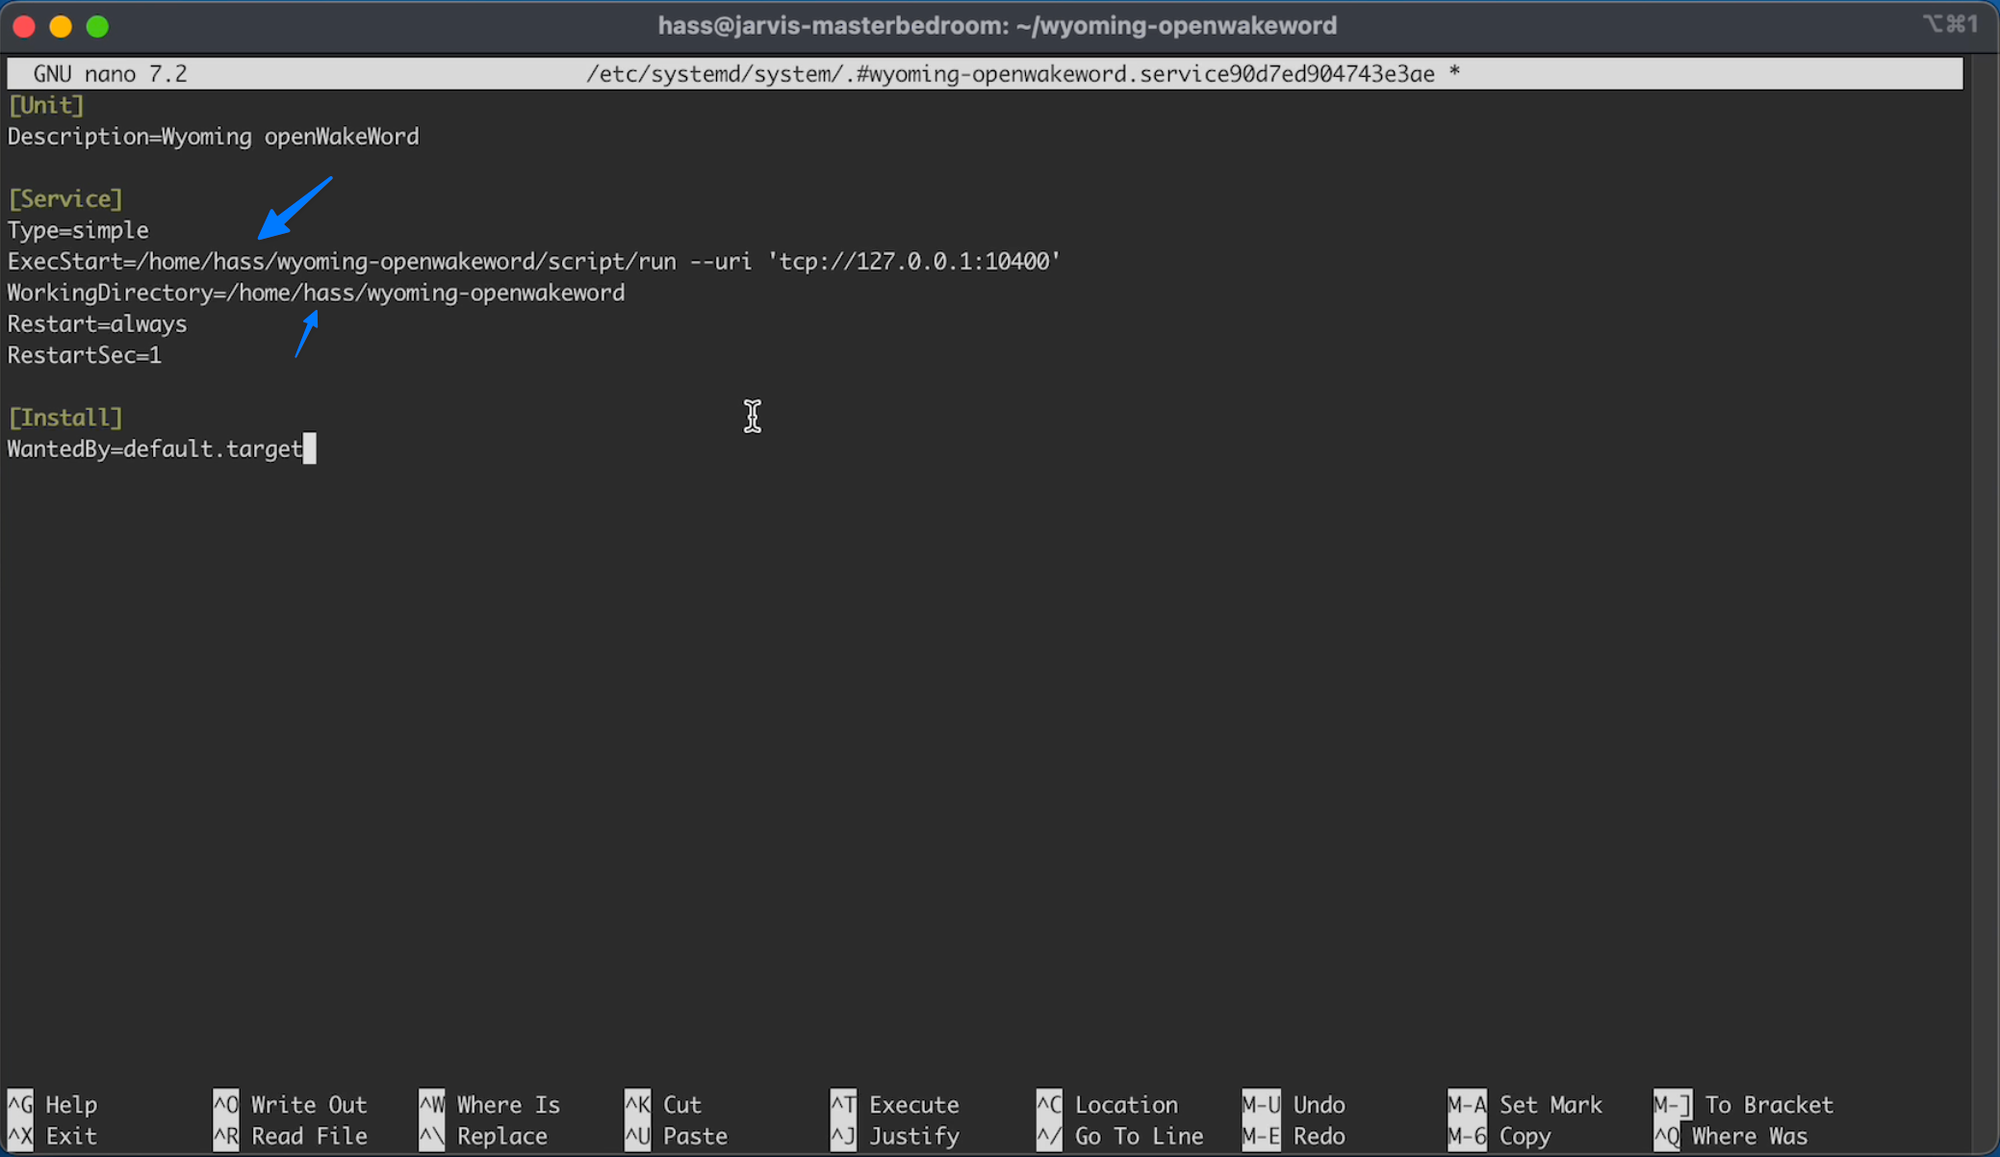
Save the file (CTRL +X, type your, press Enter)
Step 21 - Add Local Wake Word to Wyoming
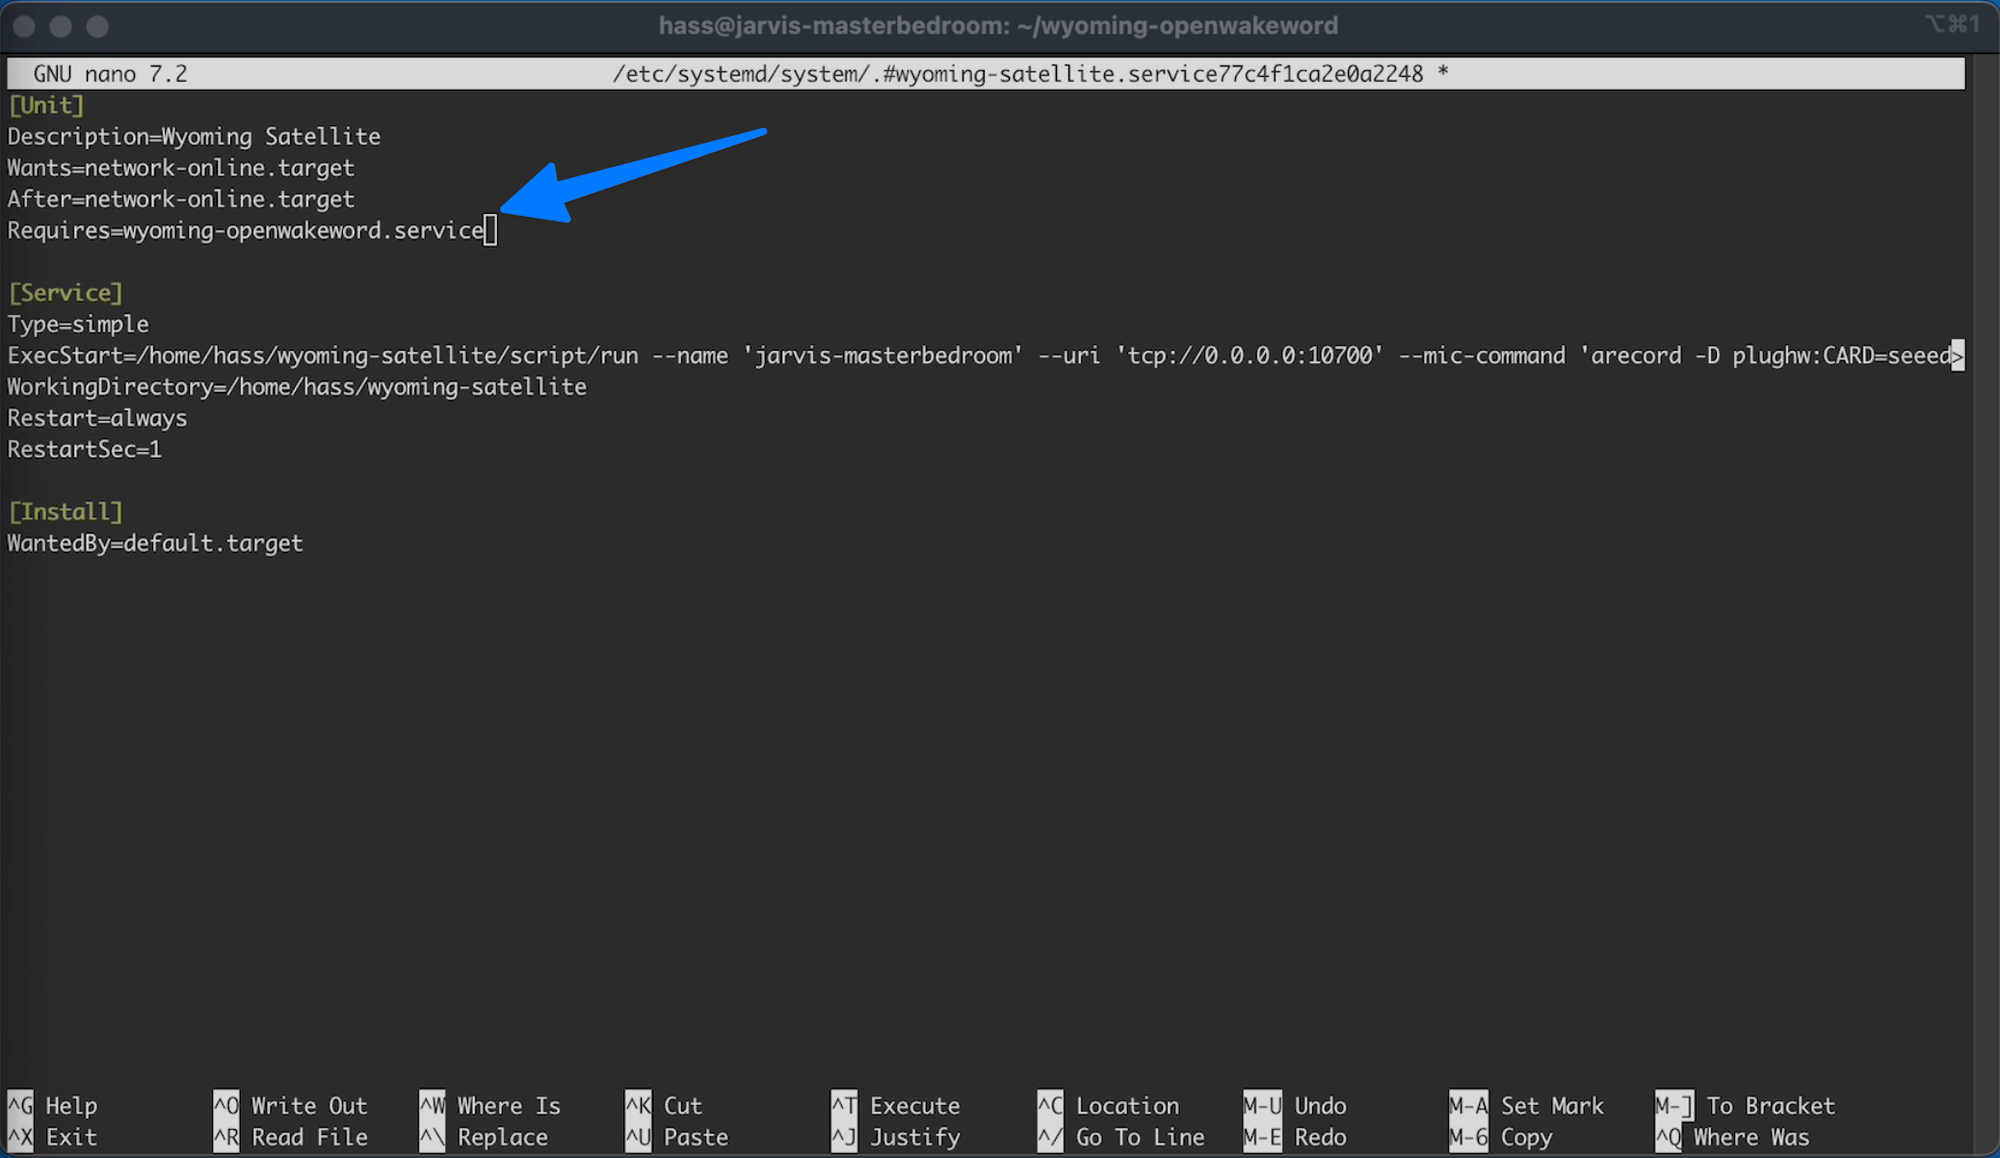
Now we need to edit that Wyoming service we created earlier.
So type or copy/paste the following command
C21.1
sudo systemctl edit --force --full wyoming-satellite.service
And then you need to add the following to the file
Under the last entire of the [Unit] section:
C21.2
Requires=wyoming-openwakeword.service
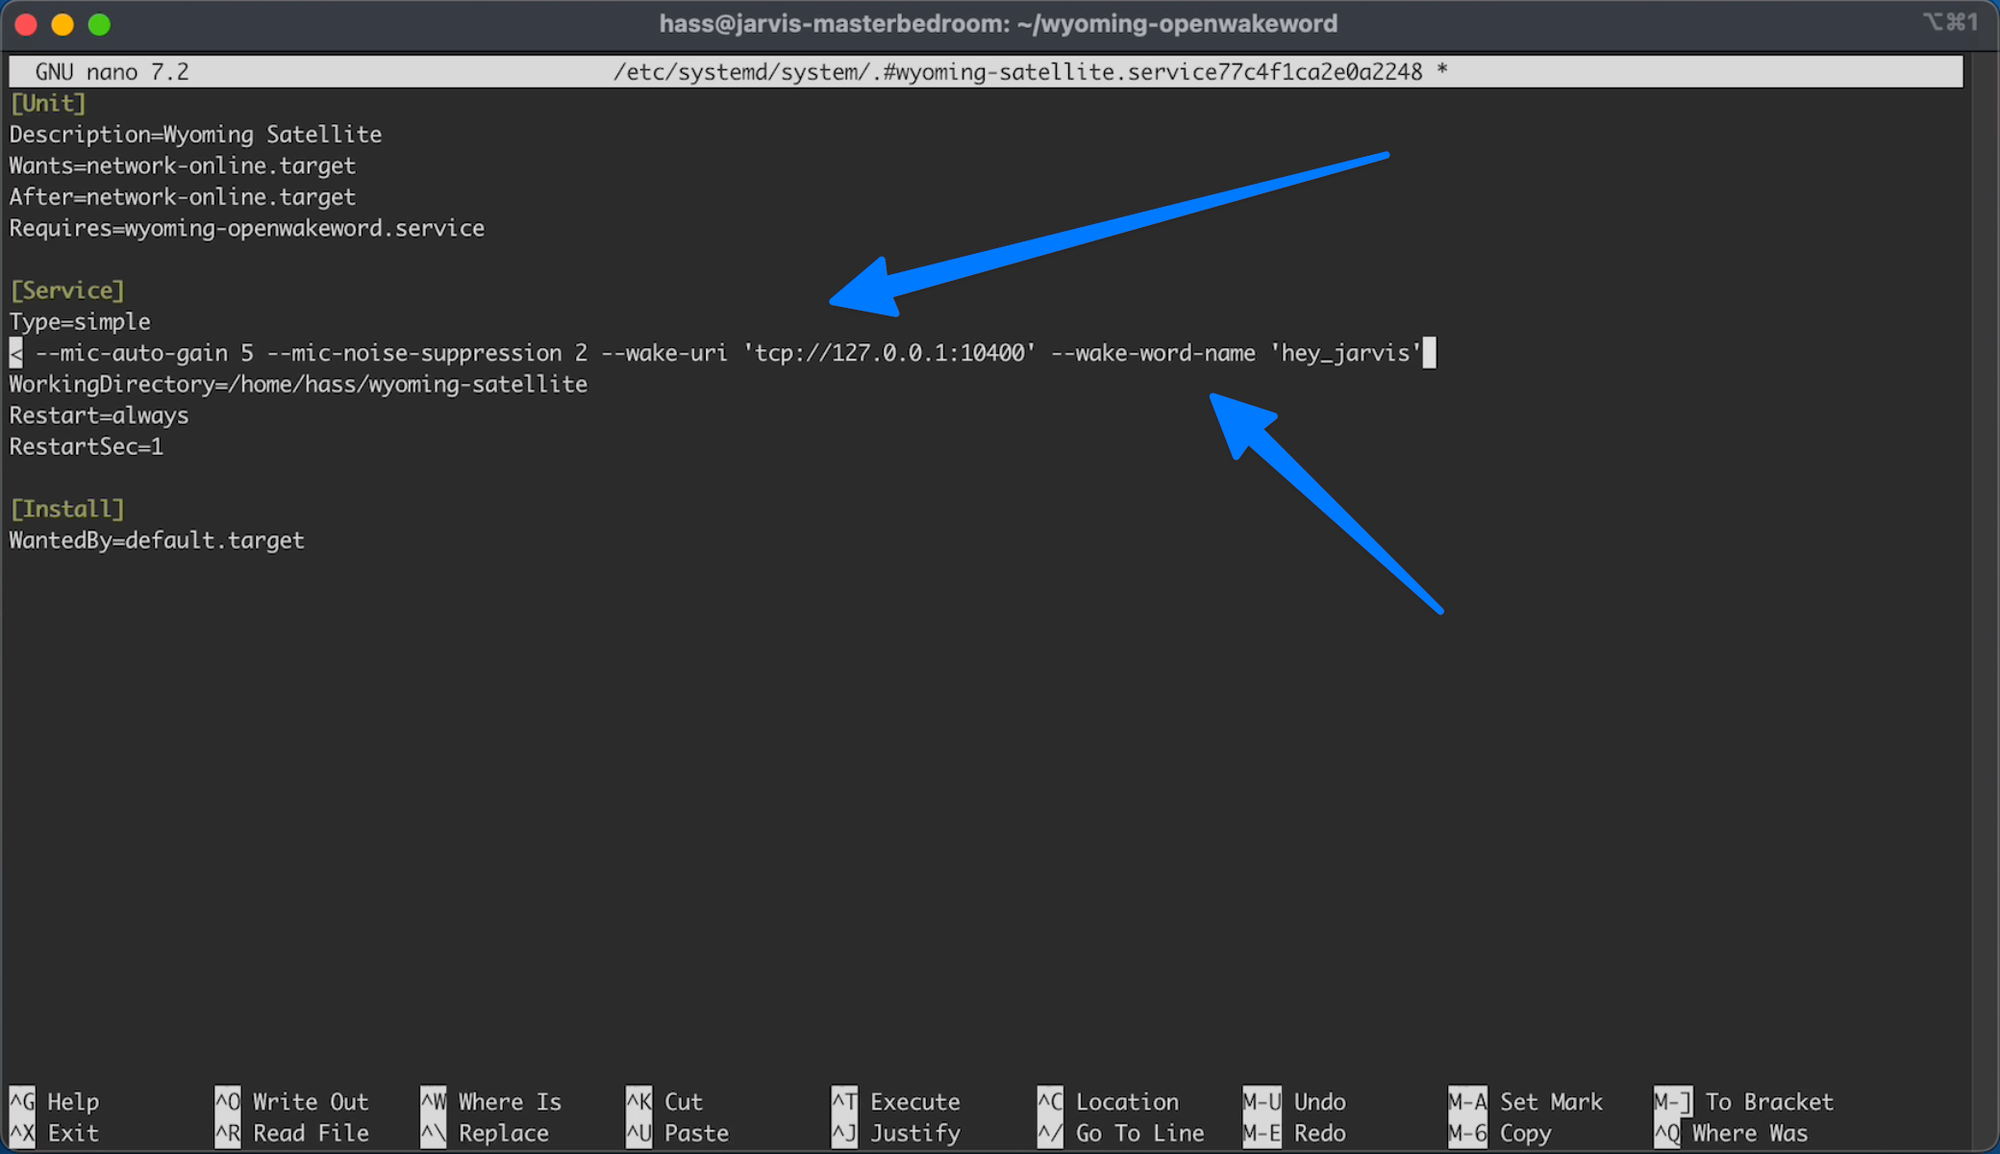
It should look like:
Then on the line that started with ExecStart you want to add the following to the end of the line:
C21.3
--wake-uri 'tcp://127.0.0.1:10400' --wake-word-name 'ok_nabu'
In my case I updated the ok_nabu to hey_jarvis
Then we need to save the changes (CTRL +X, type your, press Enter)
And back on the command line we need to use the following command to reload the changes:
C21.4
sudo systemctl daemon-reload
Then the following command to restart our Wyoming service:
C21.5
sudo systemctl restart wyoming-satellite.service
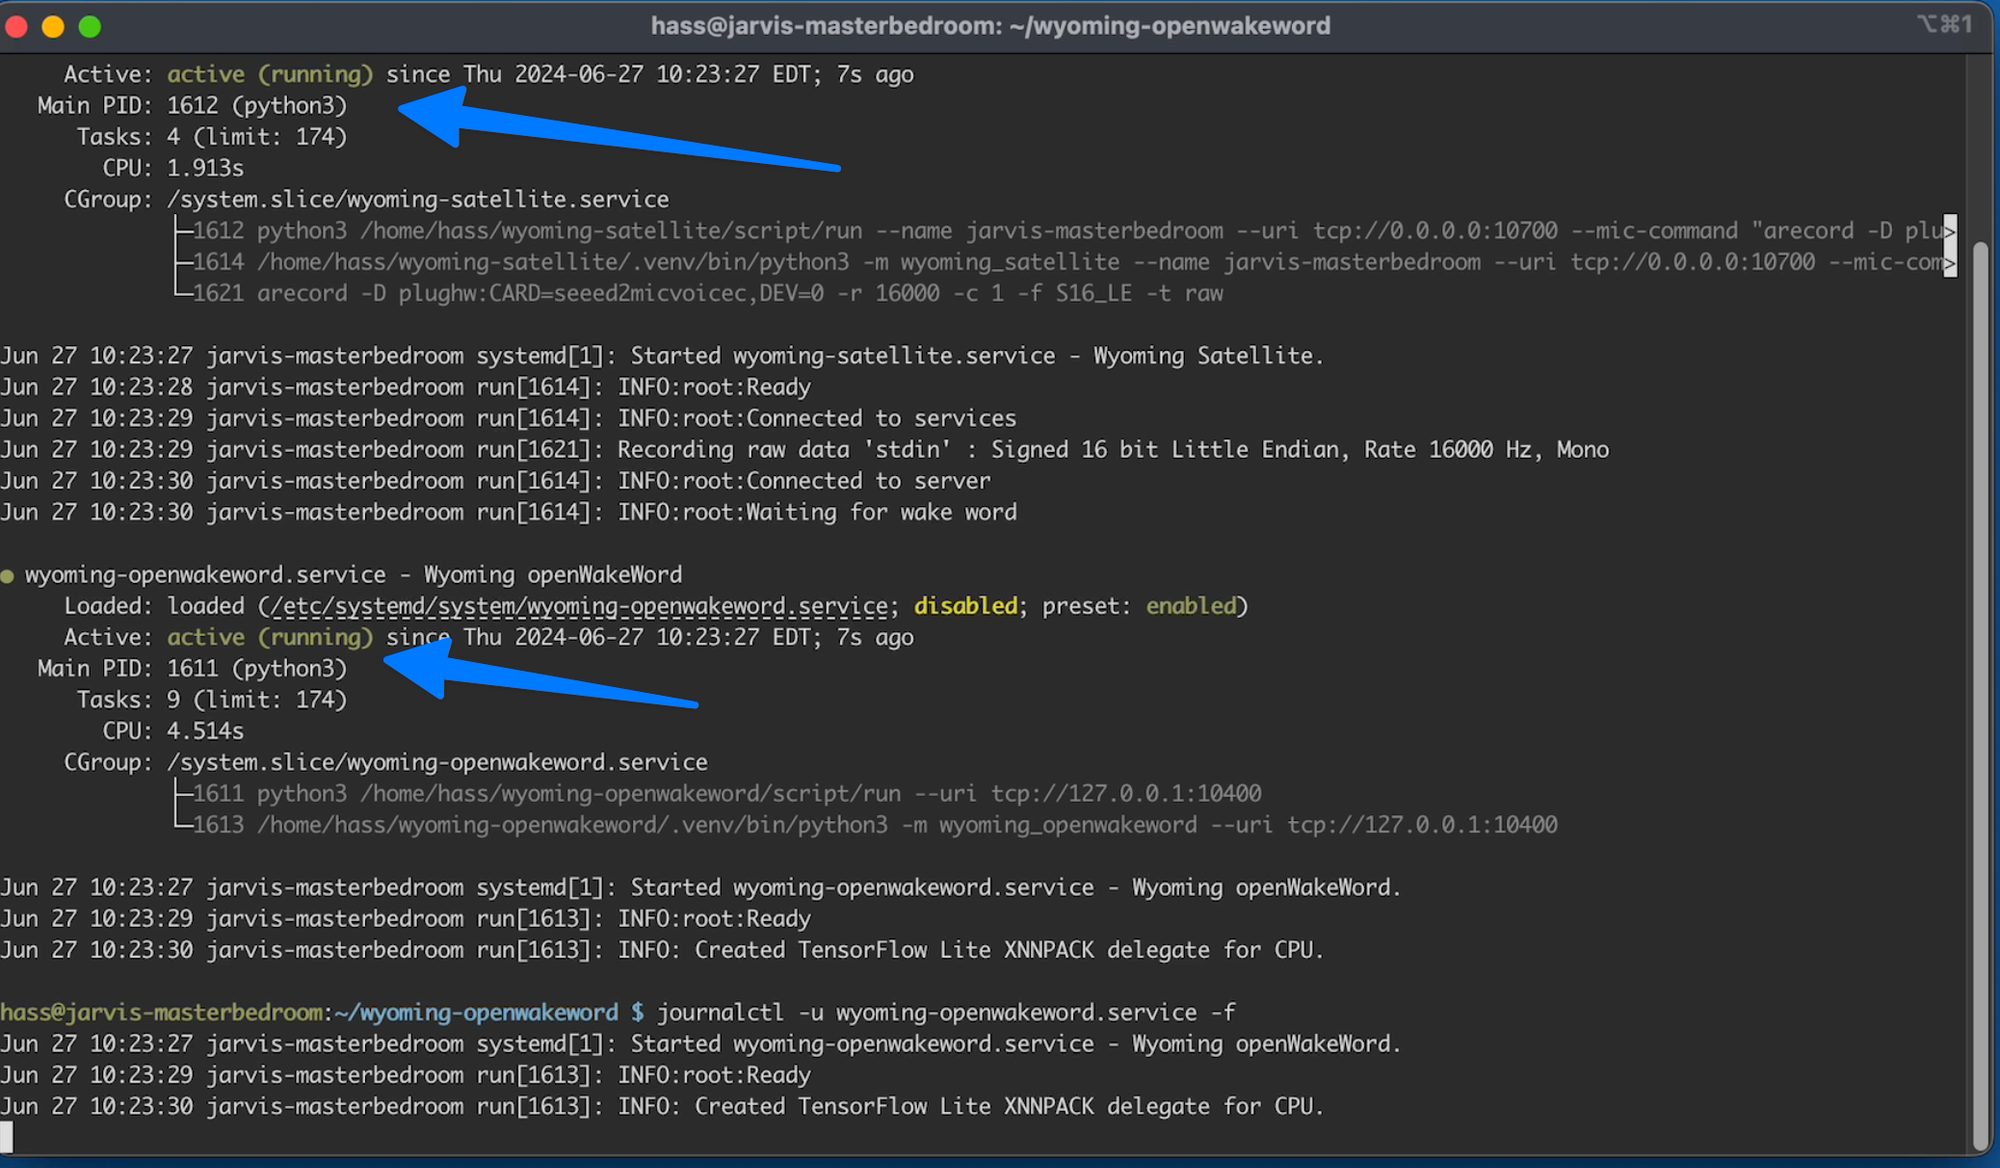
You should see the wake service get automatically loaded: when we use this command to check the starts
C21.6
sudo systemctl status wyoming-satellite.service wyoming-openwakeword.service
They should all be "active (running)" and green.
Now you can type Ctrl + C to get back to the command prompt.
Step 22 - Test your Wake Word
The easiest way to see if your wake word is working is to jump into Home Assistant
My device is still up.
And if I say the trigger word.
You will see the Assist in Progress sensor go active
Step 23 - Enable the LEDs
Now we just need to enable the LEDs
This assumes you have the 2 mic hat. If you dont then refer to the original guide on the specific changes you need.
First we need to change back to our home directory.
So lets type
C23.1
cd ../
And now we need to move back into the Wyoming Satellite directory.
For that we use the command:
C23.2
cd wyoming-satellite/examples
Then we can install the packages needed for the LEDS using the command:
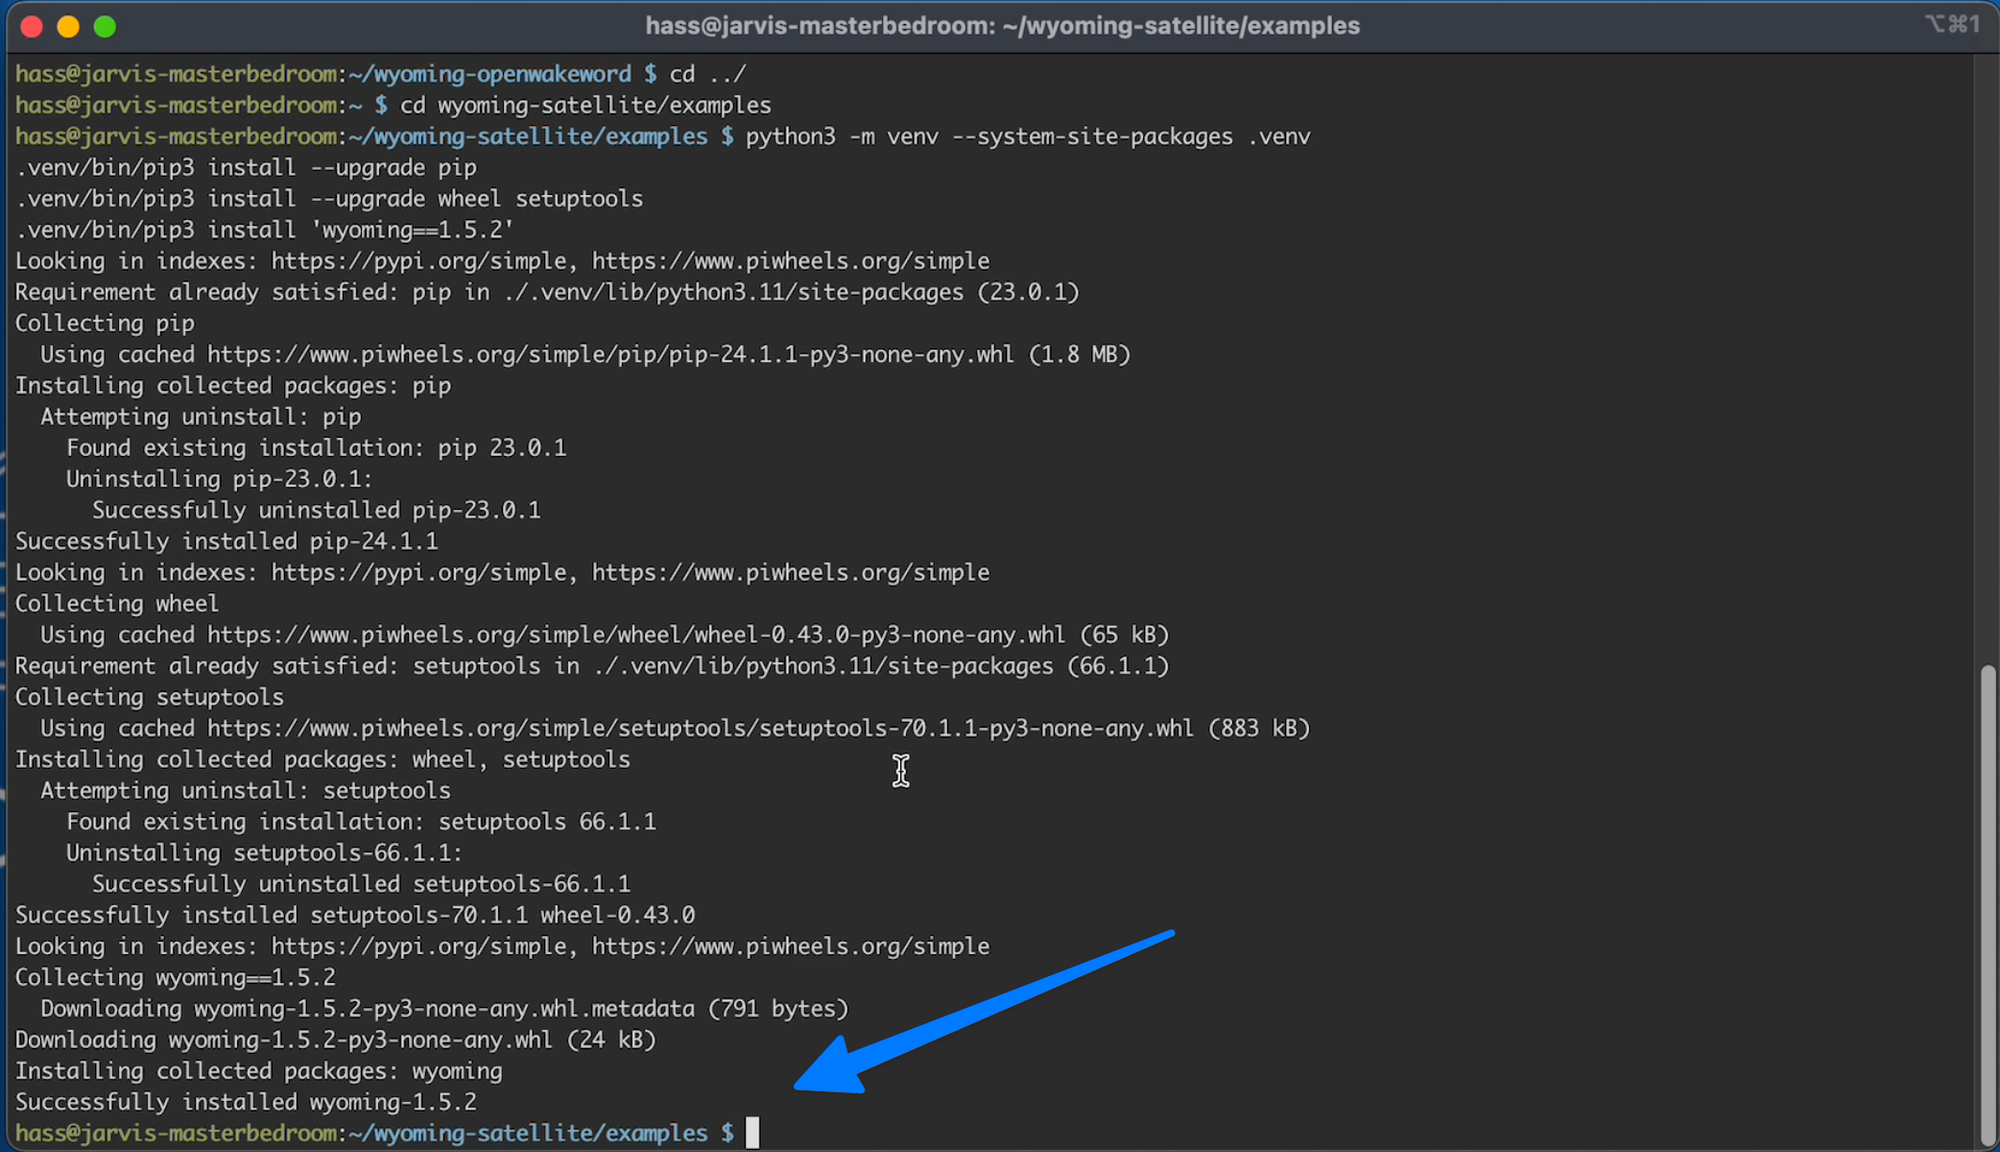
C23.3
python3 -m venv --system-site-packages .venv
.venv/bin/pip3 install --upgrade pip
.venv/bin/pip3 install --upgrade wheel setuptools
.venv/bin/pip3 install 'wyoming==1.5.2'
When its done you should see:
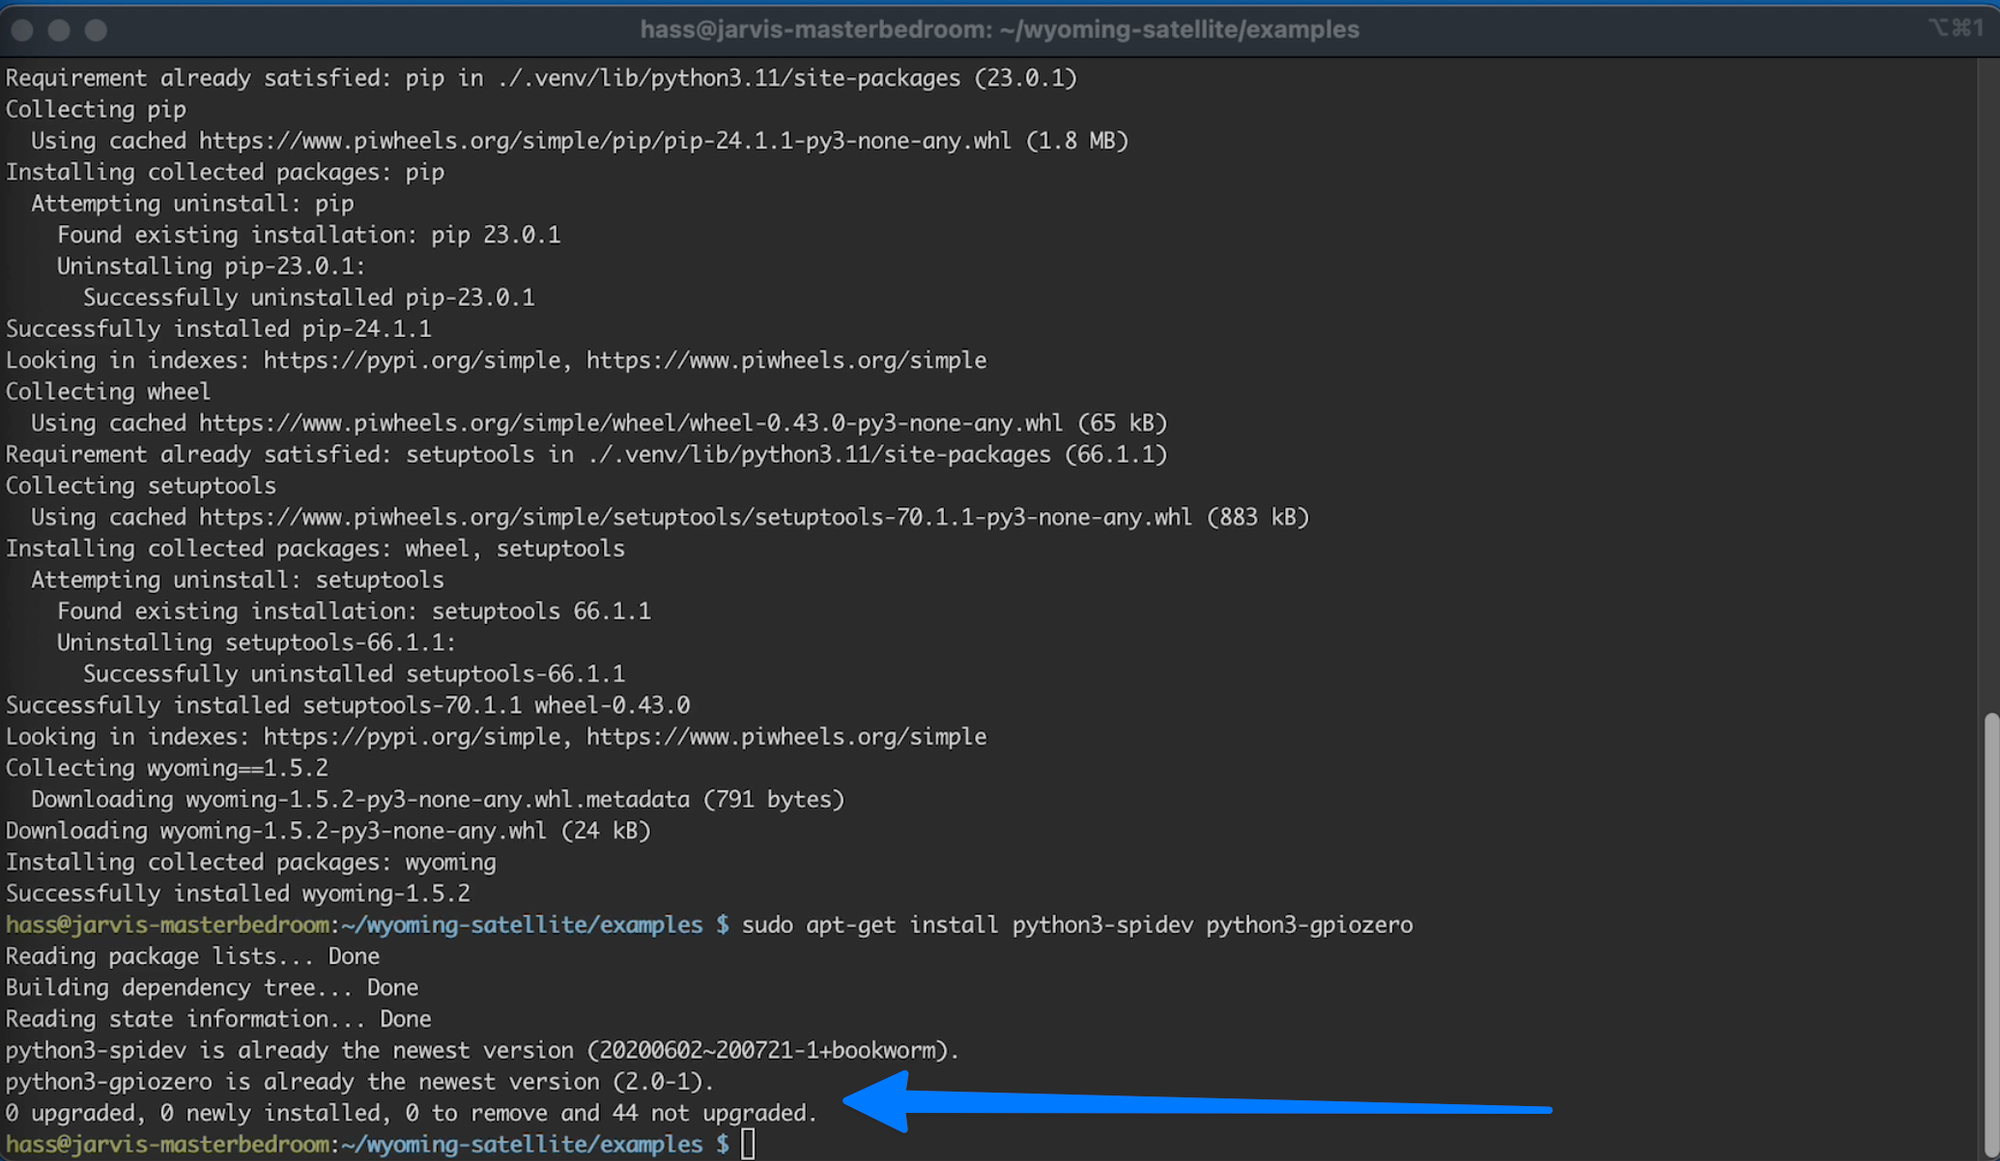
To make sure you have all the needed libraries run the command
C23.4
sudo apt-get install python3-spidev python3-gpiozero
If you didn’t get any errors you are good:
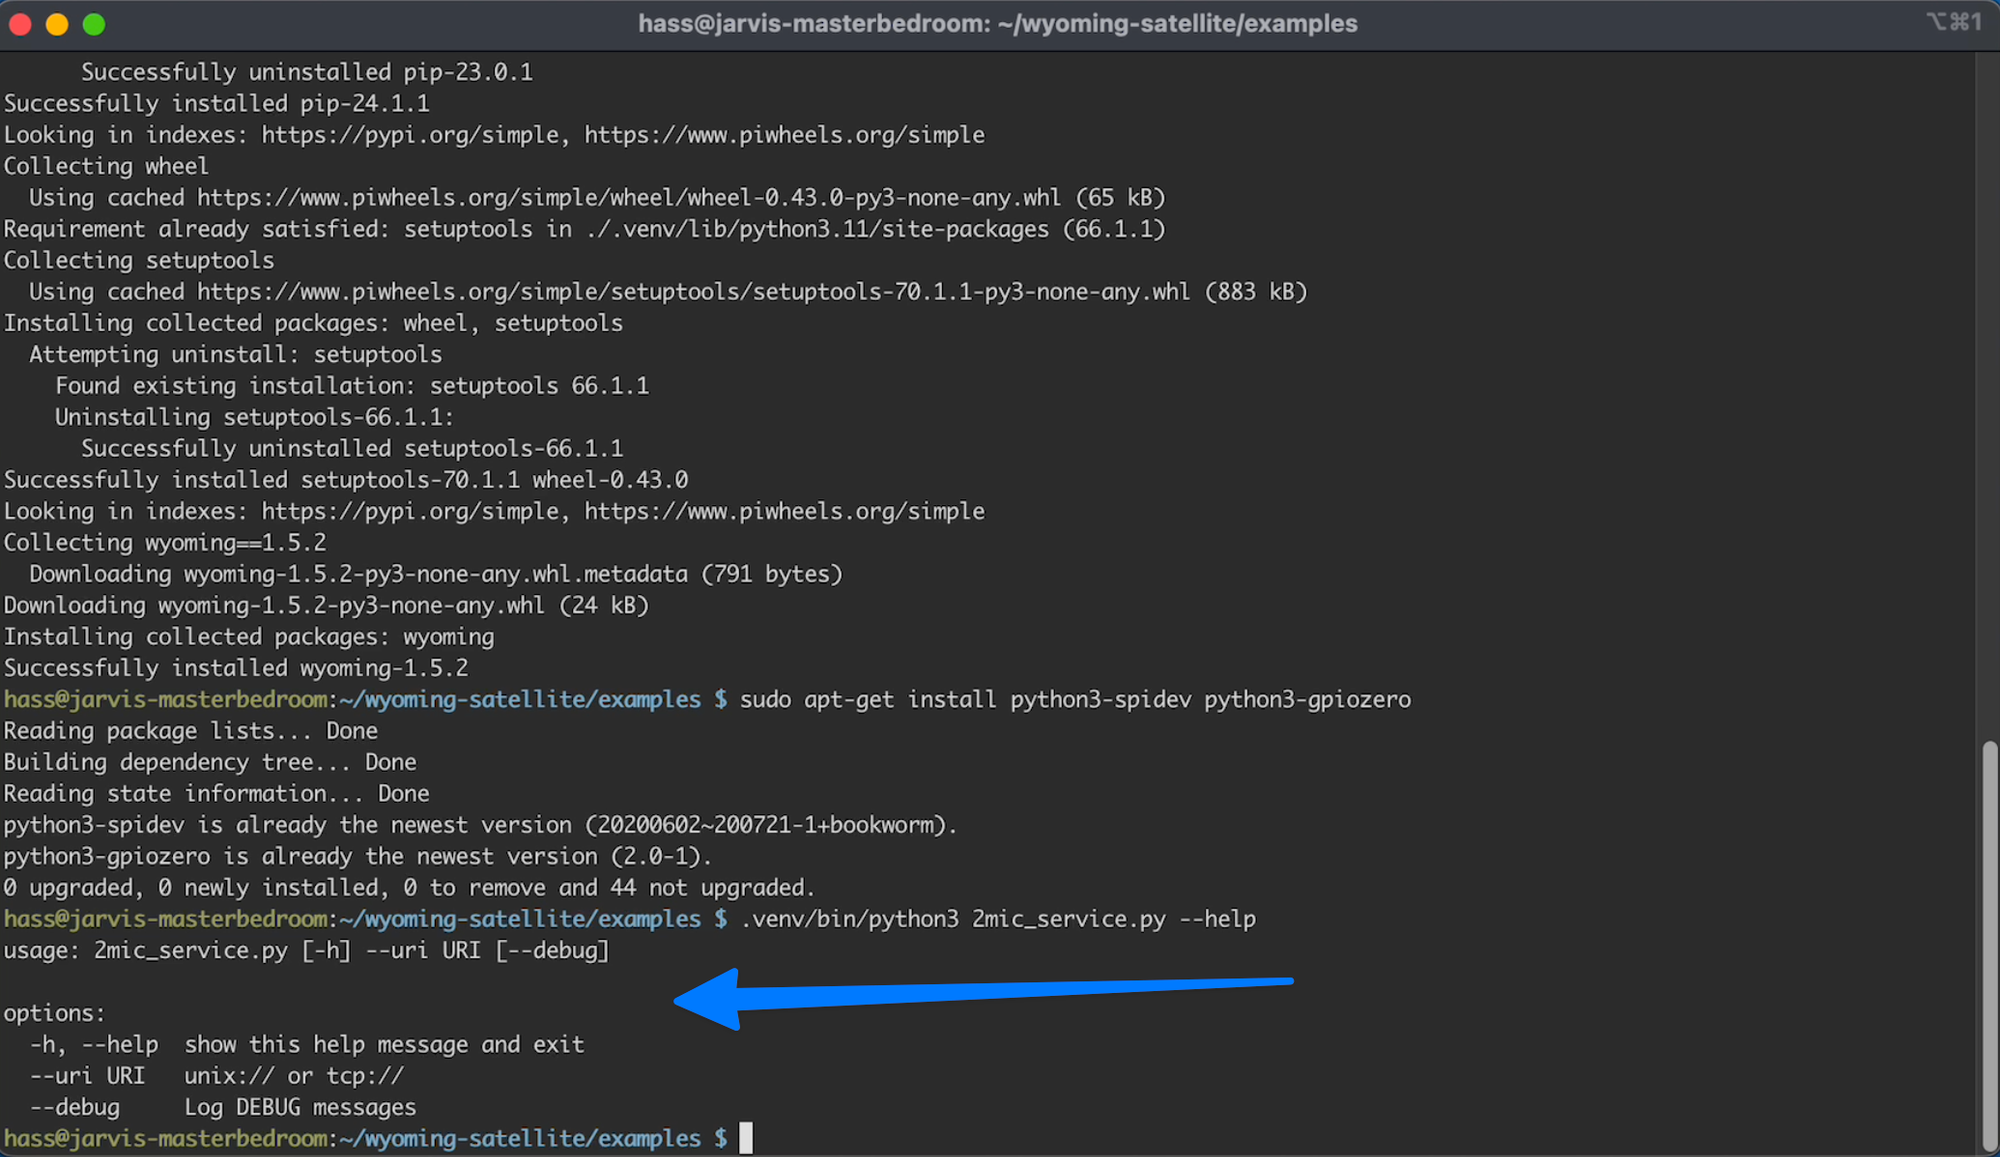
Next we can test with this command:
C23.5
.venv/bin/python3 2mic_service.py --help
If you see the following you are good:
Step 24 - Create LED Service
Now we need to create a service for this :LED app.
So type or copy/paste this command and hit enter:
C24.1
sudo systemctl edit --force --full 2mic_leds.service
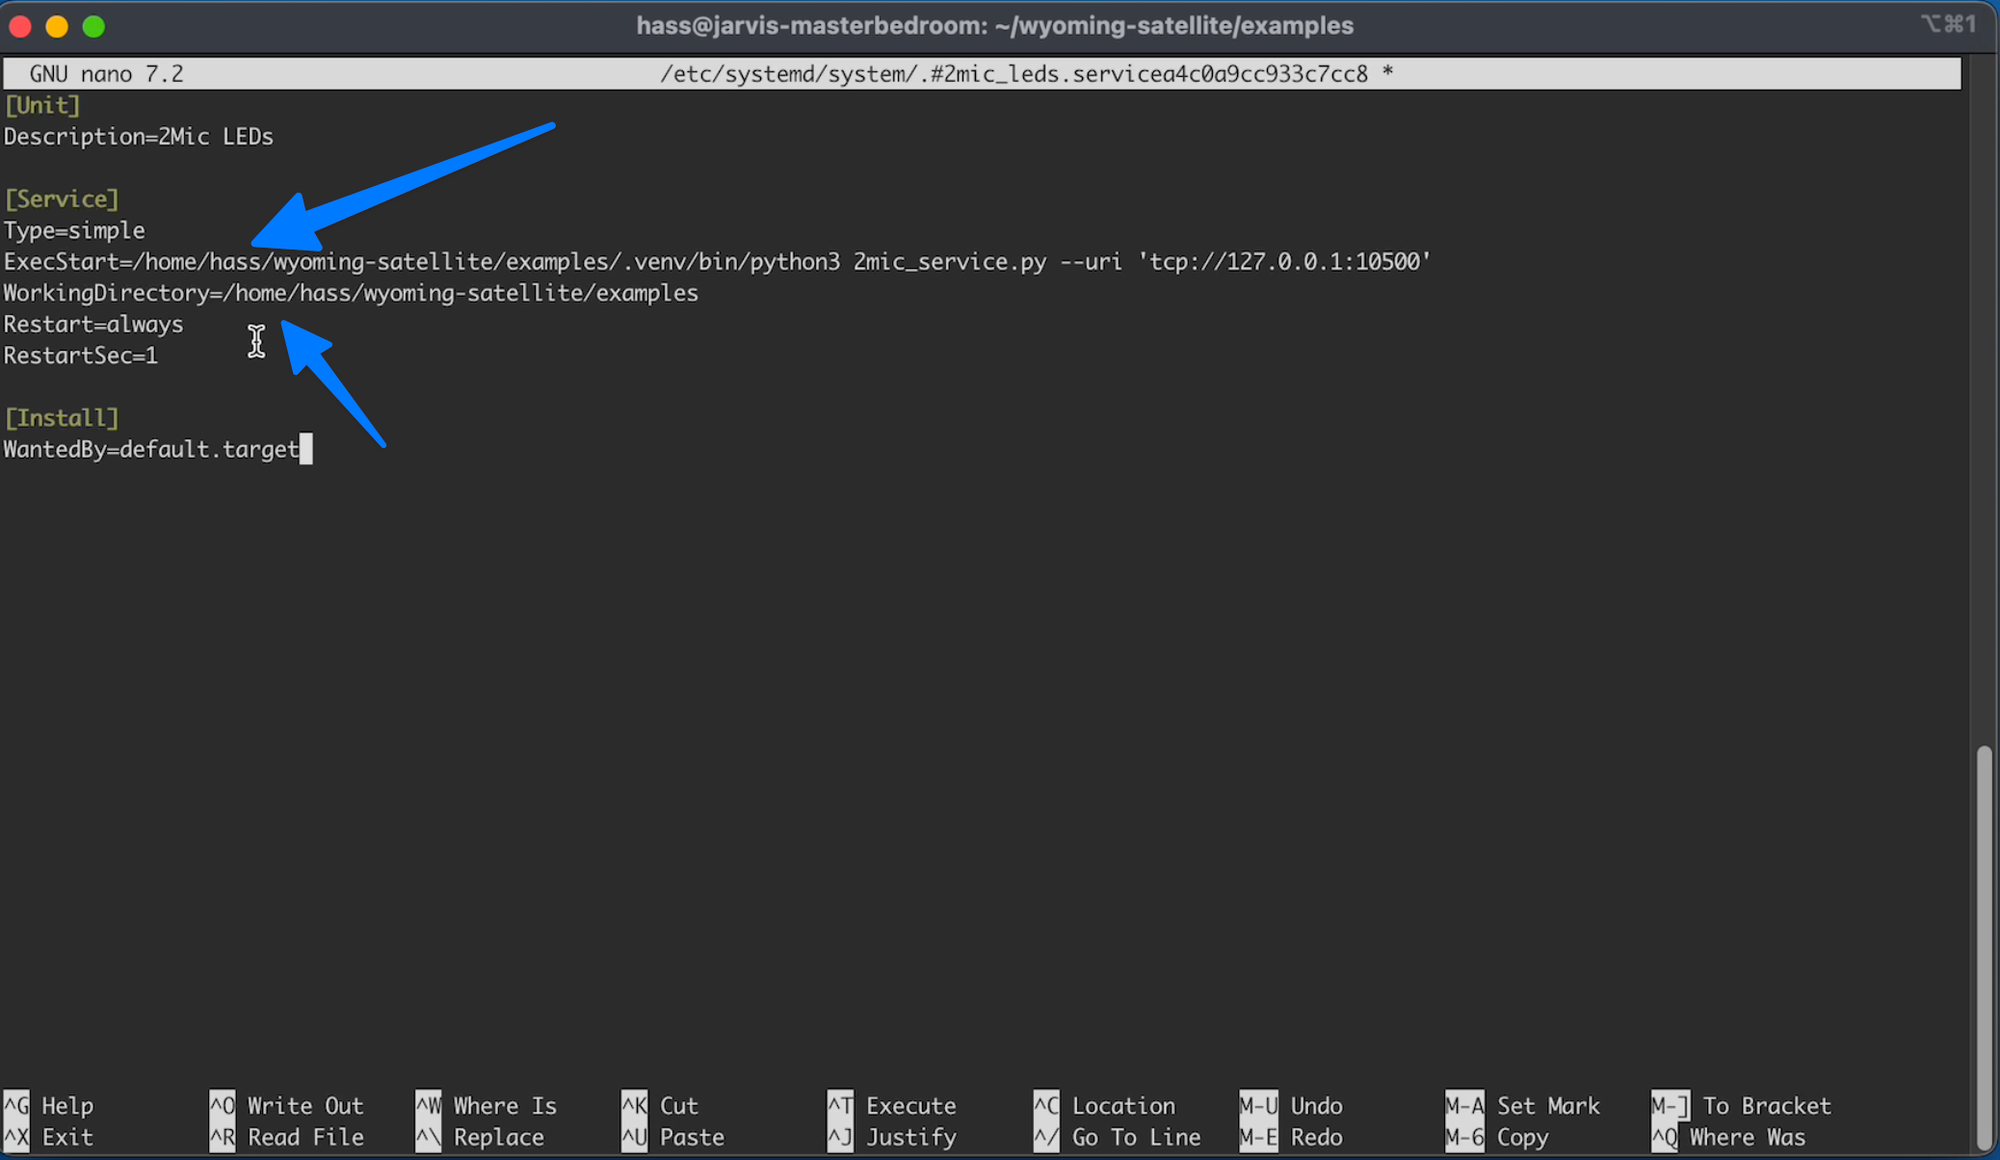
You should be pretty familiar with this. Copy this and paste it into your terminal:
C24.2
[Unit]
Description=2Mic LEDs

[Service]
Type=simple
ExecStart=/home/pi/wyoming-satellite/examples/.venv/bin/python3 2mic_service.py --uri 'tcp://127.0.0.1:10500'
WorkingDirectory=/home/pi/wyoming-satellite/examples
Restart=always
RestartSec=1

[Install]
WantedBy=default.target
Once again, beside you update the marked sections with the correct user name:
Save the file and exit your editor (CTRL +X, type your, press Enter)
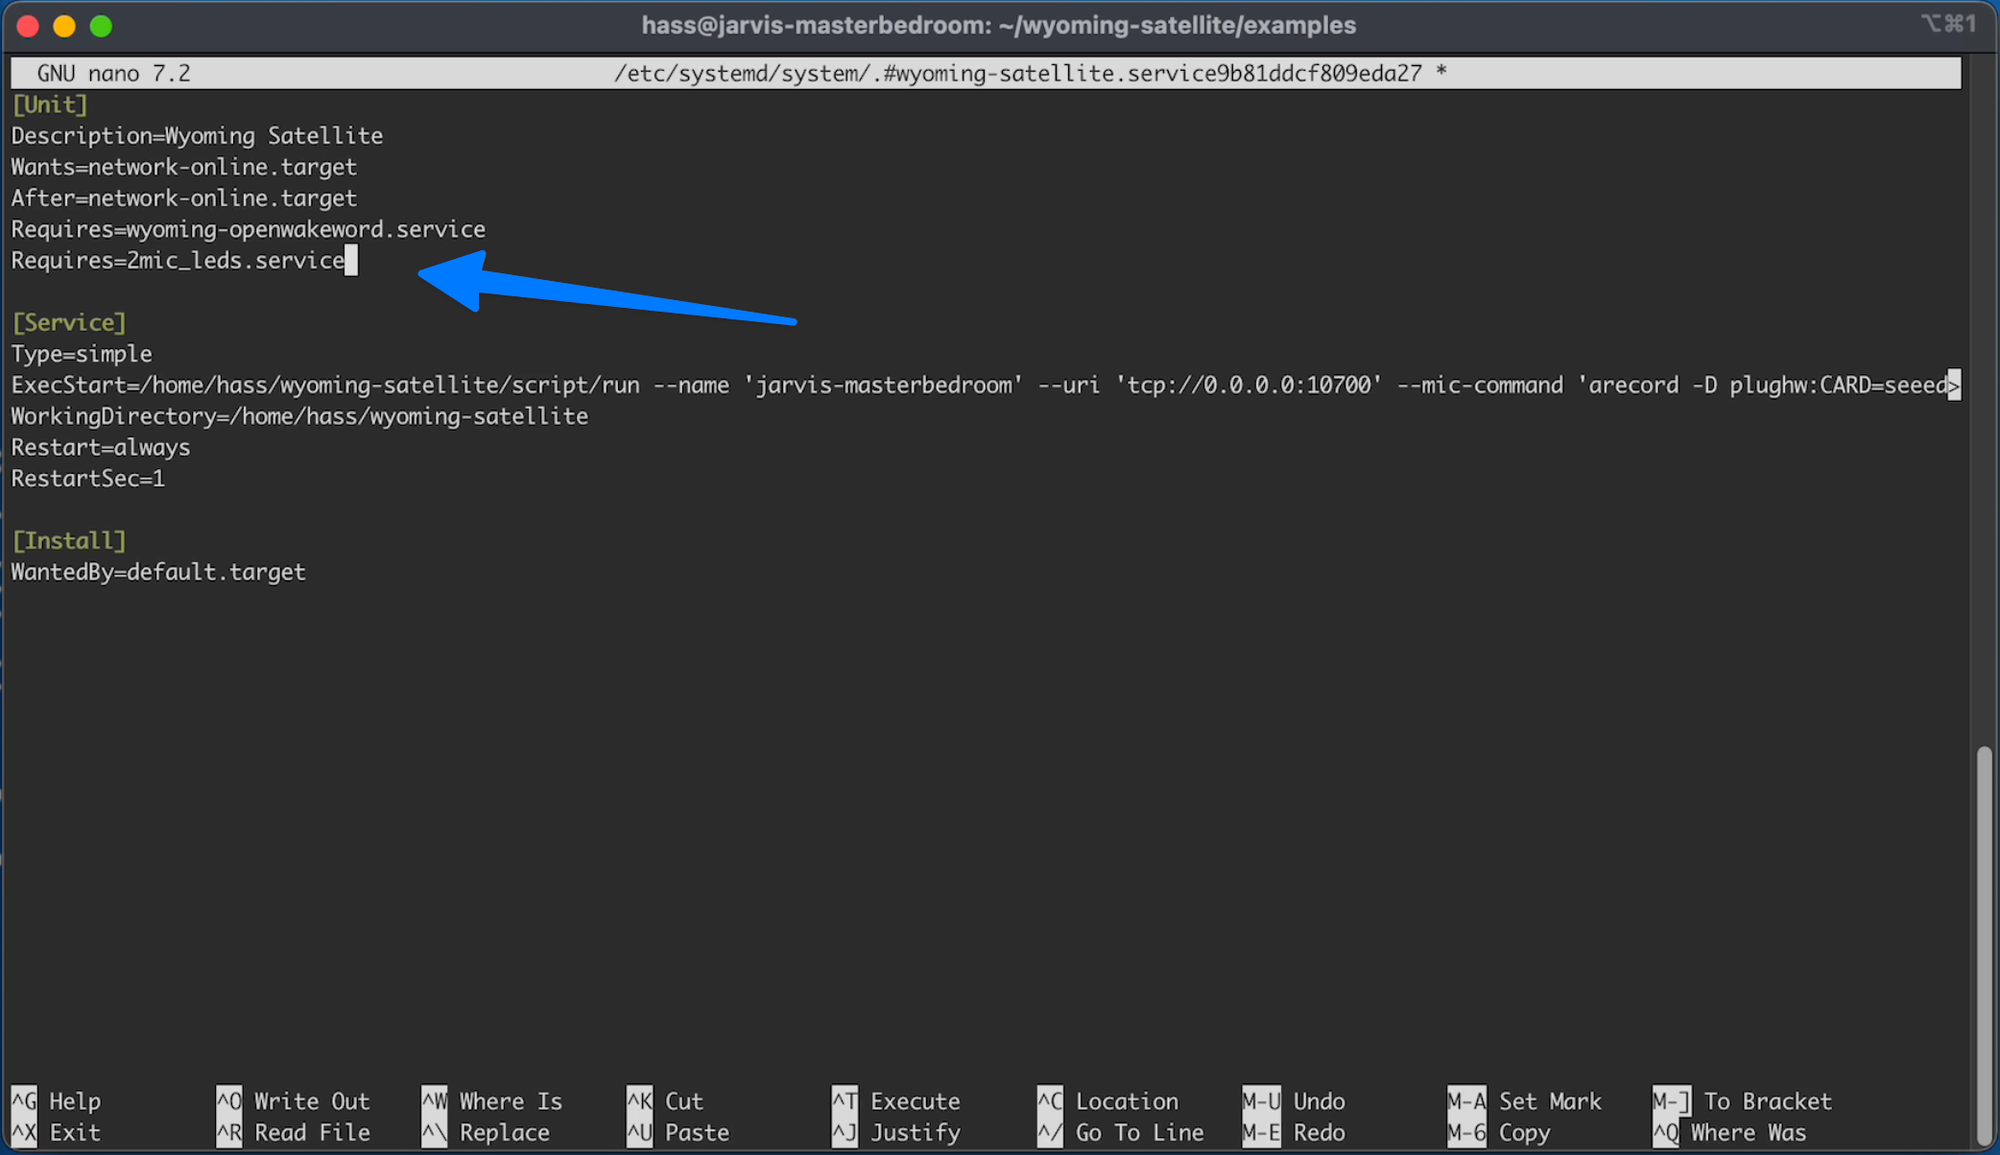
Now we need to update the Wyoming service:
So type or copy/paste this command:
C24.3
sudo systemctl edit --force --full wyoming-satellite.service
Under the [unit] section add the following line:
C24.4
Requires=2mic_leds.service
So it looks like:
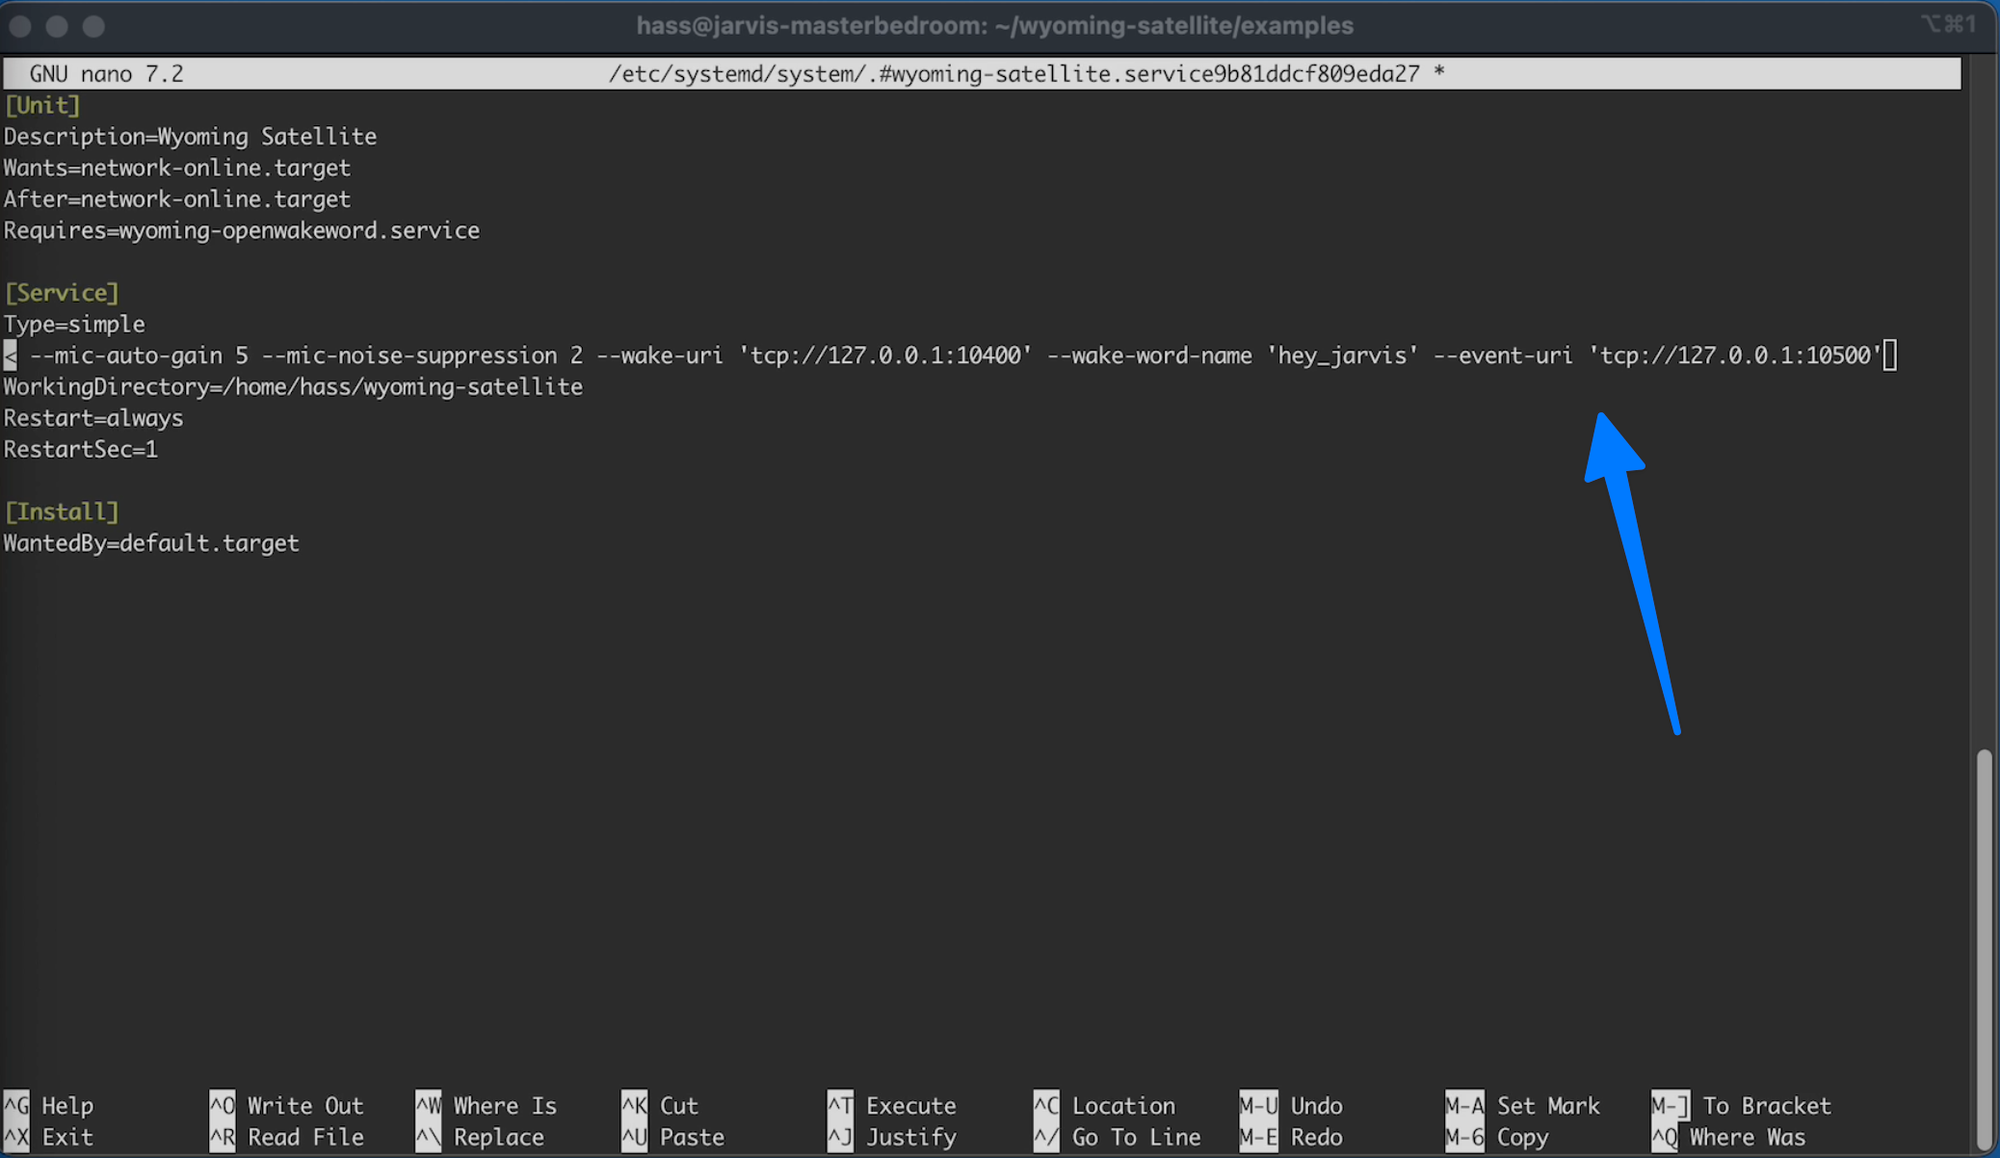
And at the end of the ExecStart line add the following:
C24.5
--event-uri 'tcp://127.0.0.1:10500'
So it looks like:
Then we need to save the changes (CTRL +X, type your, press Enter)
Then reload the services using the command:
C24.6
sudo systemctl daemon-reload
Then restart the services using the command:
C24.7
sudo systemctl restart wyoming-satellite.service
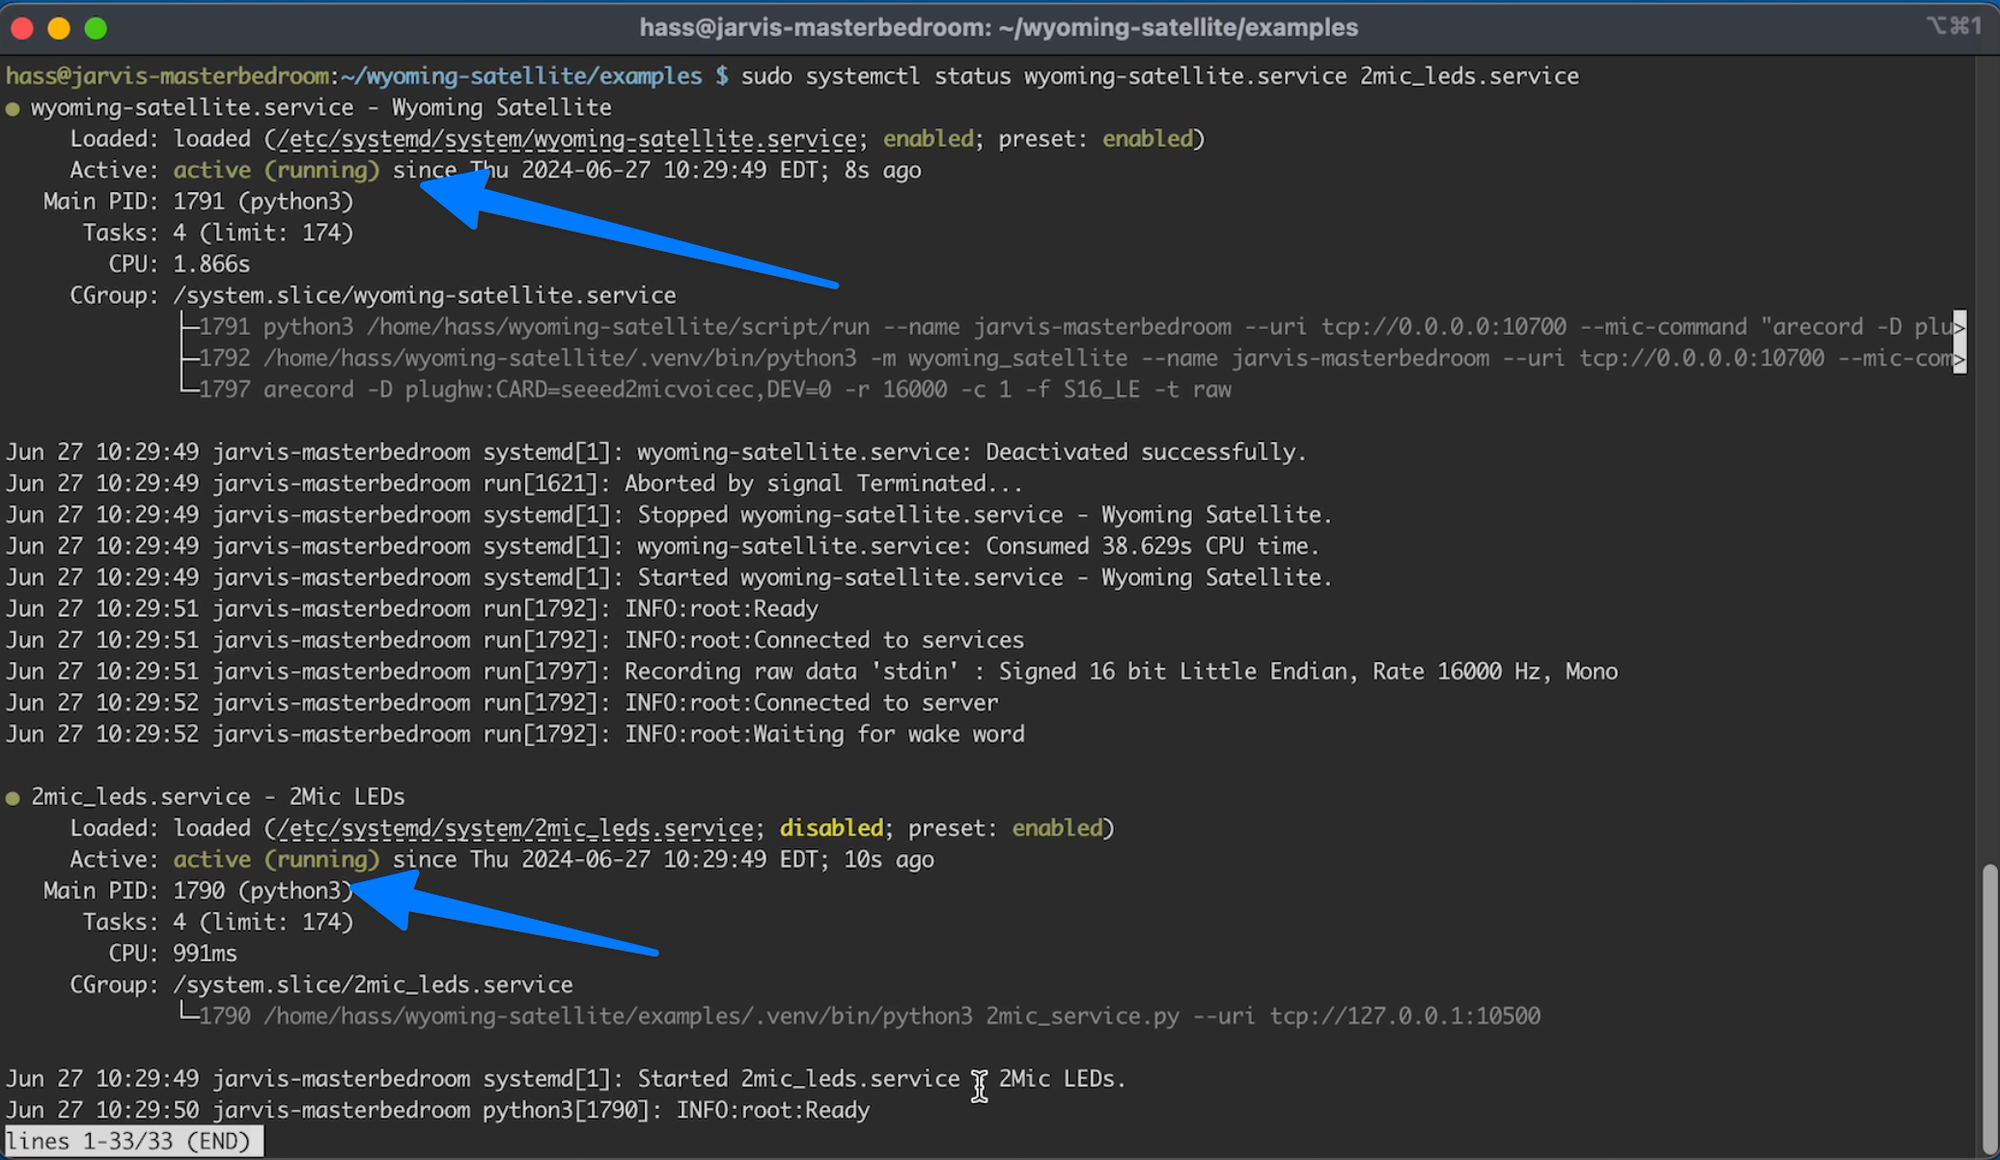
And if you want to do one final check that all is well you can check the starts using the command:
C24.8
sudo systemctl status wyoming-satellite.service 2mic_leds.service
They should all be "active (running)" and green.
Now we can hit CTRL + c and then type exit and press enter.
And you know have configured your Pi Zero with local wake word and the LEDs